Show video
Grade L mild steel
50m (164ft)
60cm (2ft)
15cm (6 inch)
x5
£54.99 inc. VAT
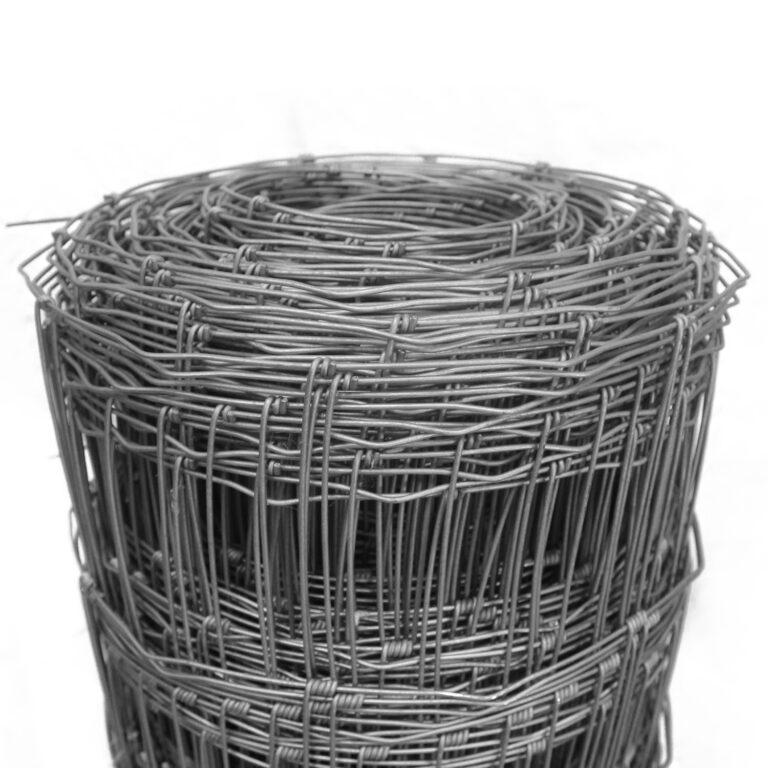

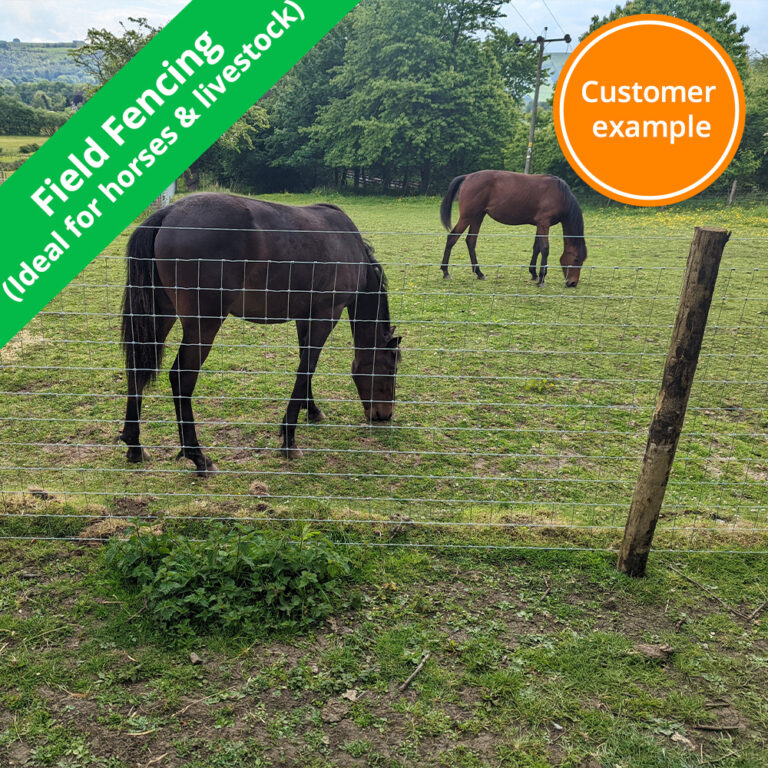
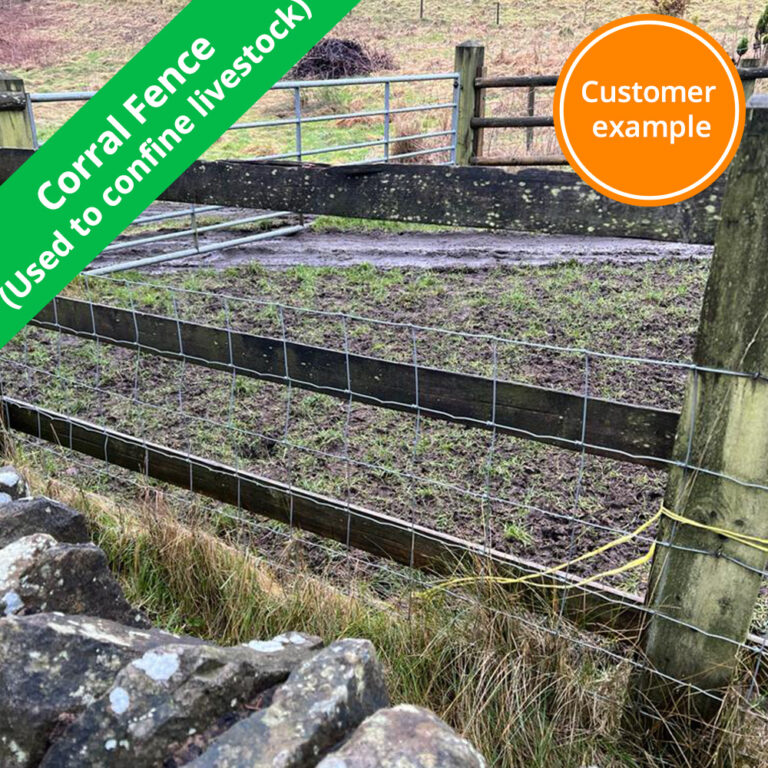
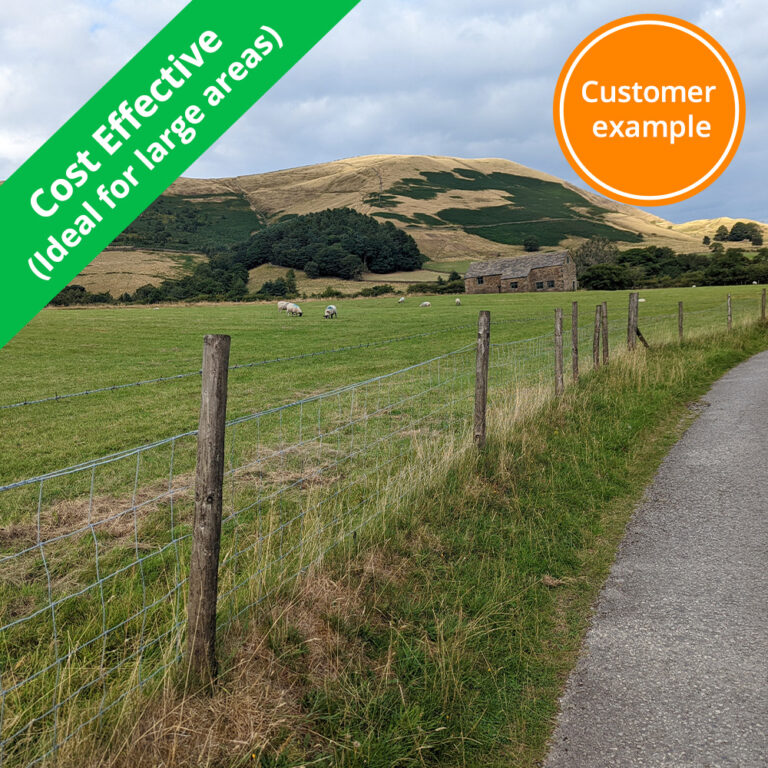
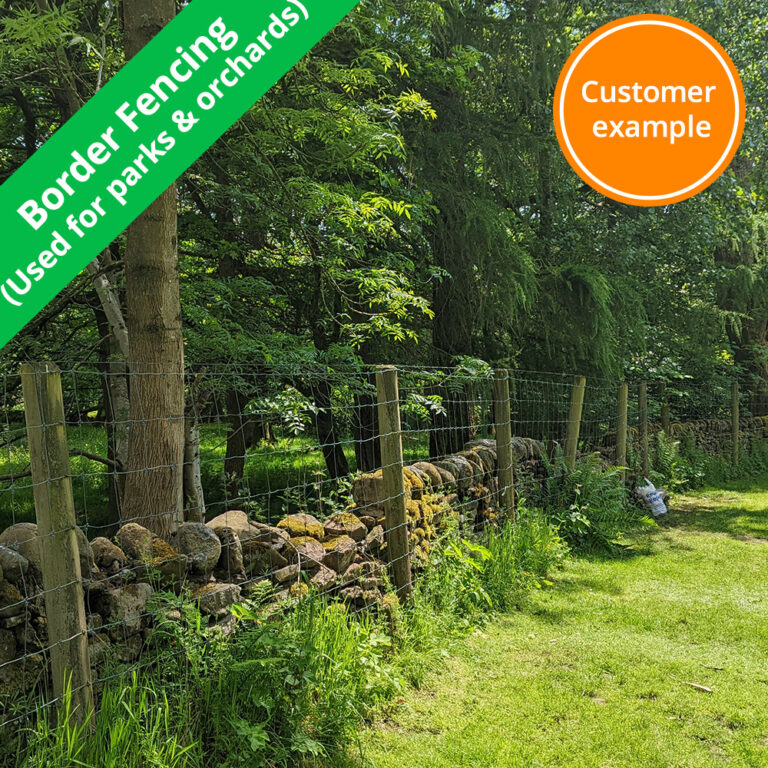
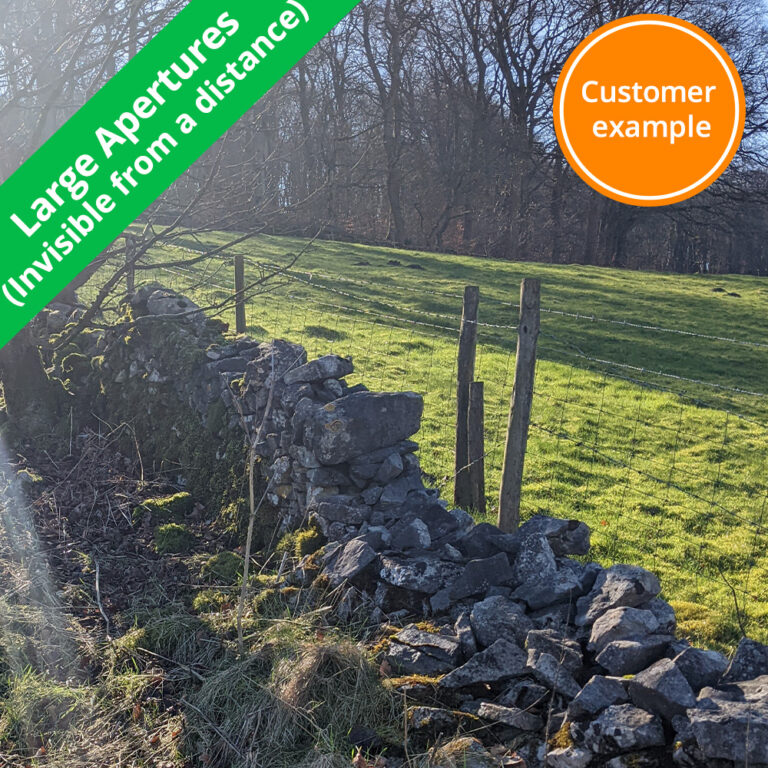
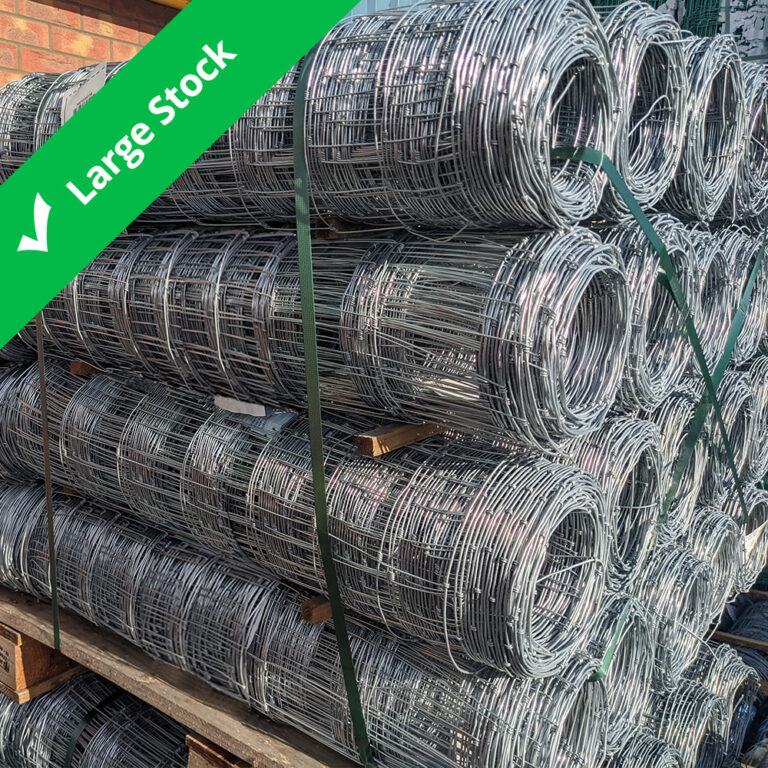
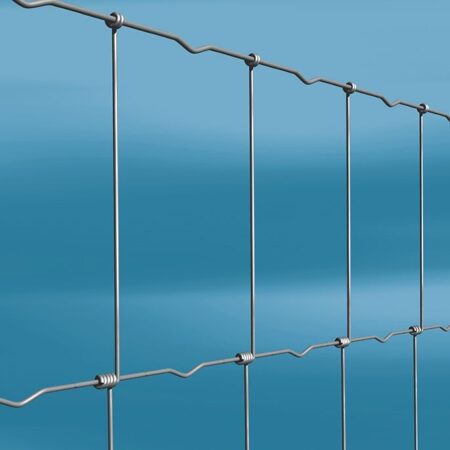
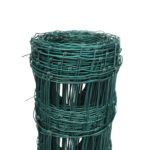
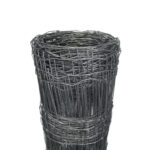
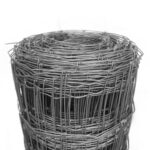
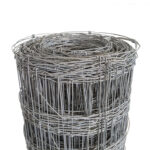
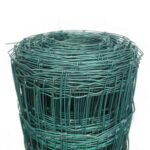
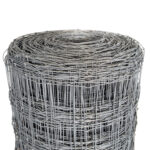
Stock wire fencing available in mild steel and high tensile options. An effective, economical method of separating and protecting livestock, dividing fields and creating boundaries.
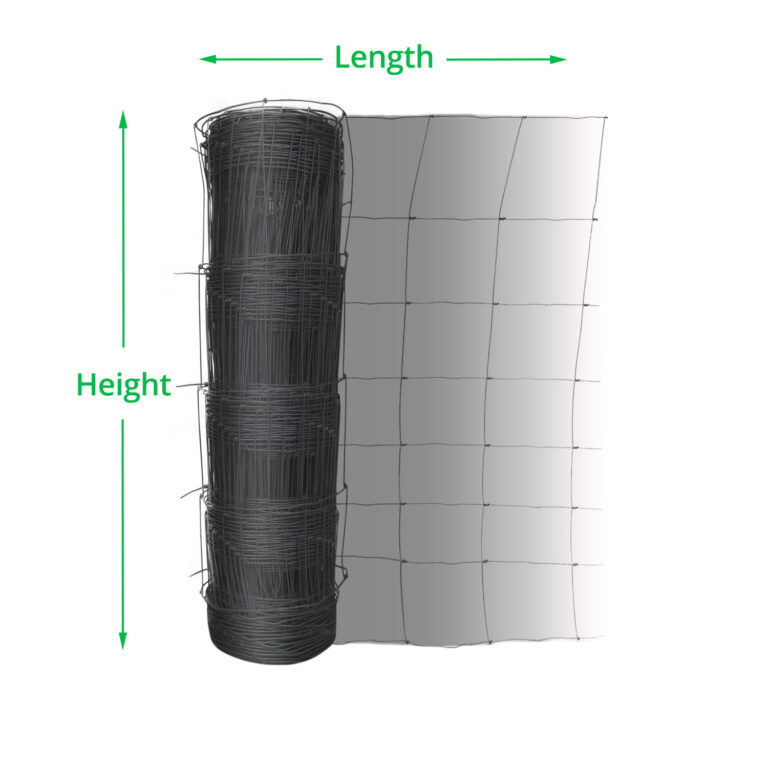
Understanding Mesh Configuration

High Tensile
| Attributes | Choose from: |
|
|
Mild Steel
| Attributes | Choose from: |
|
|
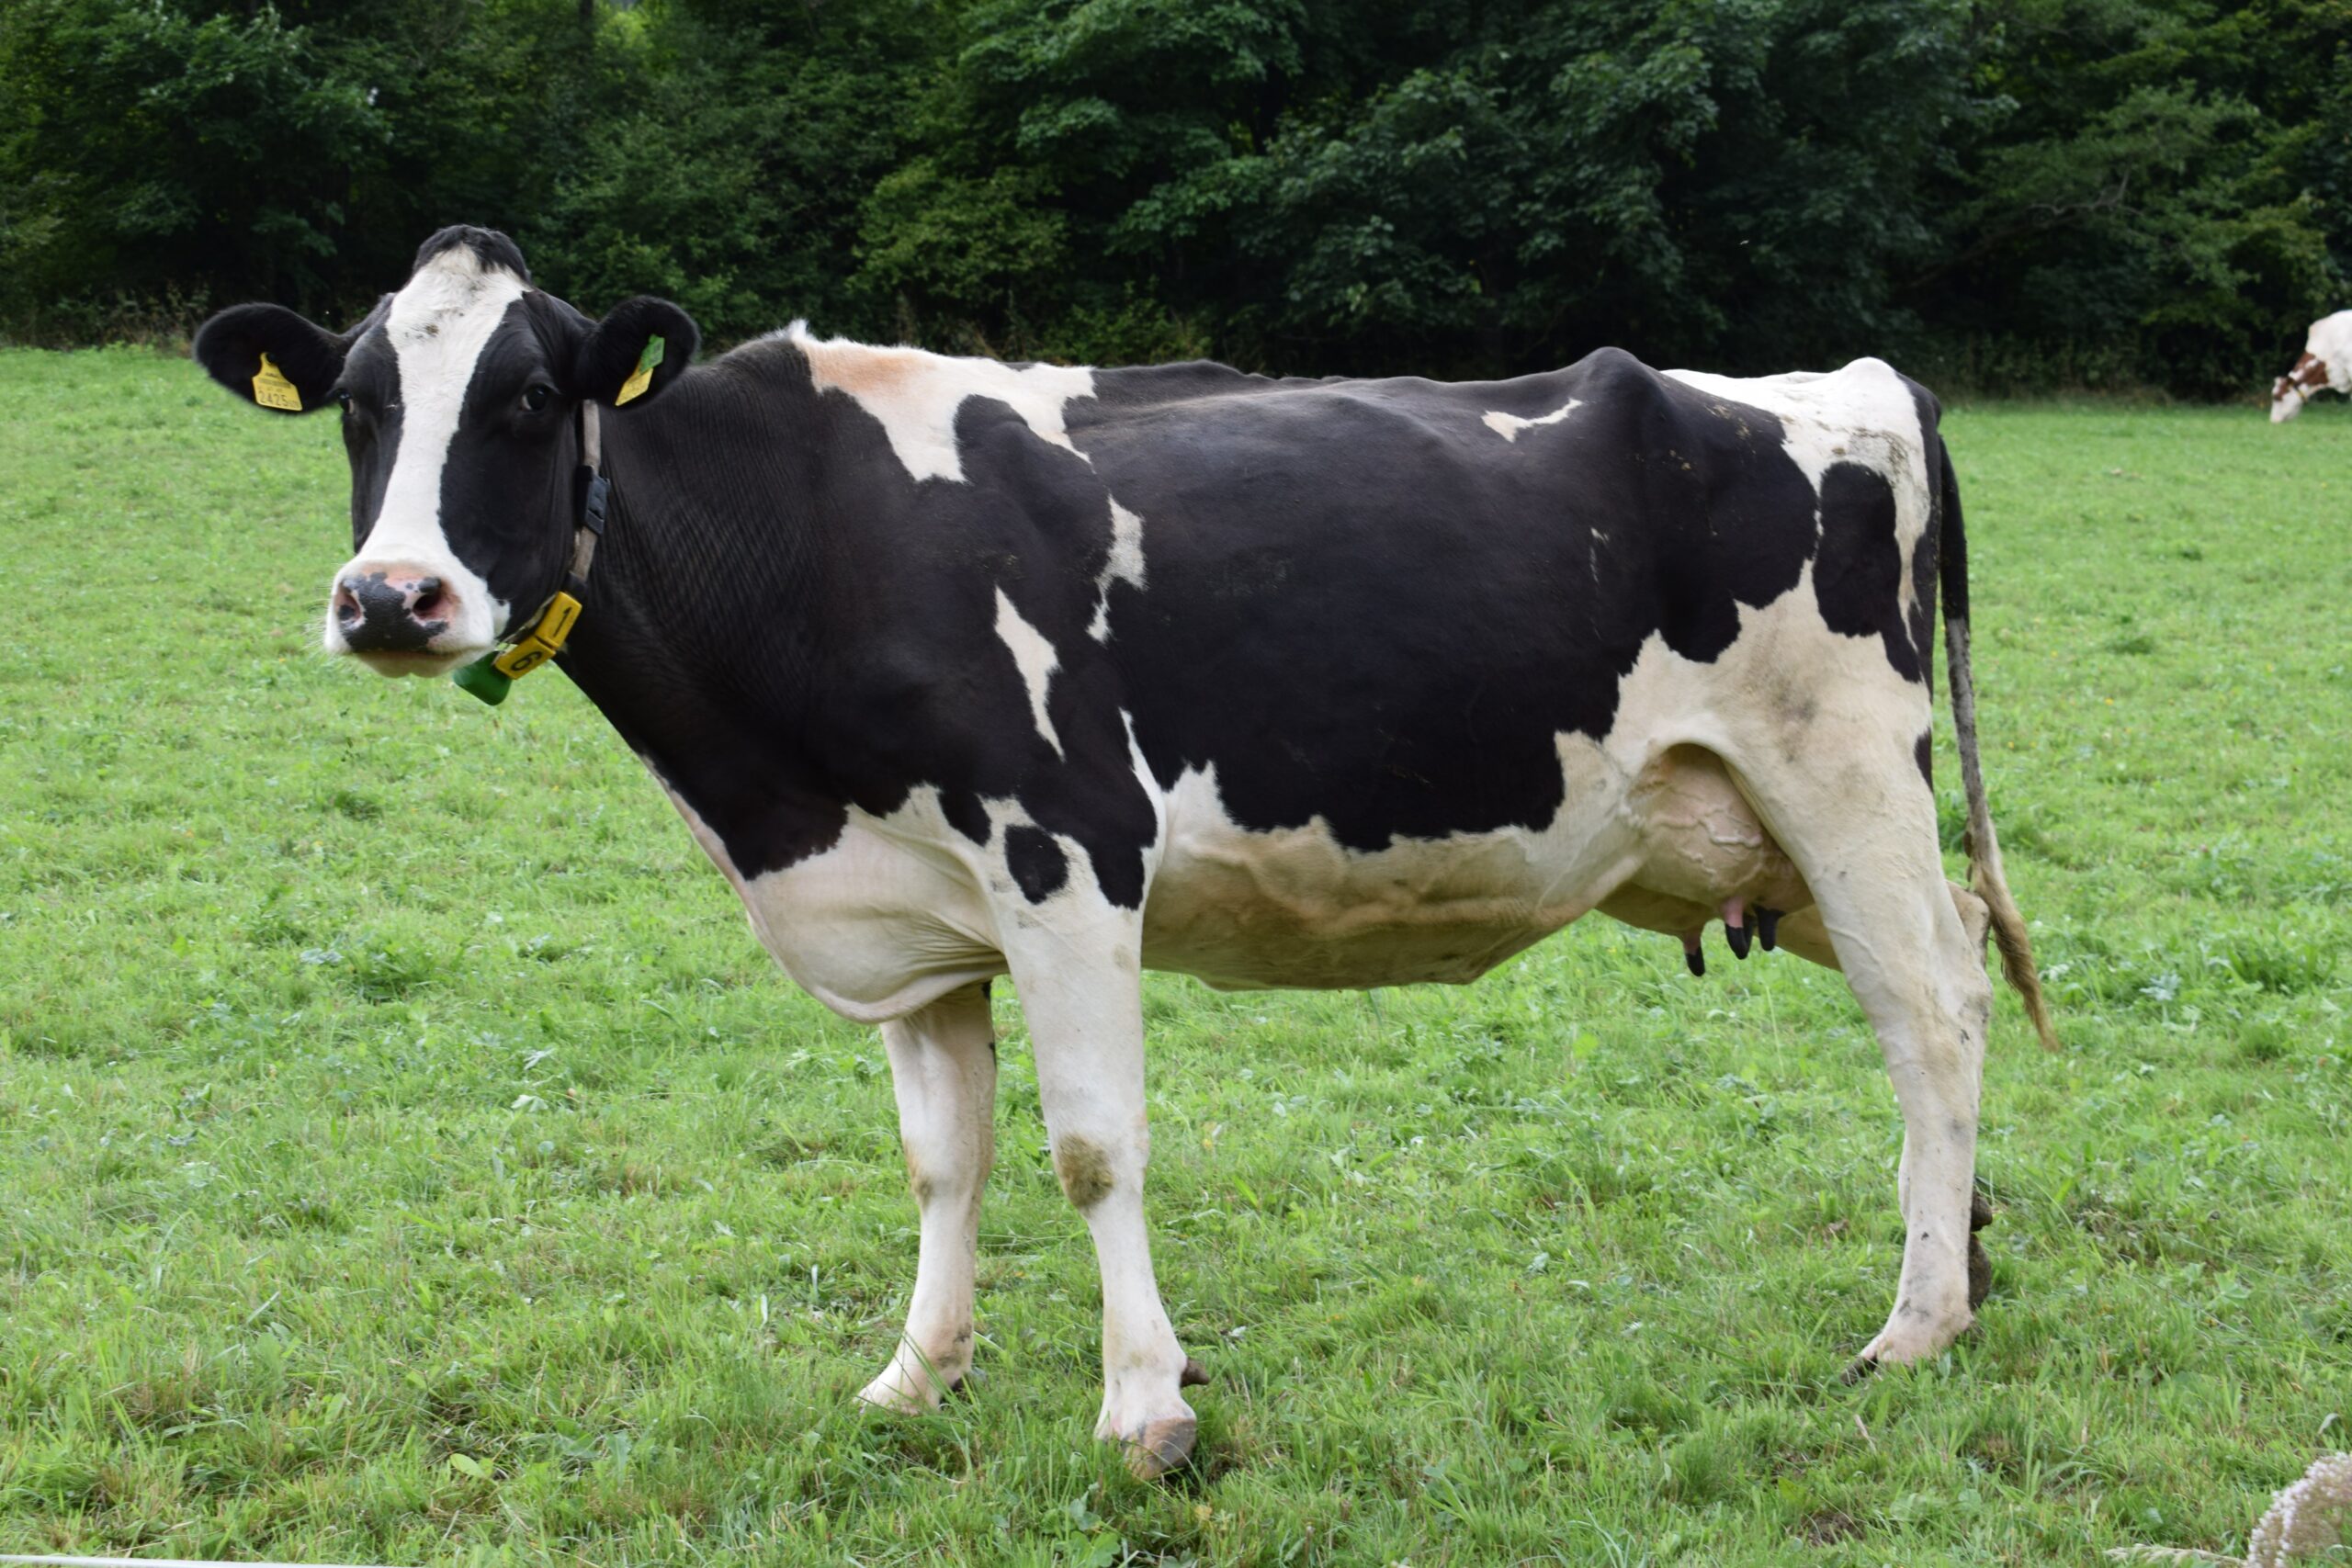
| Animal | Min Height required | Mild Steel
(L Grade) |
Mild Steel
(C Grade) |
High Tensile | Add Electrical Wire |
| Cattle | 90cm | ||||
| Bull | 1.8m | ||||
| Pig | 75cm | ||||
| Sheep | 1m | ||||
| Goat | 1.2m | ||||
| Llama | 1.2m | ||||
| Alpaca | 1.2m | ||||
| Horse | 1.4m | ||||
| Deer | 1.5m | ||||
| Large animals to lean against | Any | ||||
| General field boundary | Any | ||||
| Dog | See dog fencing for more information | ||||
| Chickens | See poultry fencing for more information | ||||
| Fox | See fox proof fencing | ||||
| Badger | See Badger proof fencing | ||||
| Rabbits | See Rabbit proof fencing | ||||
Wire Specification Comparison
| Mild Steel
(L Grade) |
Mild Steel
(C Grade) |
High Tensile | High Tensile PVC Coated | |
| General | ||||
| Cost | £ | ££ | £££ | £££ |
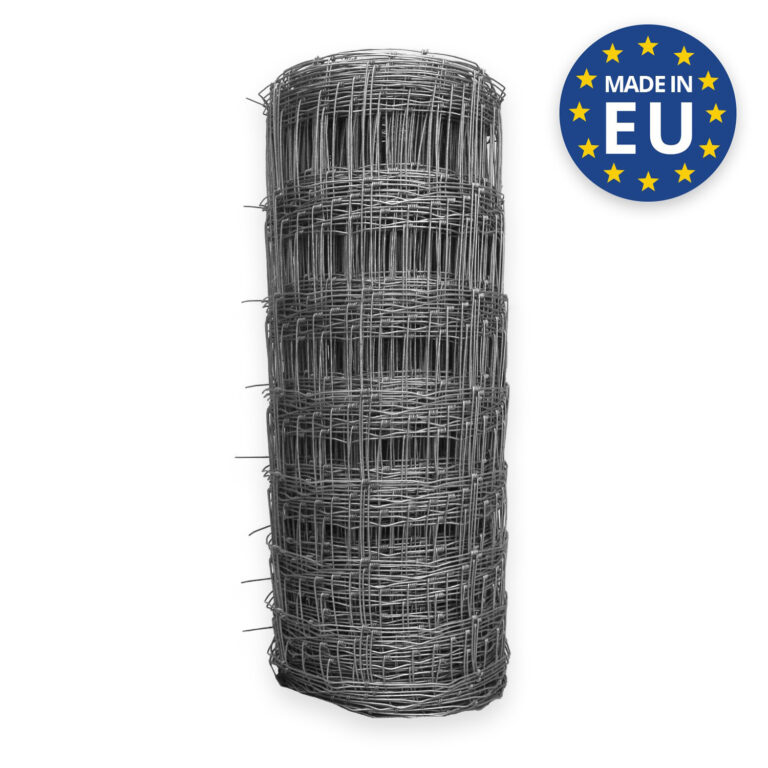
| Made in | EU | EU | EU | EU |
| Conforms to British Manufacturing standards |
BS EN 10223-5:2012 BS EN 10244-2:2009 BS EN 10218-2:2012 BS EN 1179:2003 |
BS EN 10223-5:2012 BS EN 10244-2:2009 BS EN 10218-2:2012 BS EN 1179:2003 |
BS EN 10218-2:2012 BS EN 10223-5:2012 BS EN 10244-2:2009 |
BS EN 10218-2:2012 BS EN 10223-5:2012 BS EN 10244-2:2009 |
| Strongest | ||||
| Flexibility | Most flexible | Good flexibility | Low flexibility | Low flexibility |
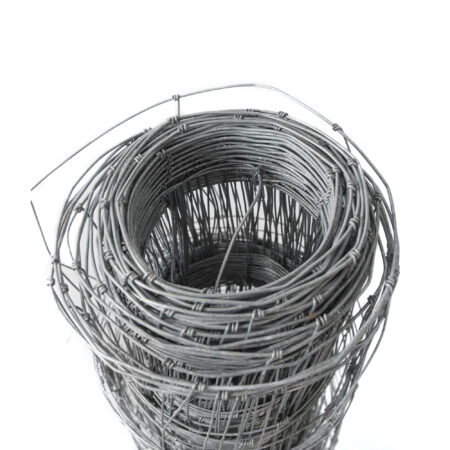
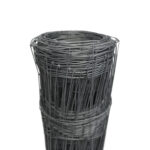
| Delivered as | As a roll. If the roll exceeds 33kg it will be delivered on a pallet | |||
| Construction | ||||
| Material | Lightweight mild steel | Mild steel | High tensile steel | High tensile steel |
| Coating | Galvanised | Heavily galvanised | Heavily galvanised | Heavily galvanised with green ecover |
| Min height | 80cm (2.6ft) | 80cm (2.6ft) | 80cm (2.6ft) | 80cm (2.6ft) |
| Max height | 2m (6.5ft) | 80cm (2.6ft) | 80cm (2.6ft) | 80cm (2.6ft) |
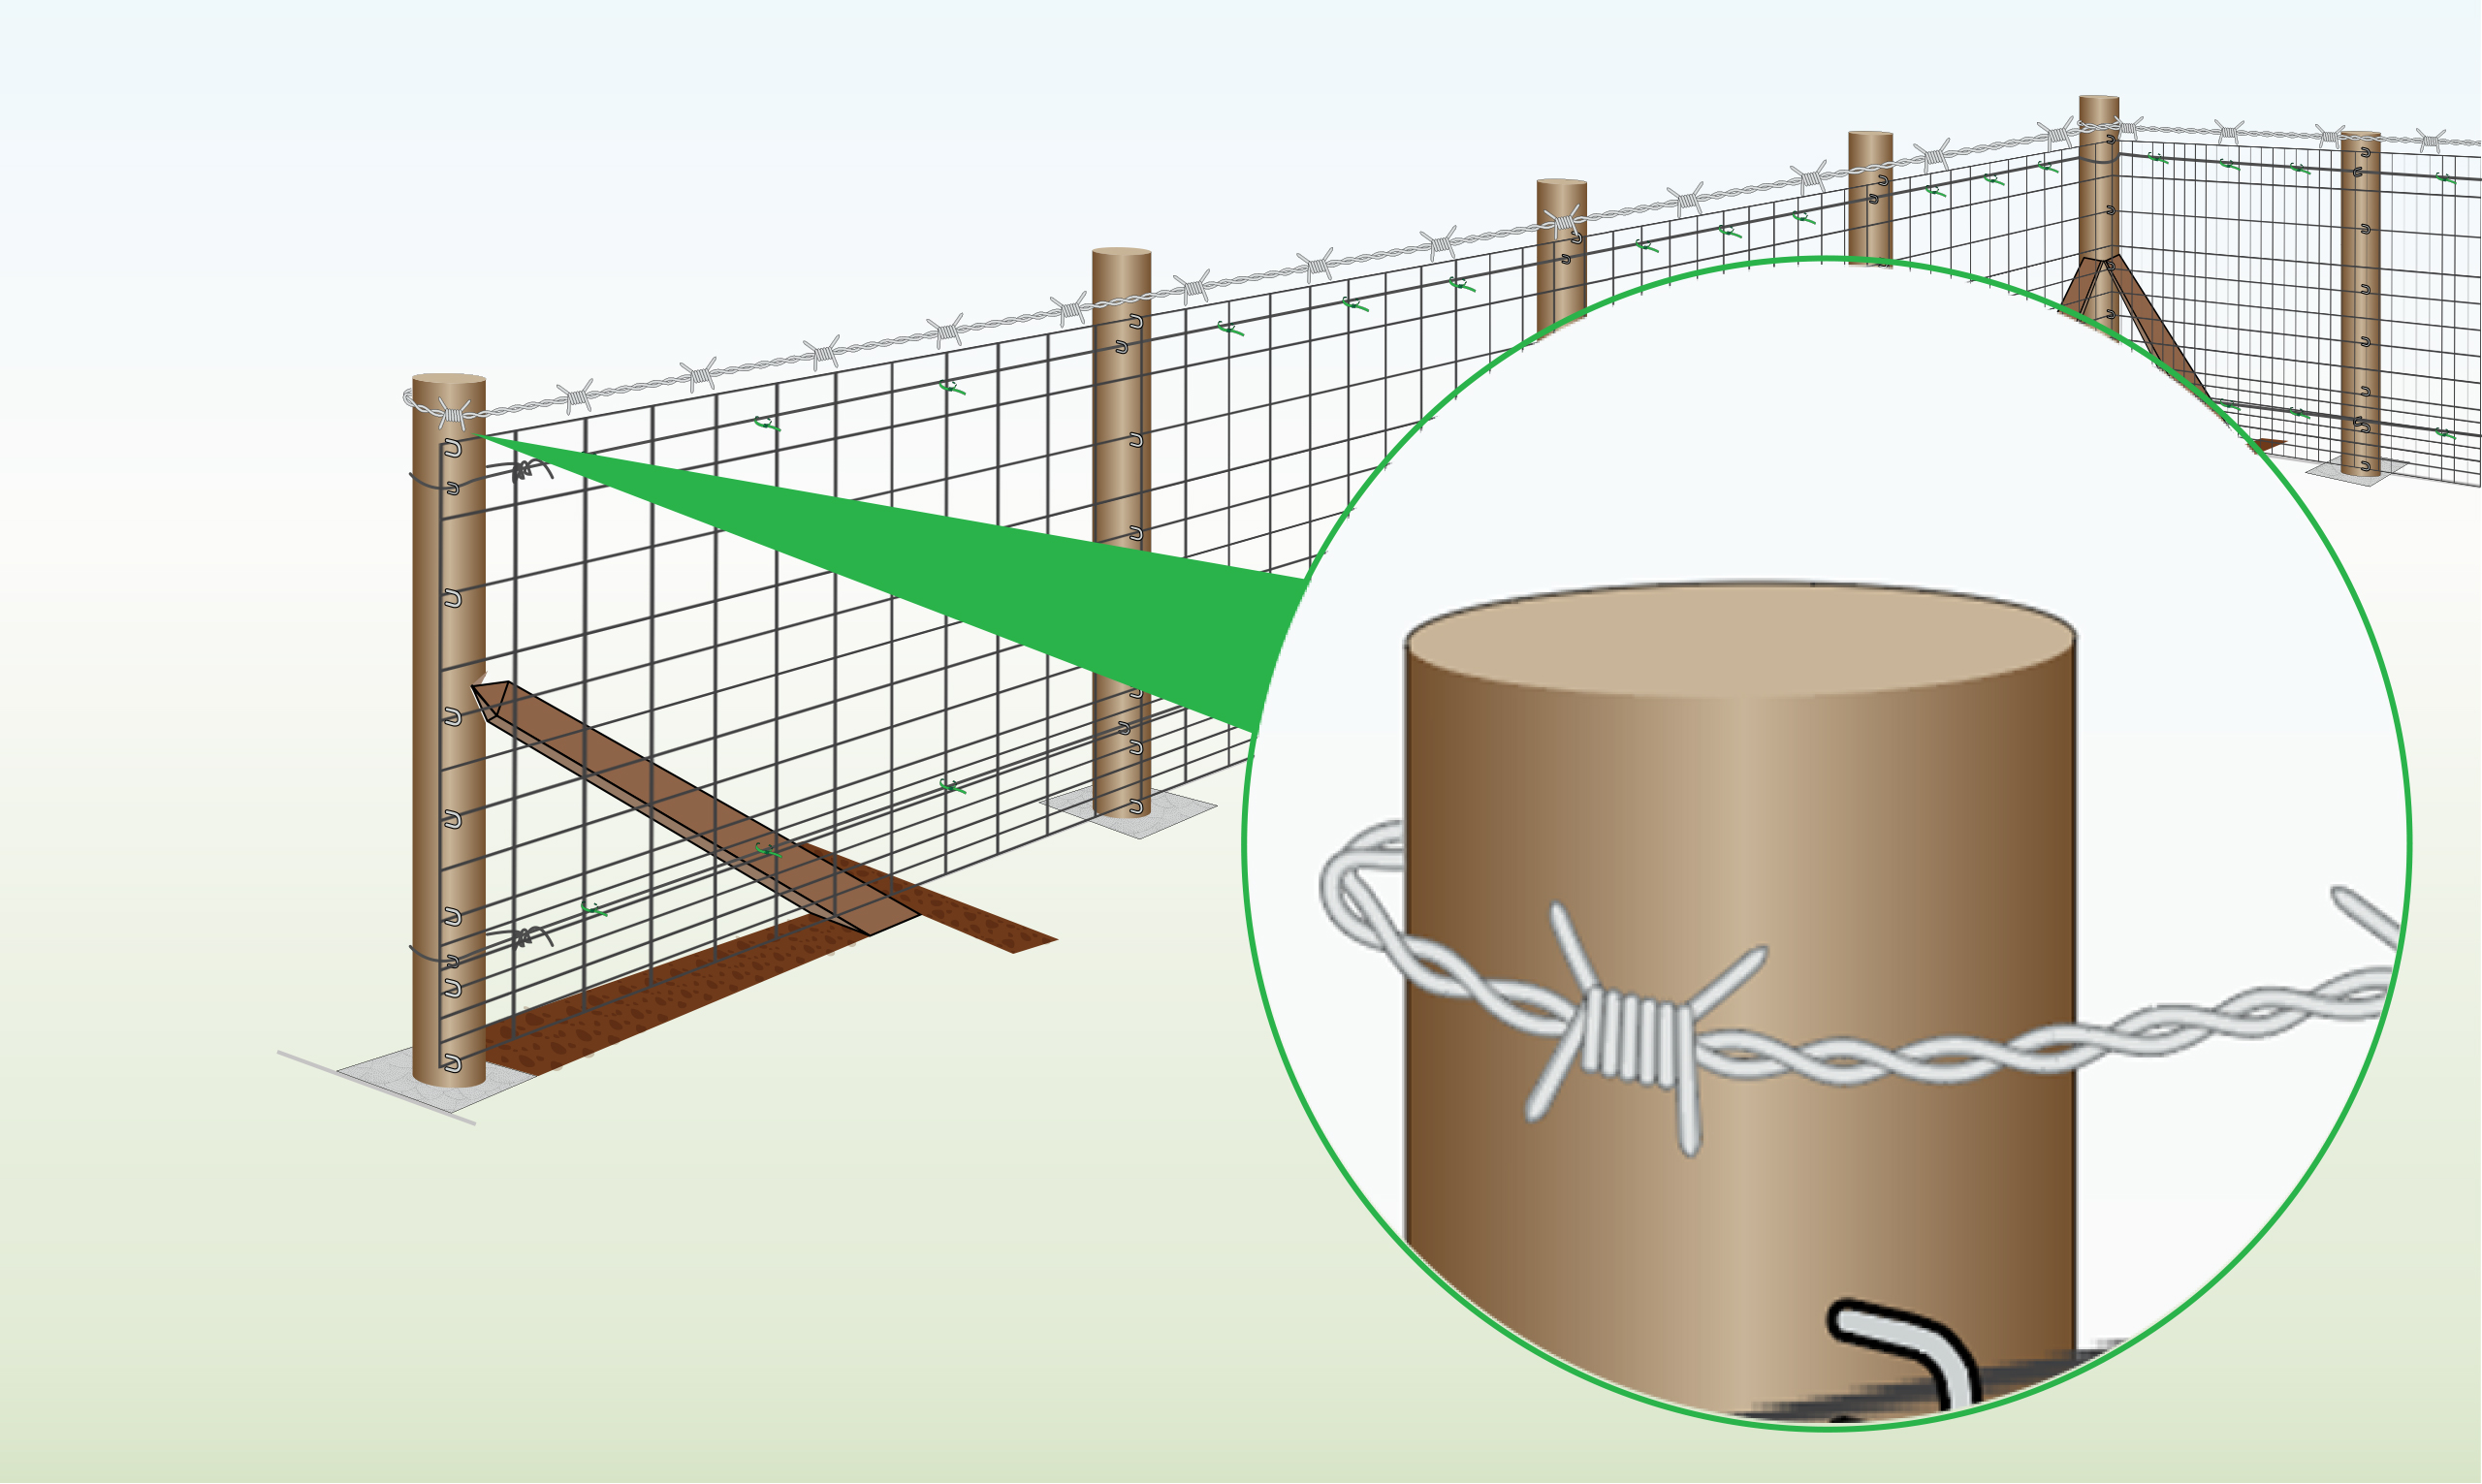
| Increase height | Add Barbed Wire or Tension Wire (view instructions) | |||
| Base & top wire diameter | 2.5mm | 3mm | 2.5mm | 2.5mm |
| Inside wire diameter | 1.9mm | 2.5mm | 1.9mm | 1.9mm |
| Type of knot | Knotted hinge joint | |||
| Strength & Environment | ||||
| Corrosion resistance | Good | Very good | Very good | Excellent |
| Abrasion resistance | Good | Very good | Very good | Very good |
| Tensile strength range | 695-850 N/mm2 | 695-850 N/mm2 | 1235-1390 N/mm2 | 1235-1390 N/mm2 |
| Best if heavy livestock lean against fence | ||||
| Best if fence has multiple turns | ||||
| Suited to animals | See application list above | |||
| Installation | ||||
| Recommended post spacing | 2m | 2m-3m | 3m-5m | 3m-5m |
| Can be installed with wooden posts | Yes, the most common option. Attach with Staples and Tension Wire.
(download instructions) |
|||
| Can be installed with metal posts | Yes, less common but a variety of metal posts are now available | |||
| Speed of installation | Due to the product weight and tensioning required it takes longer than panels or wire mesh but it is also cheaper | |||
| Qty of people required to instal | One experienced person or two people new to stock fence | |||
| Handle with protective gloves | ||||
| Maintenance | ||||
| Will stretch after installation? | ||||
| Need retightening each year? | ||||
| 1.9 – 2.5mm | 2 – 2.5mm | 2 – 3mm | ||
| Steel Grade | L (Mild) | High Tensile | L (Mild) | C (Medium) |
| Can be bent Refers to the ability of the mesh to be bent out of shape by hand | ||||
| Holds shape when bent Confirms whether the mesh will hold its shape after bending it | ||||
| Sags over time Refers to whether the mesh will droop over time if it is stood up | ||||
|
Can be cut using Refers to the tool that is required as a minimum to cut the mesh |
Wire Cutters | Wire Cutters | Wire Cutters | Bolt Cutters |
with T posts
with Wood posts
| To Do | Explanation |
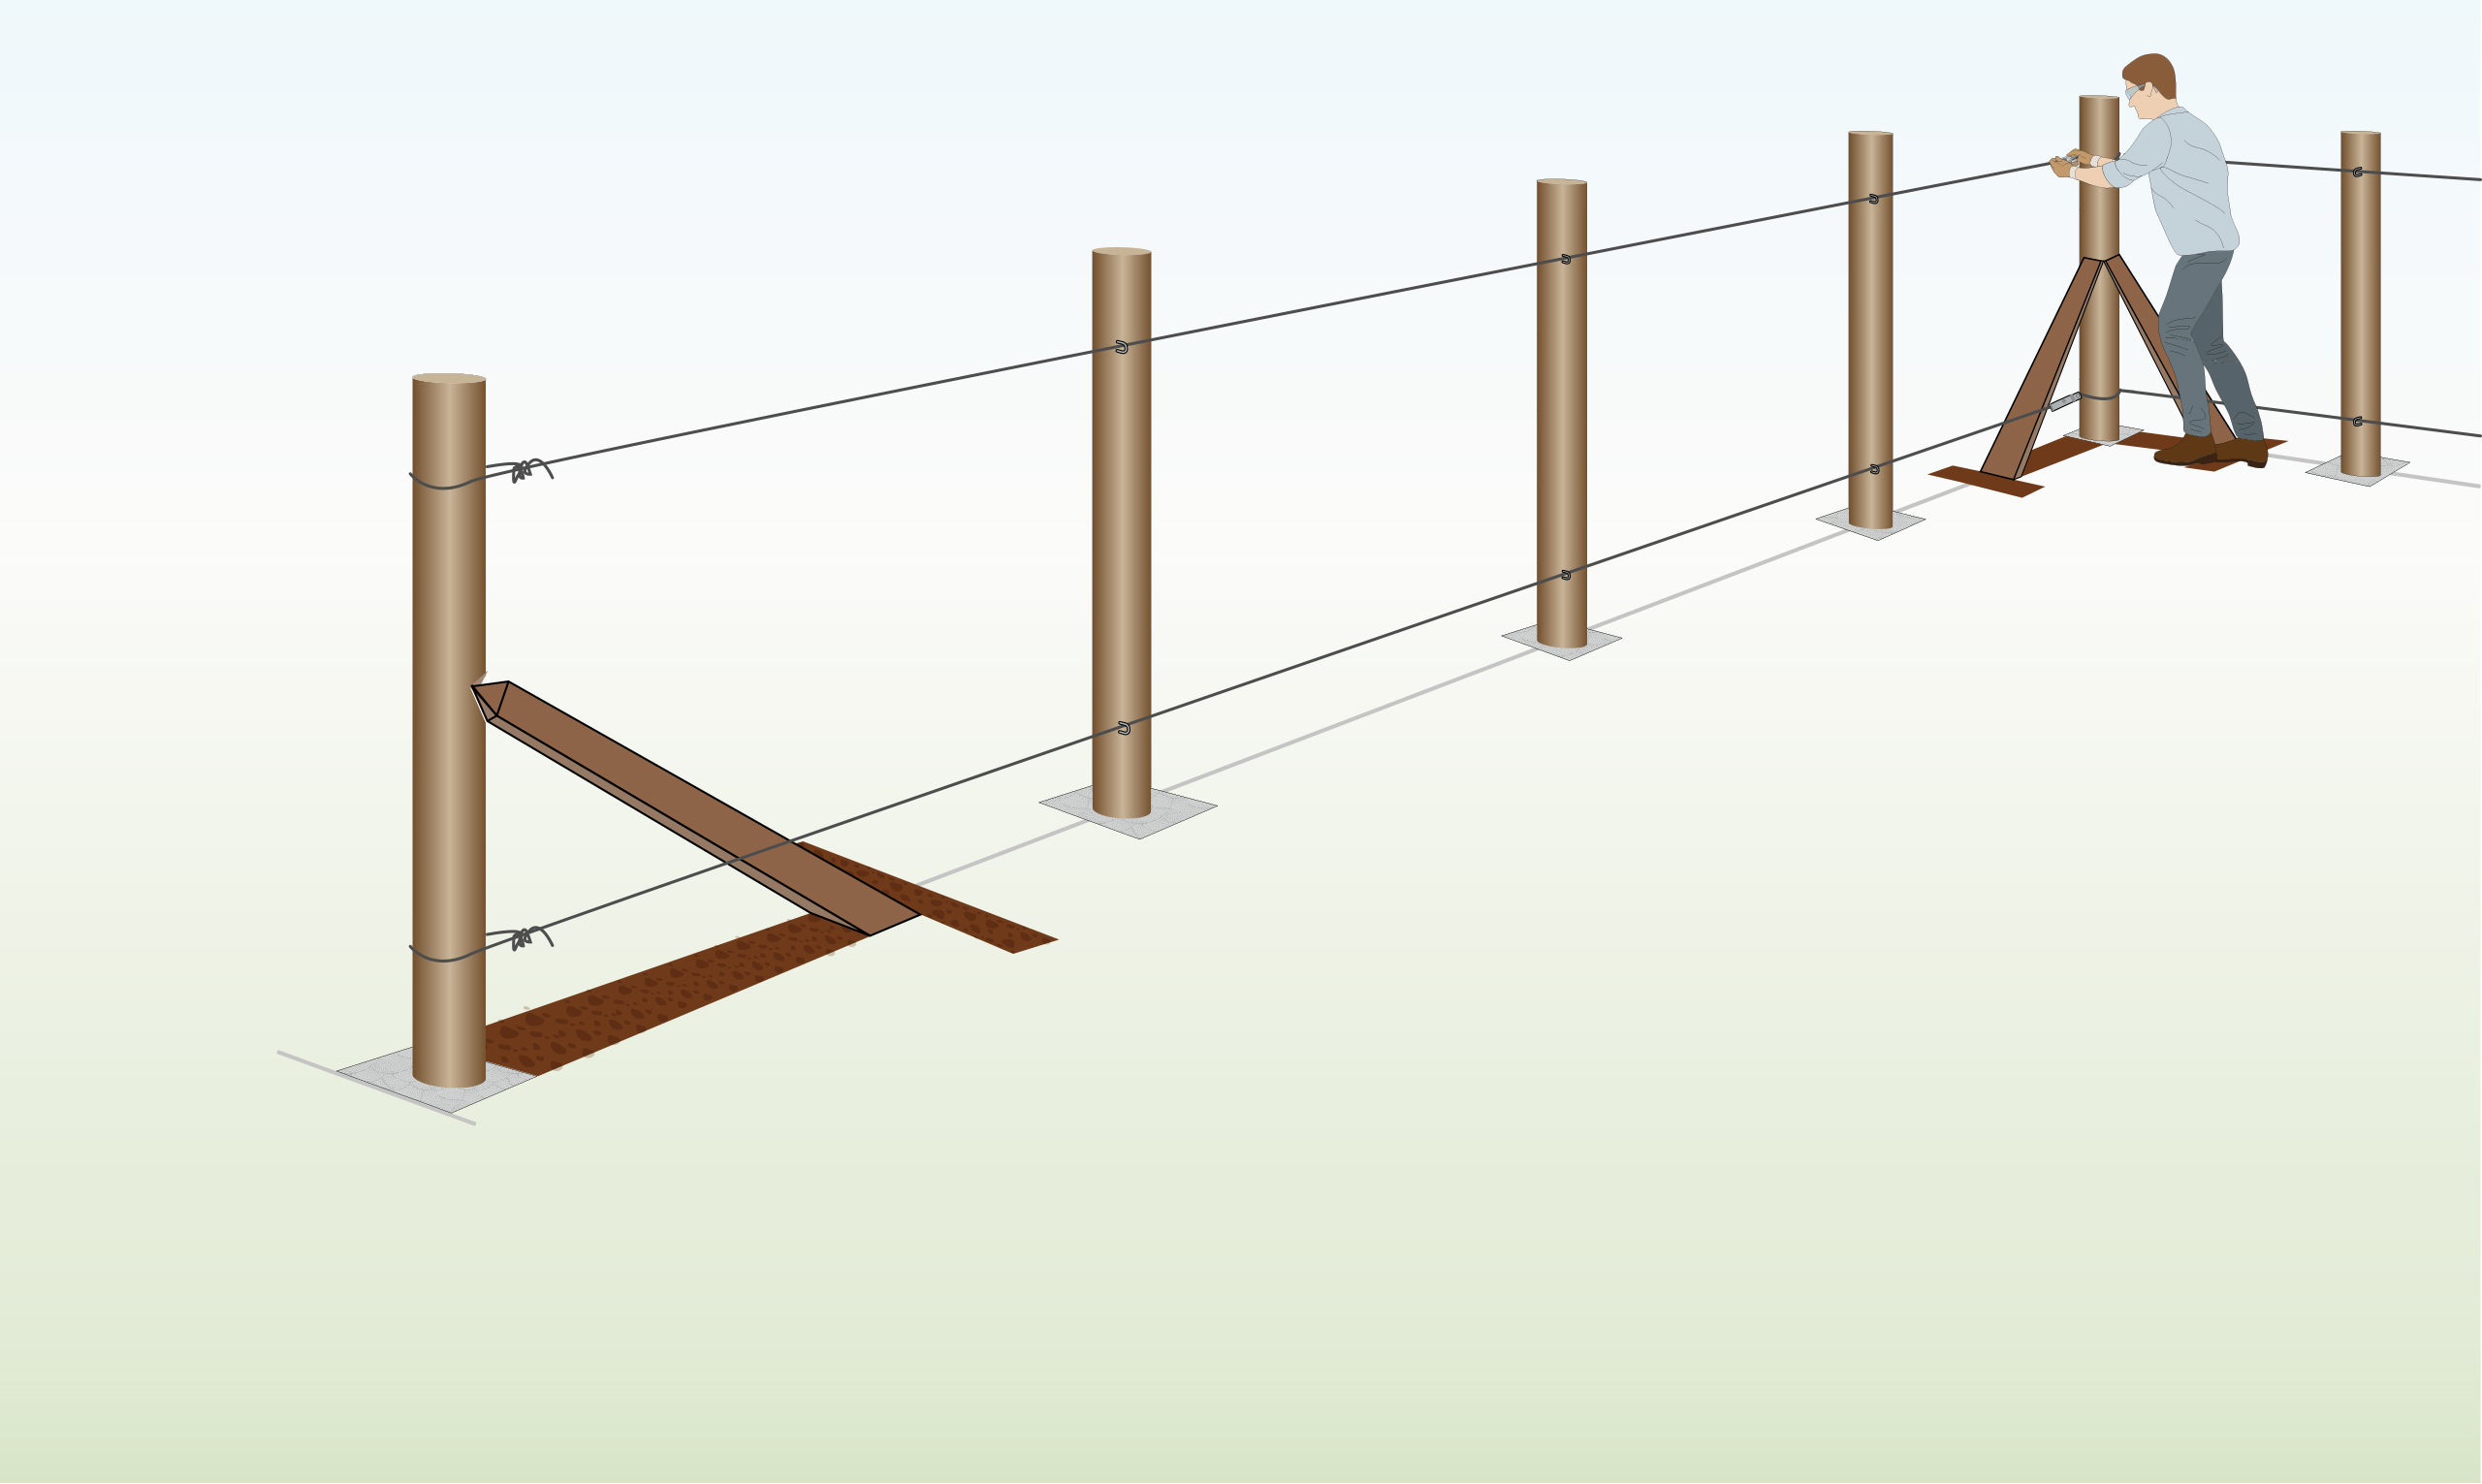
| Completed Installation
|
Follow these steps to install. |
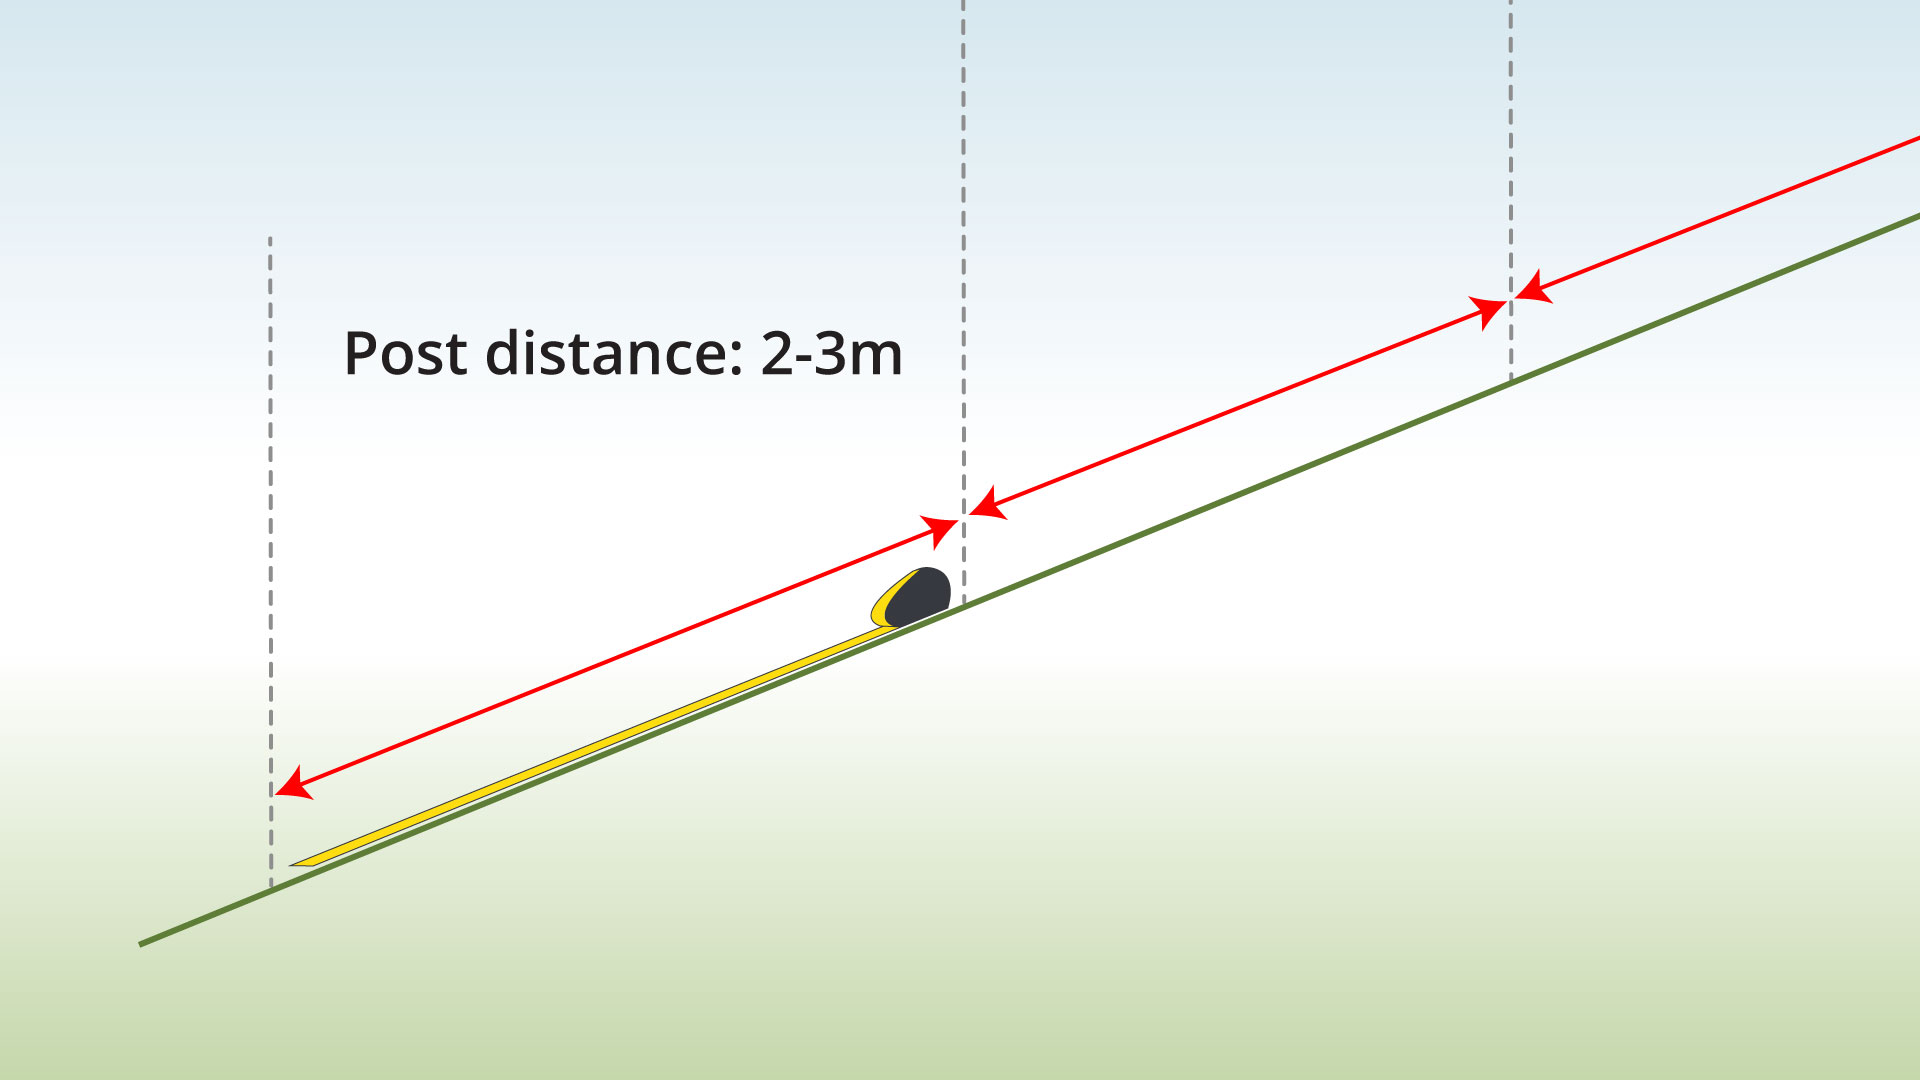
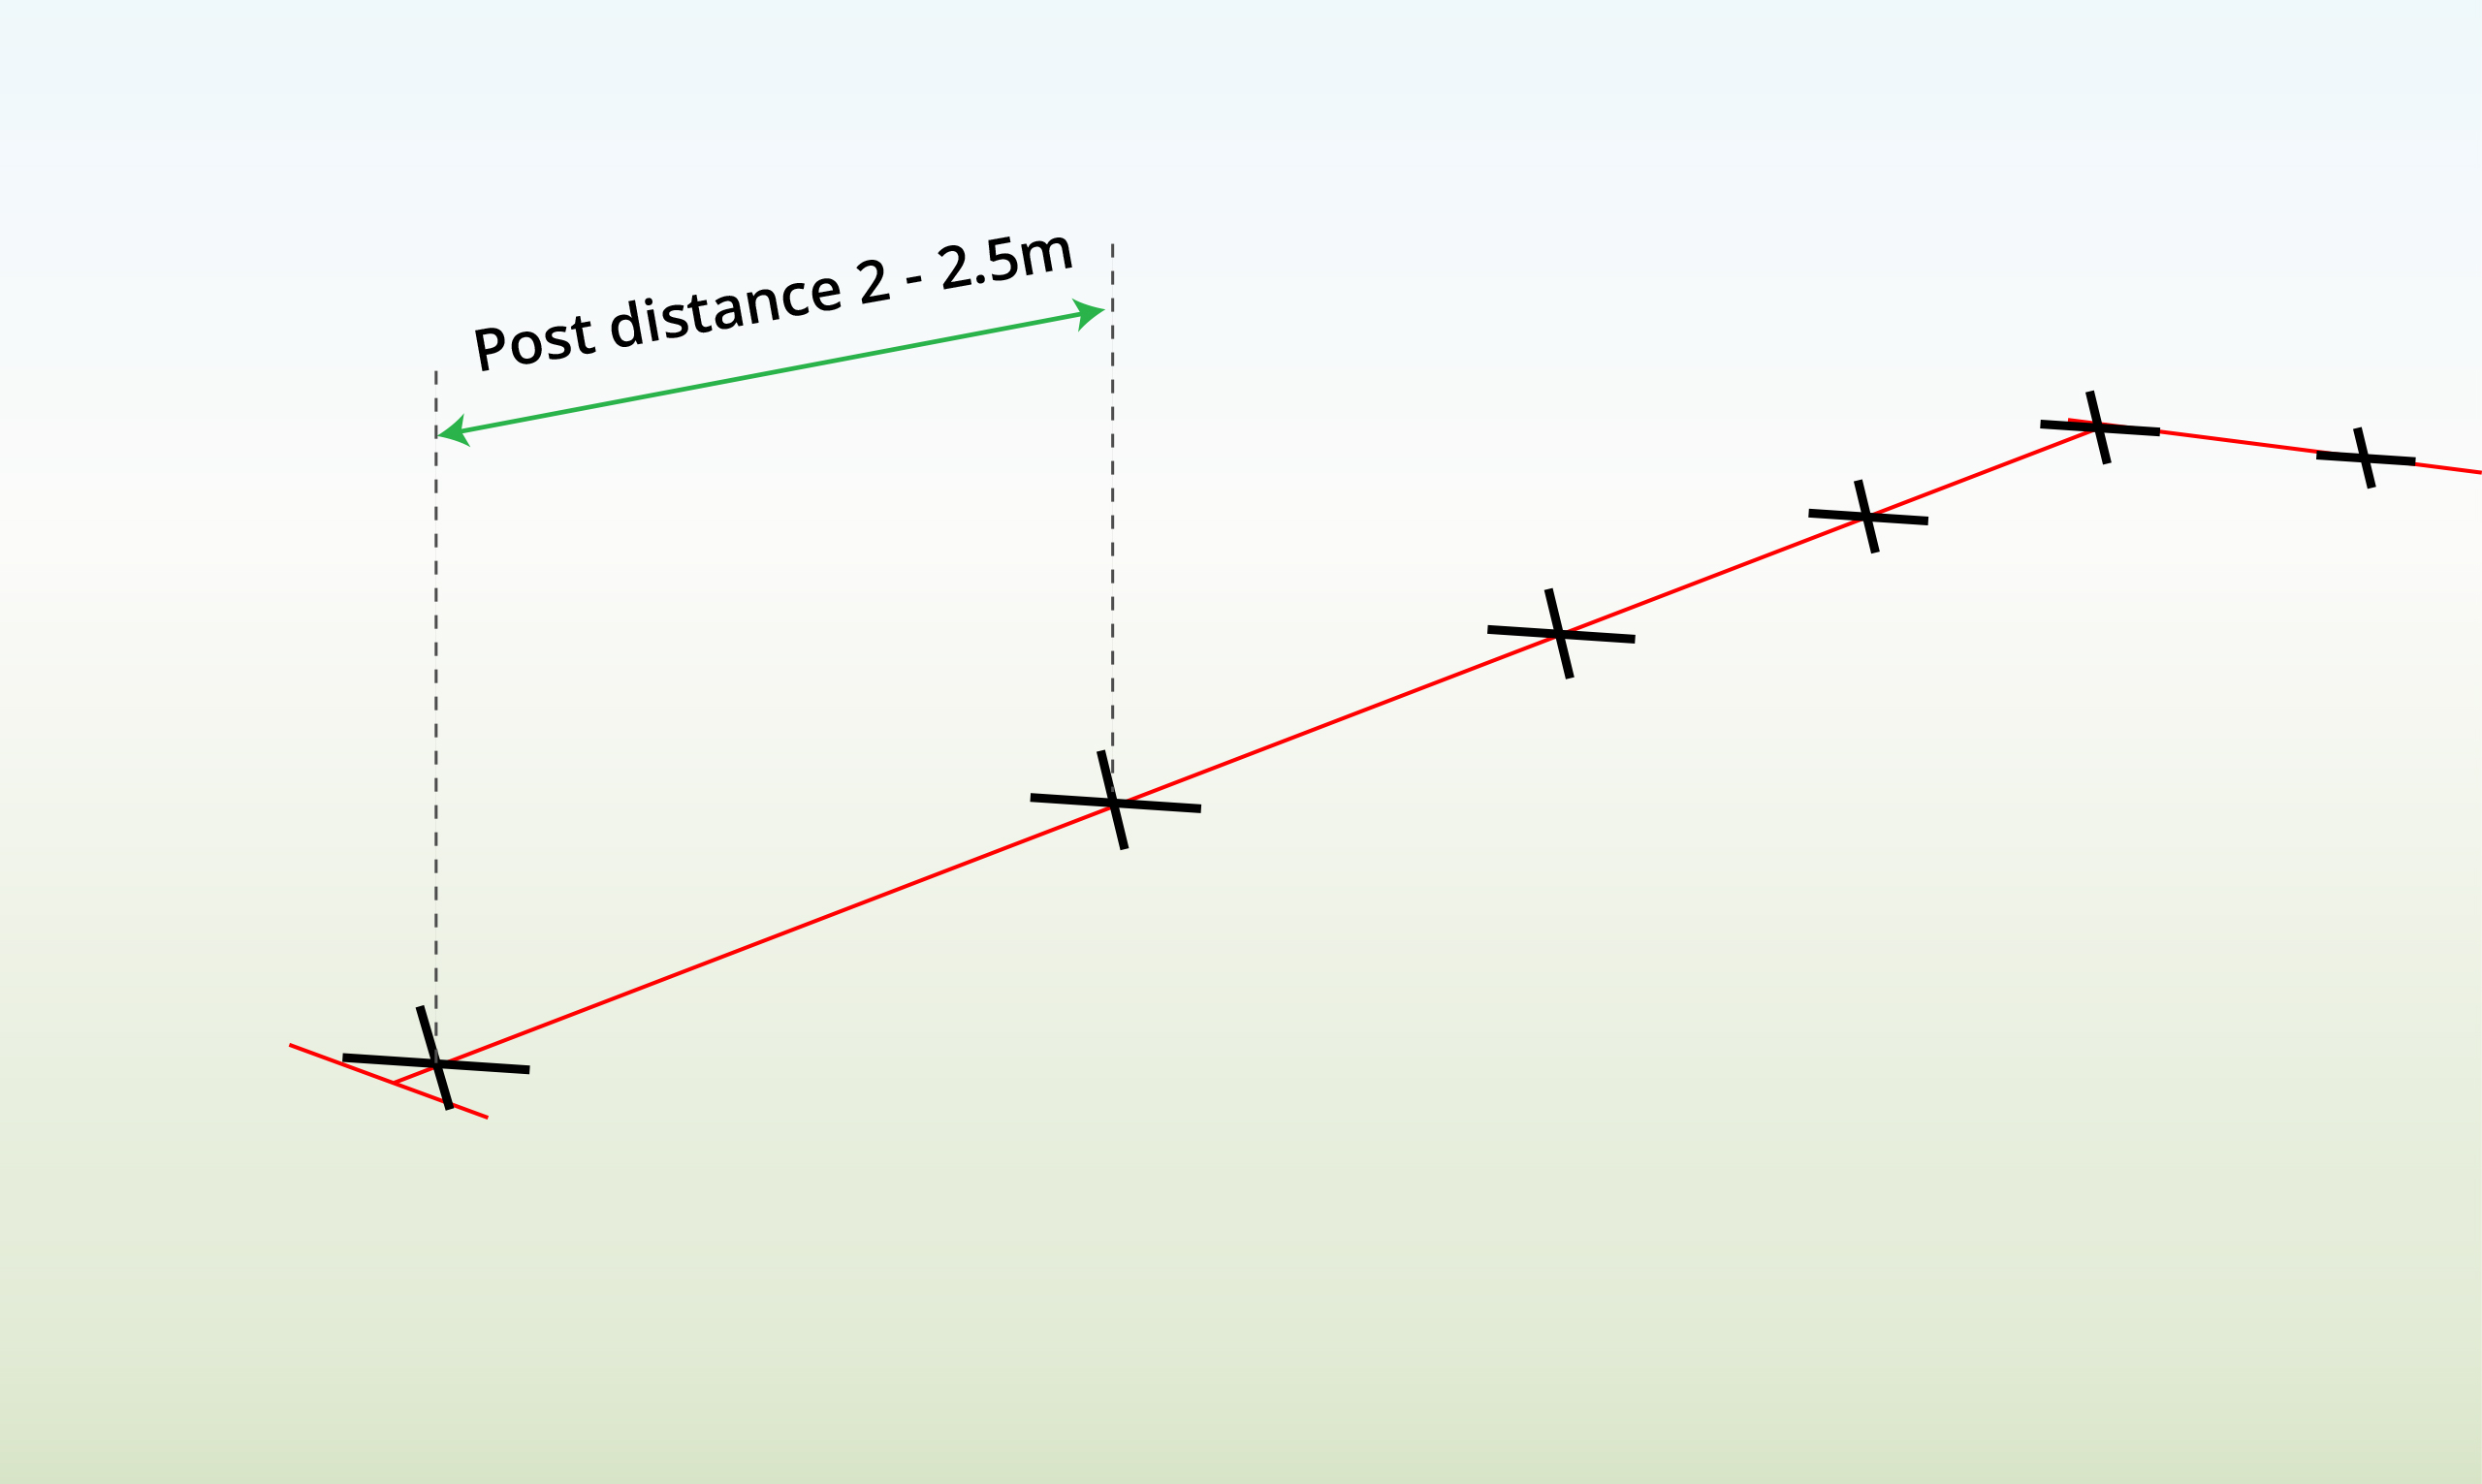
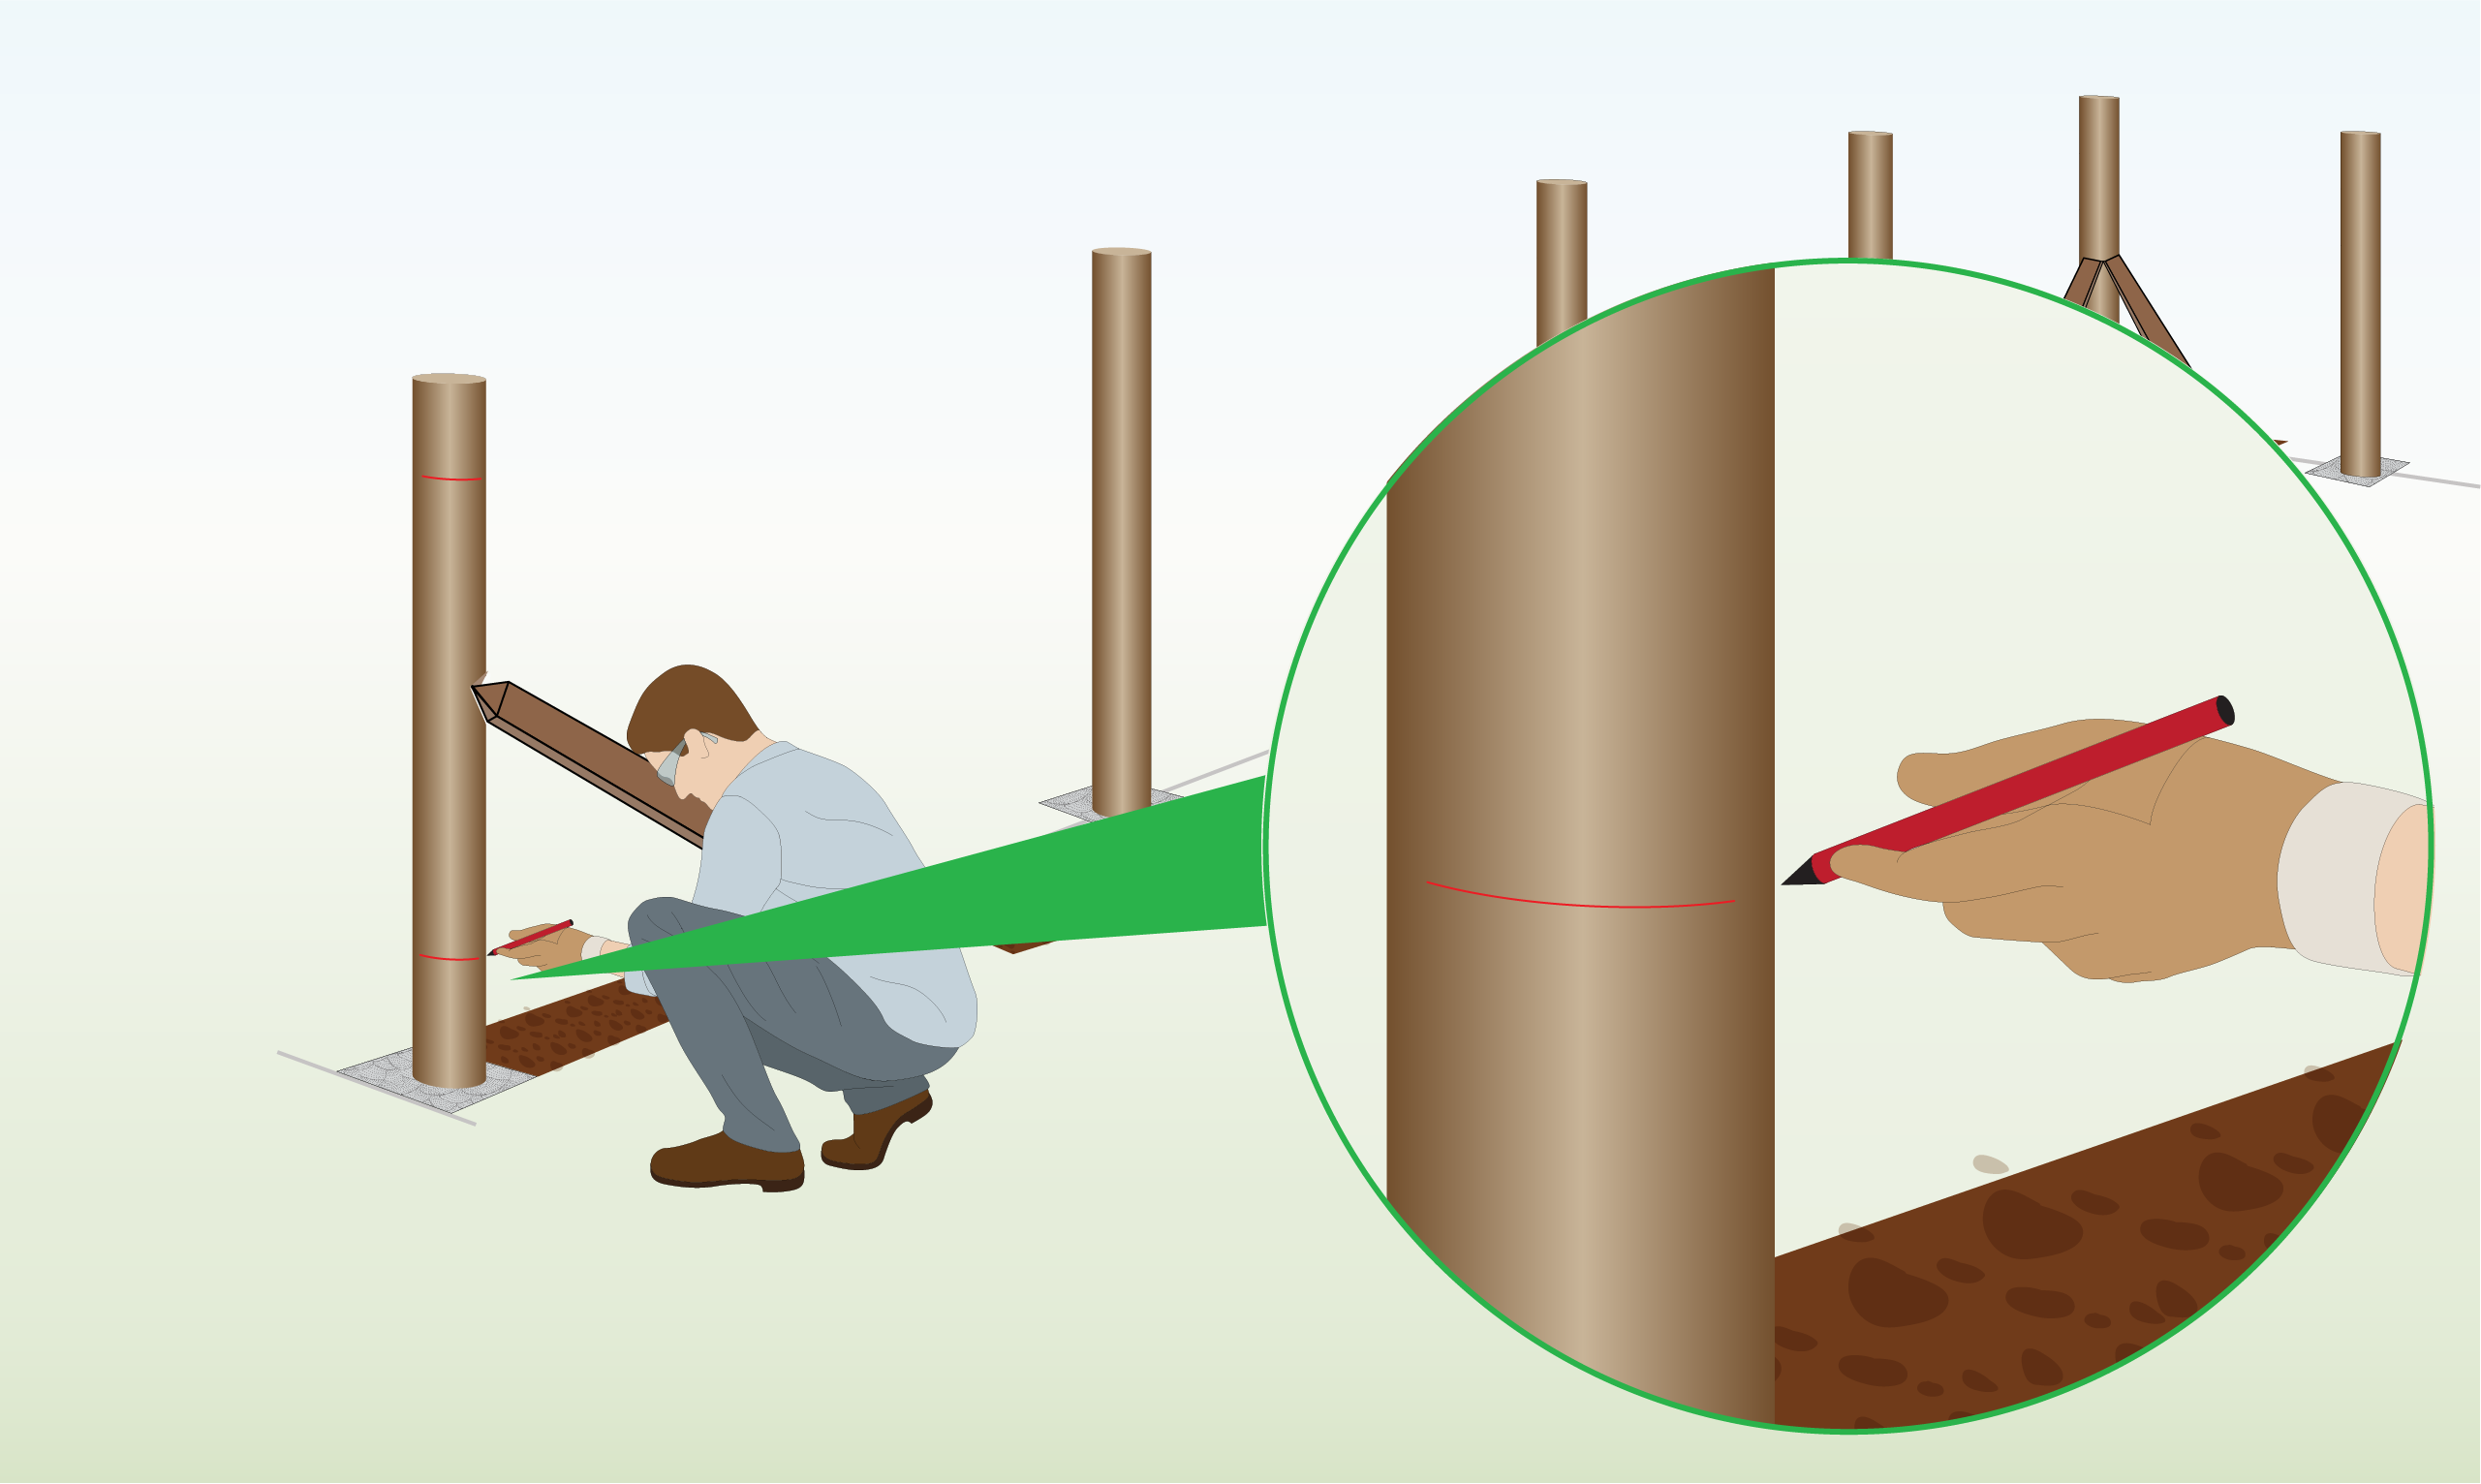
| Step 1 – Measure Post Distance
|
Measure and mark the post positions, spacing them 2–3 m apart. |
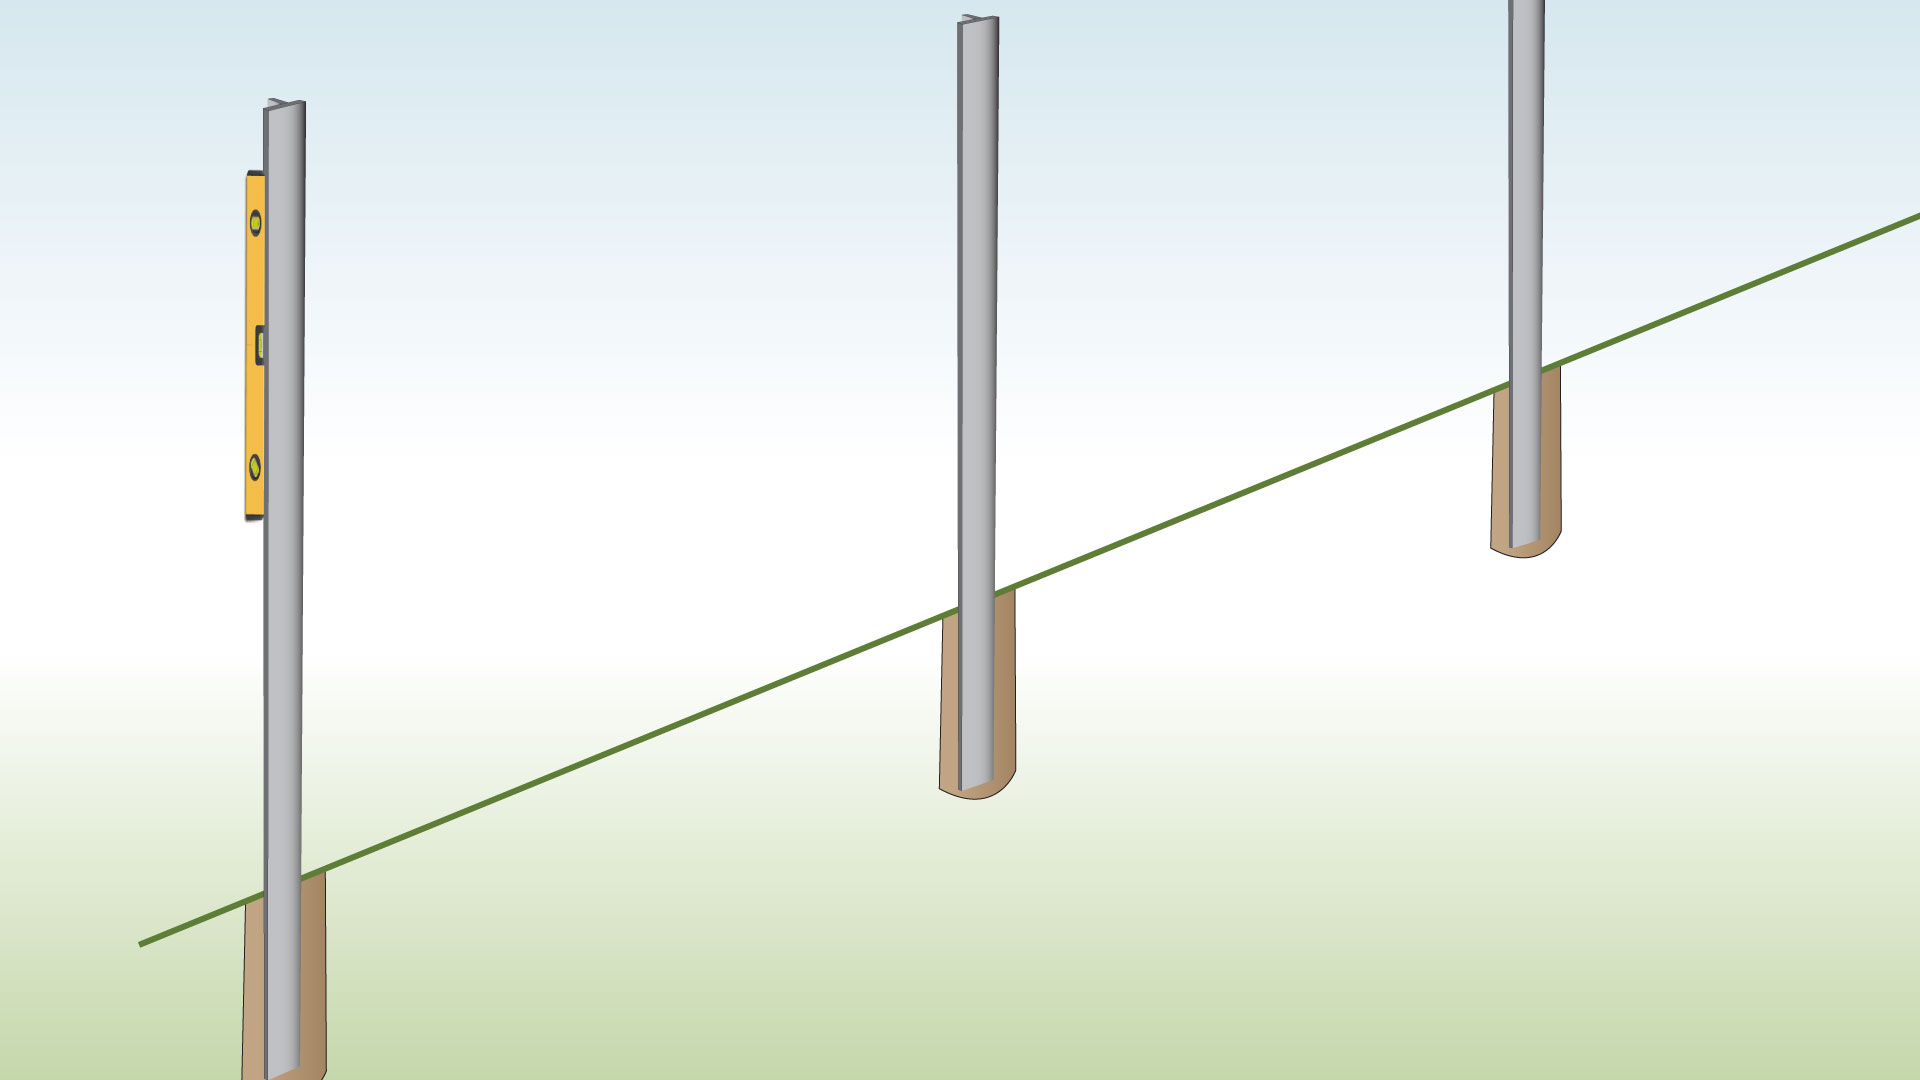
| Step 2 – Dig Holes
|
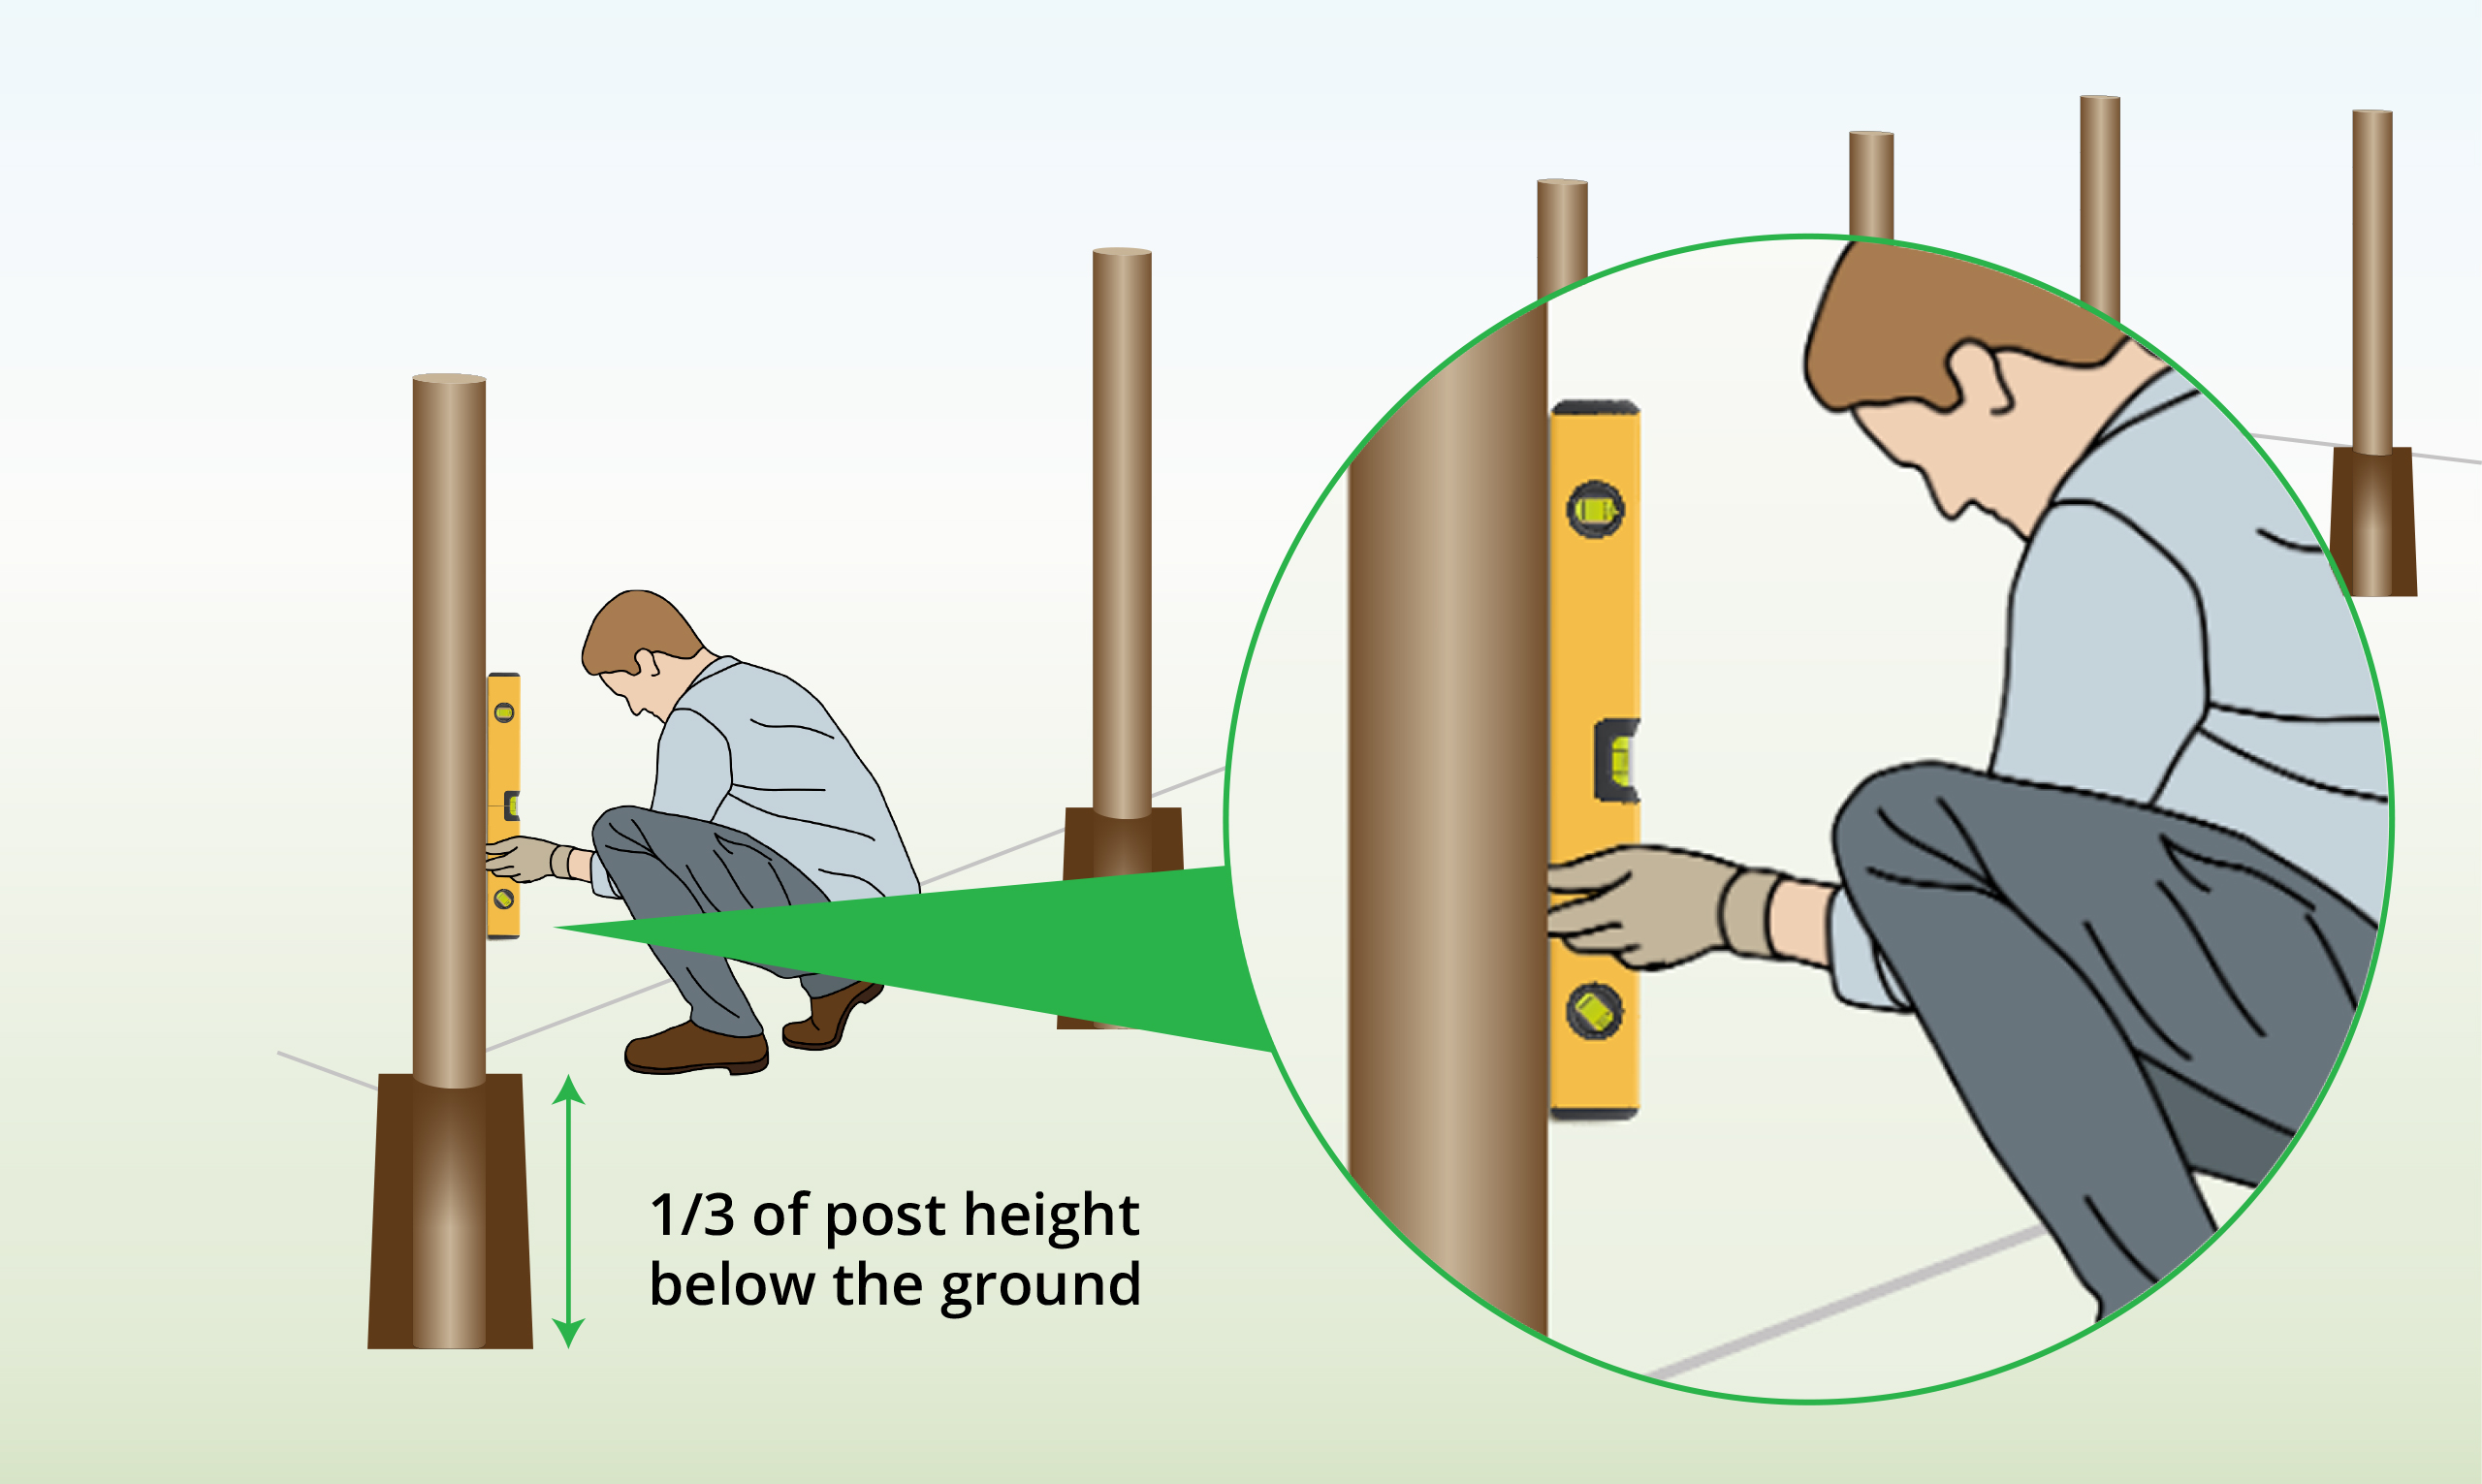
Dig the holes and place the posts inside, keeping them aligned with the flat sides facing outwards. |
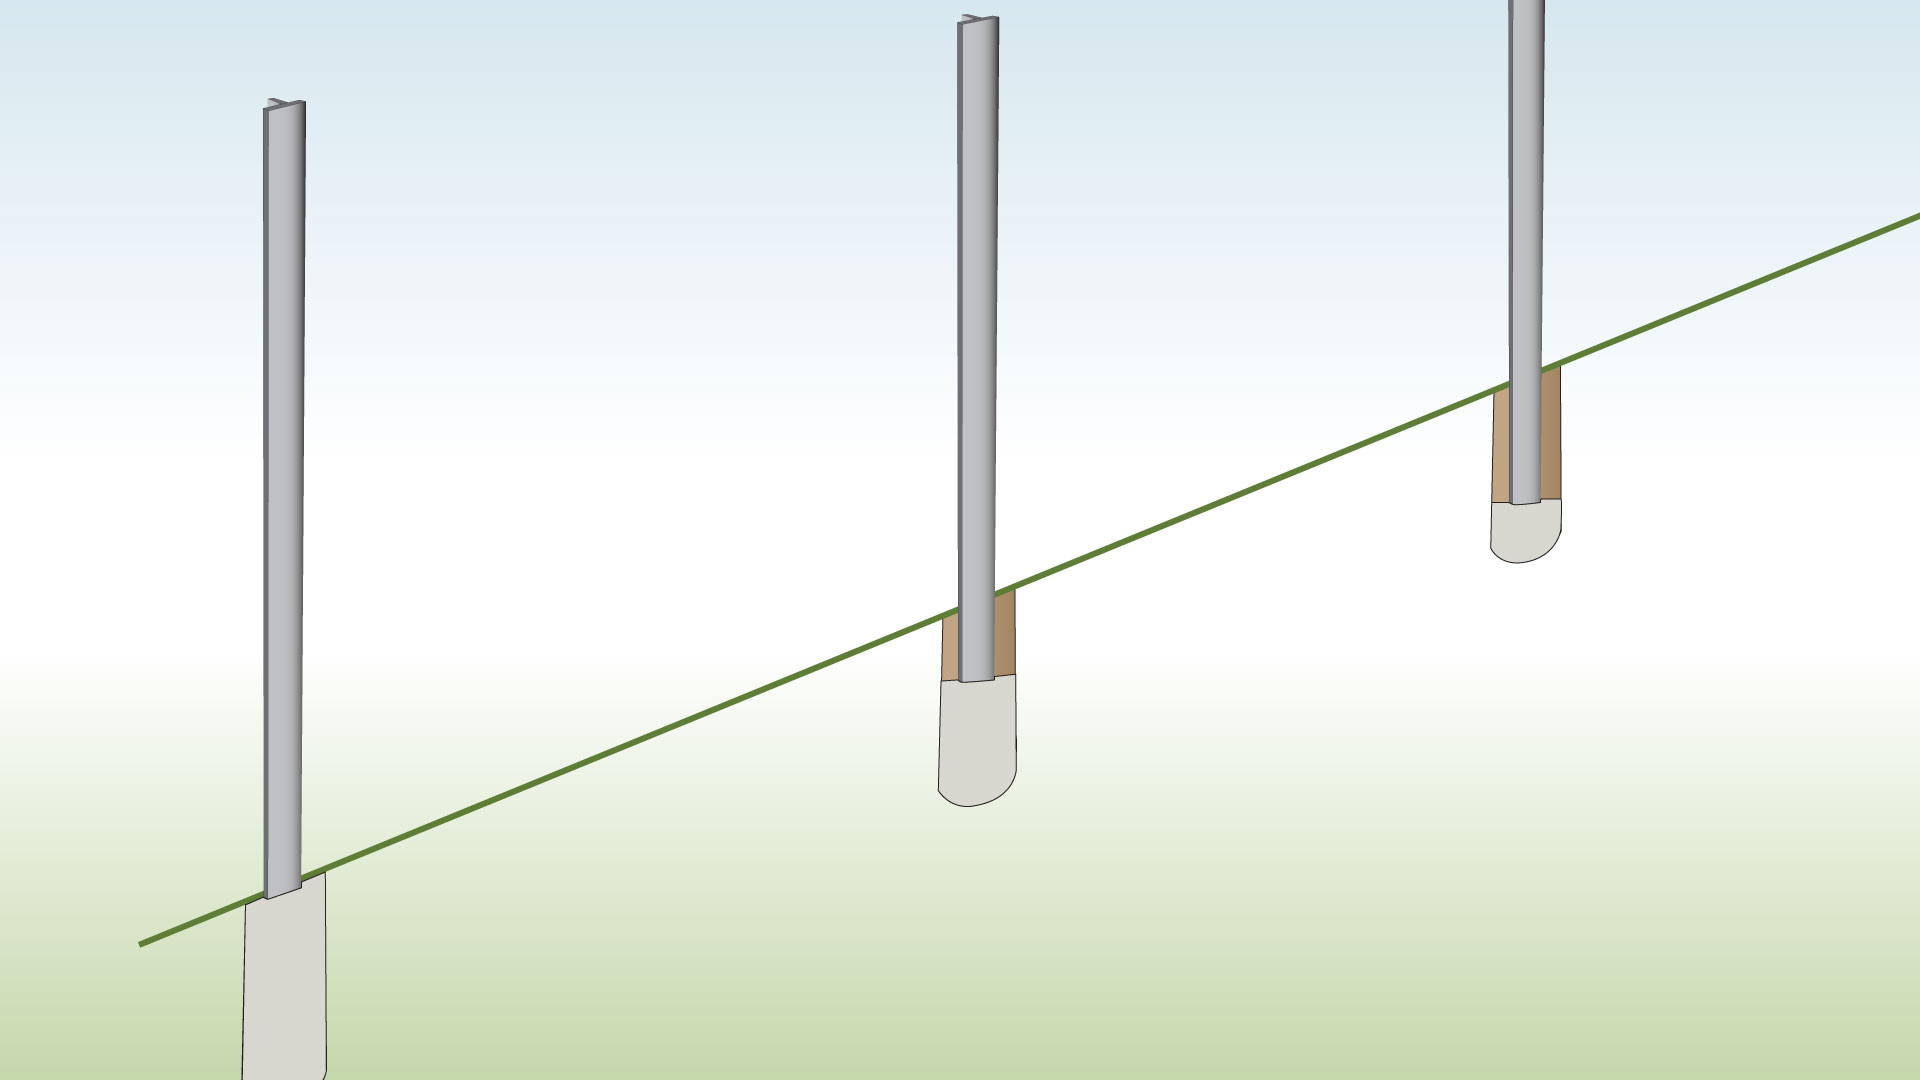
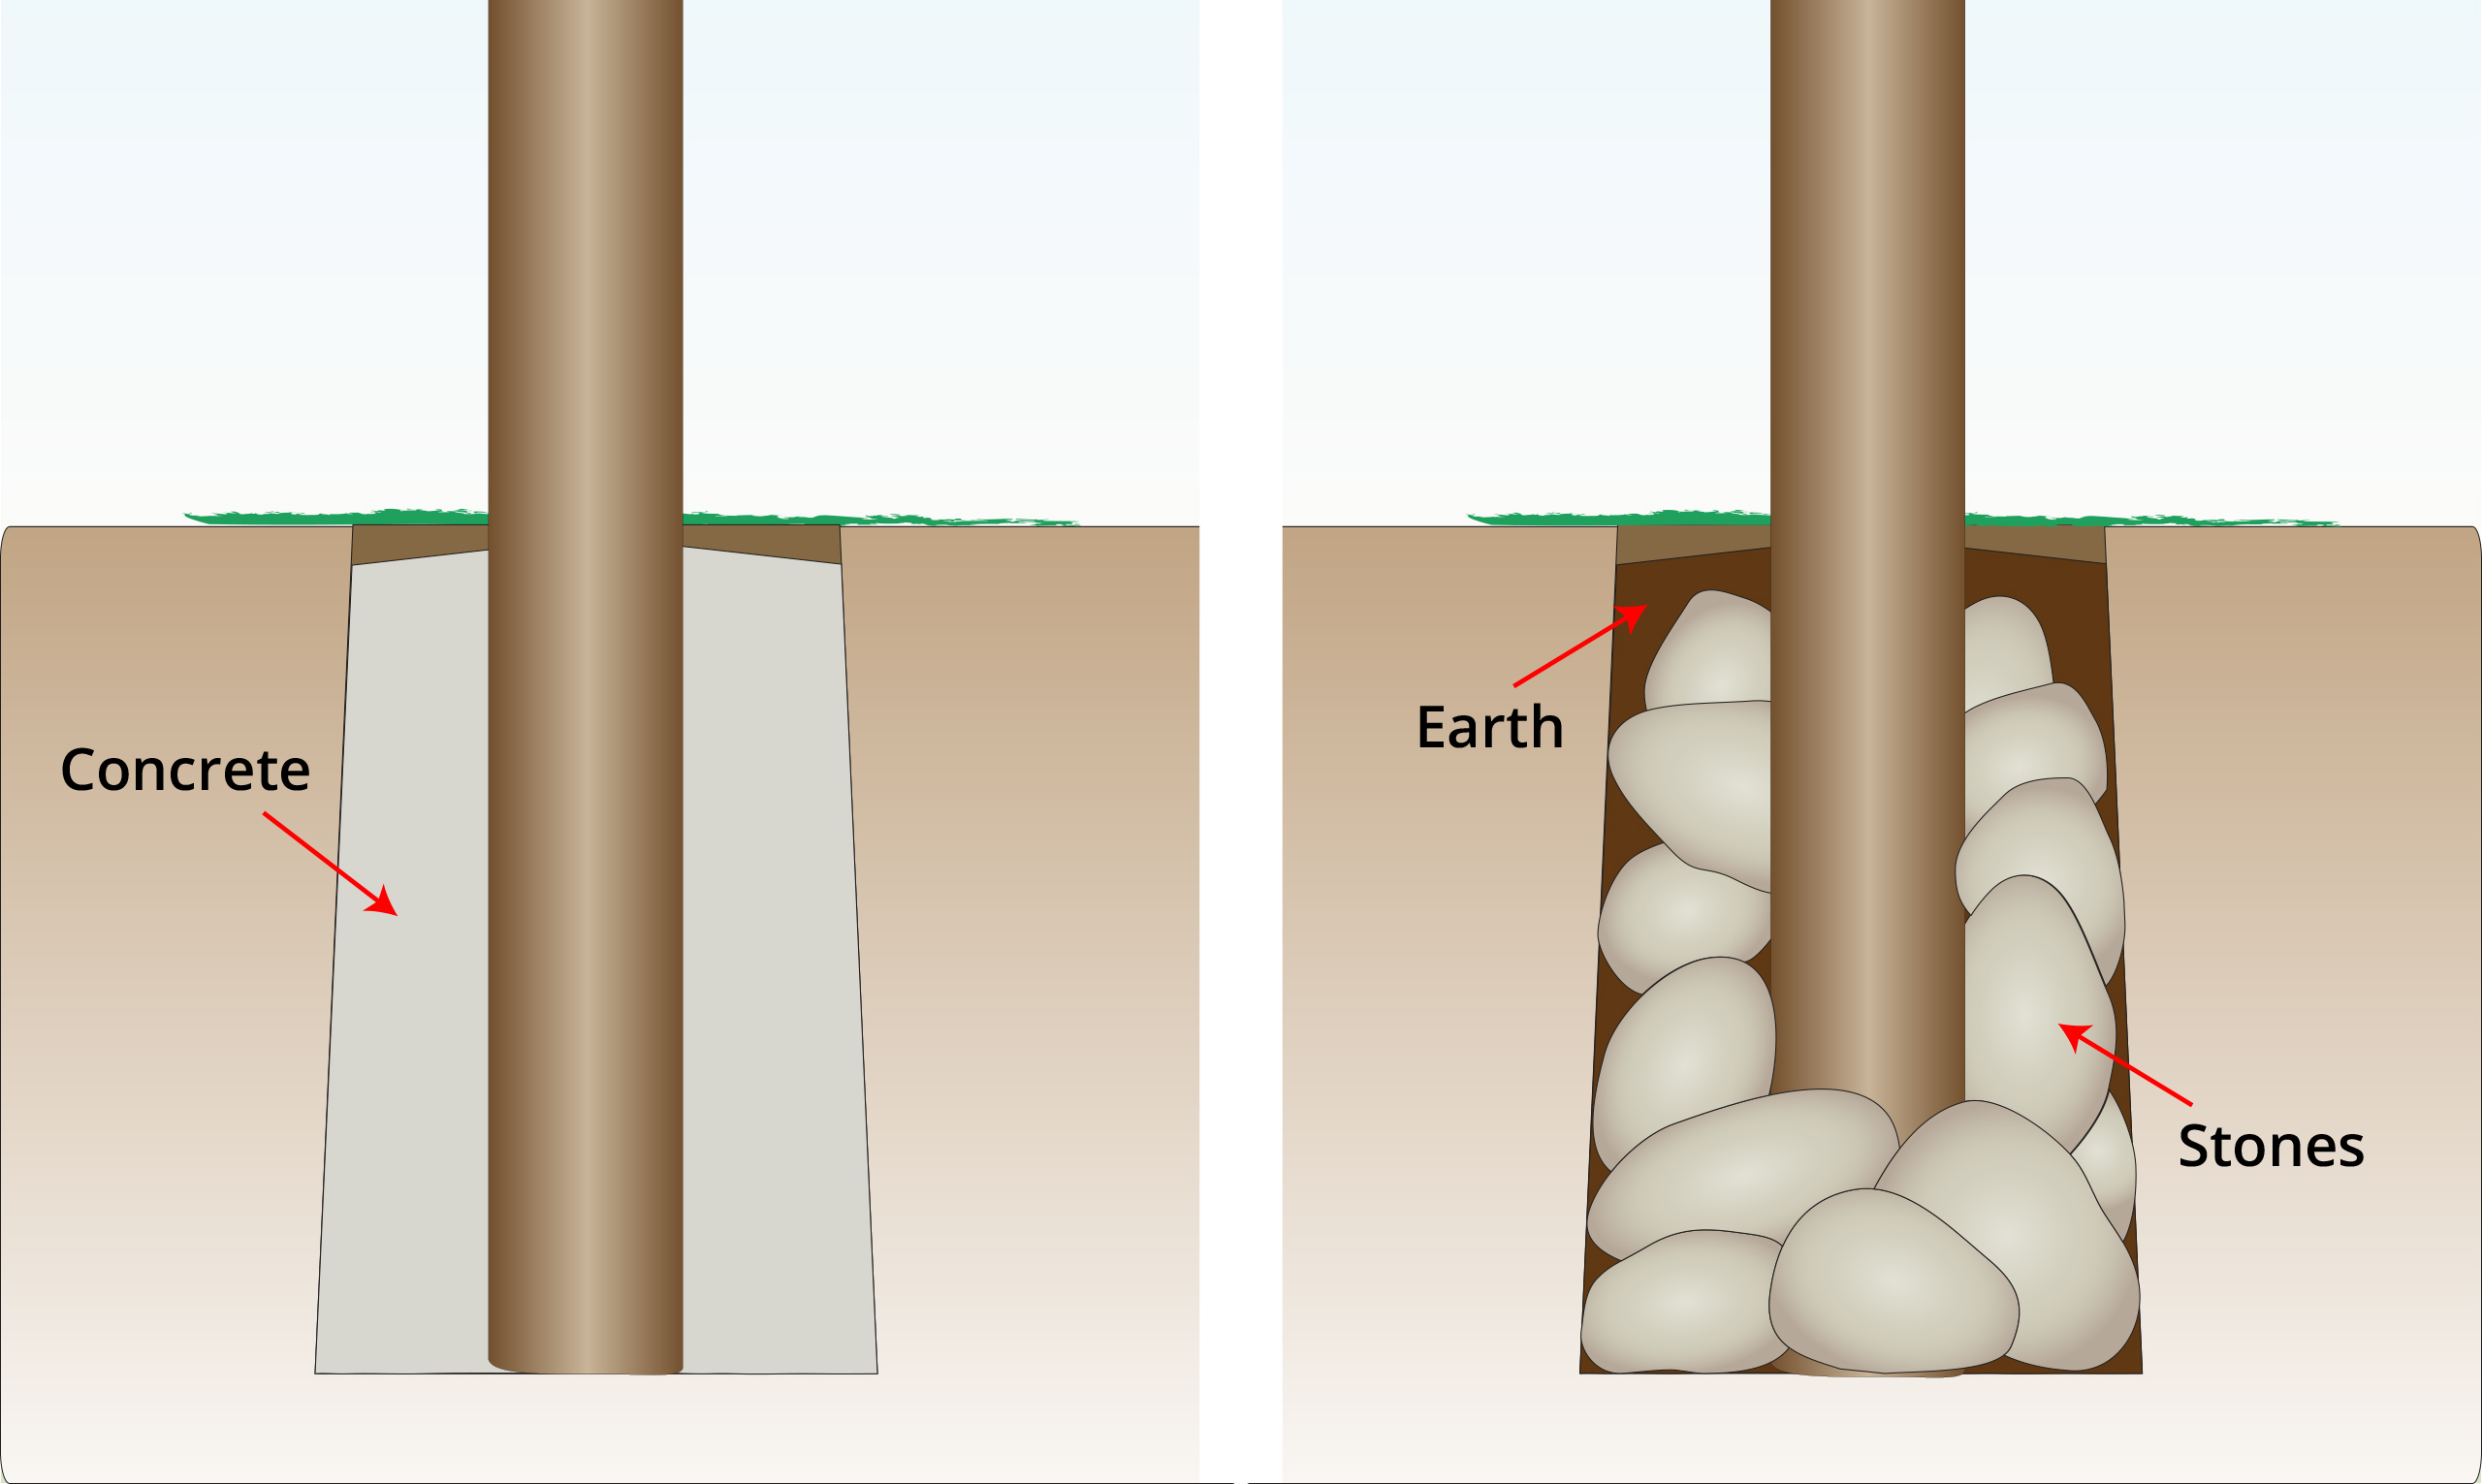
| Step 3 – Set Posts in Concrete
|
Secure the posts with concrete to ensure they are stable. |
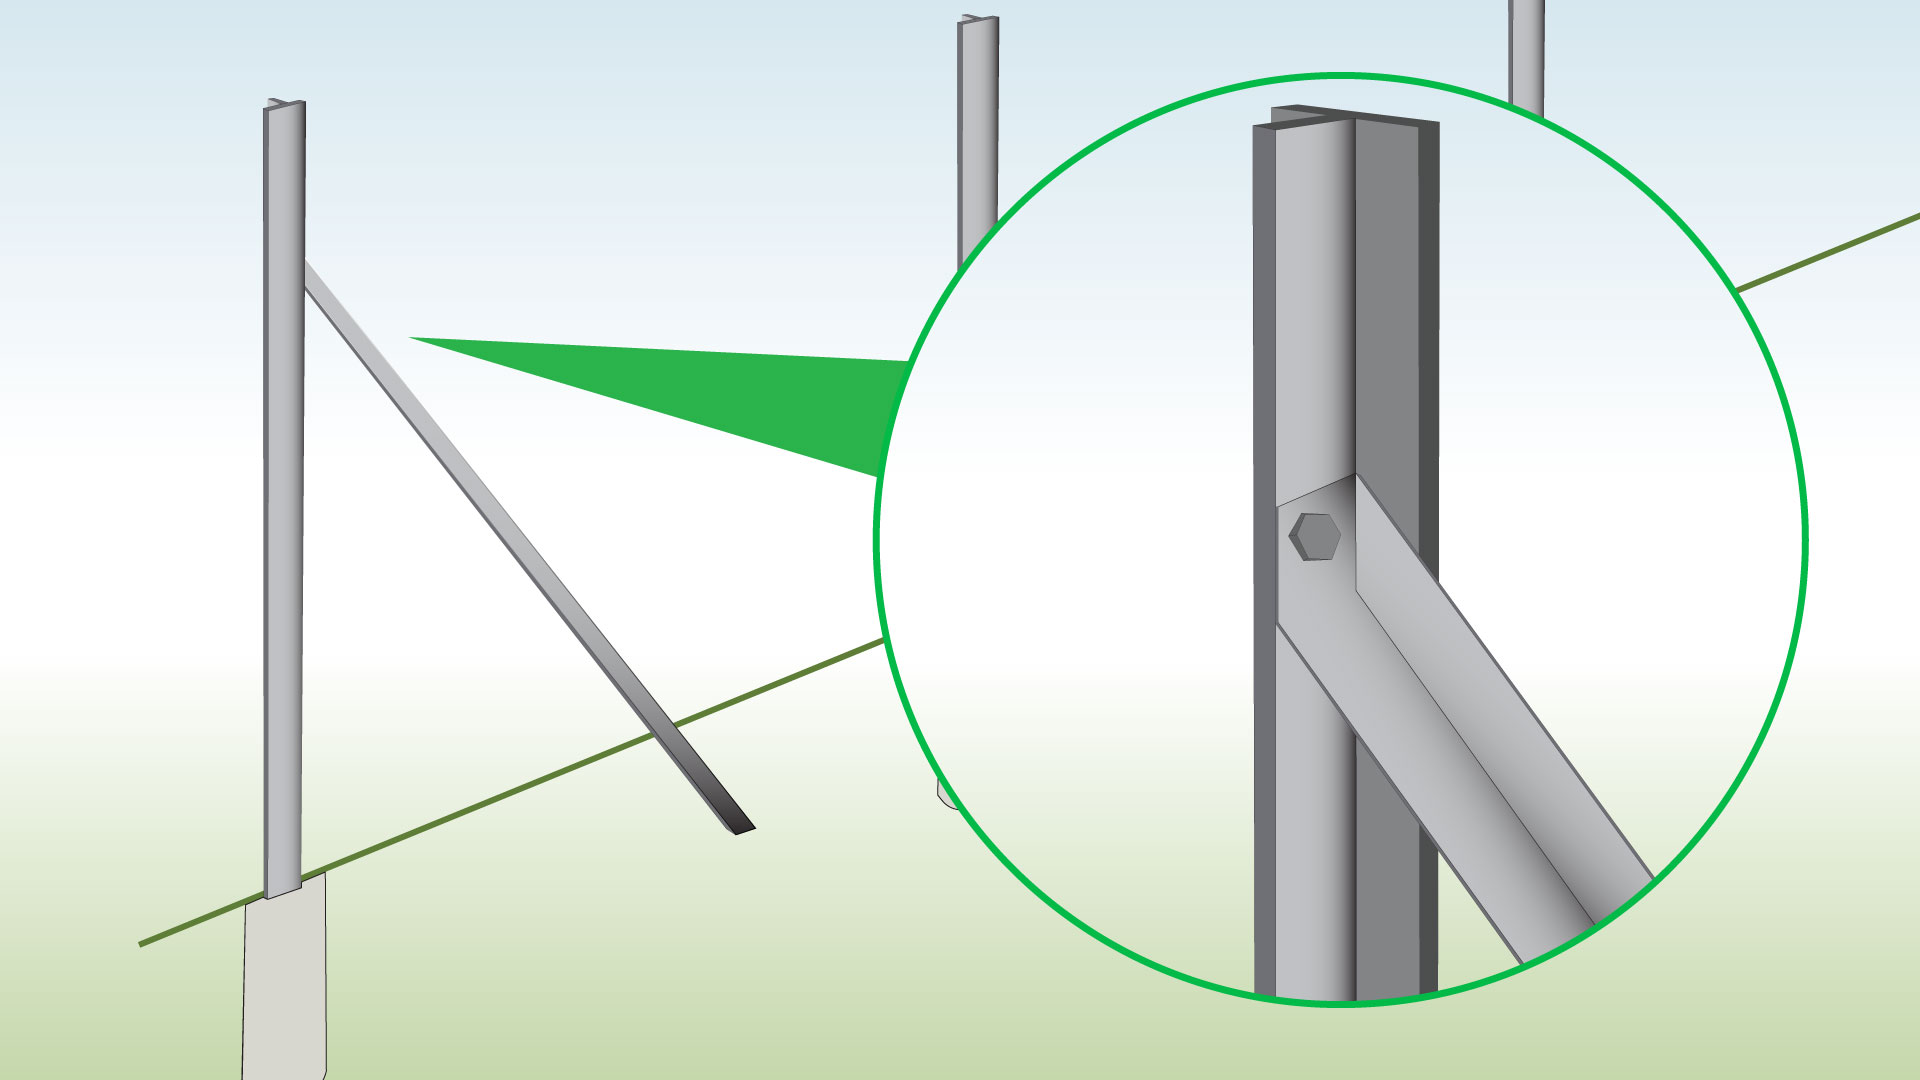
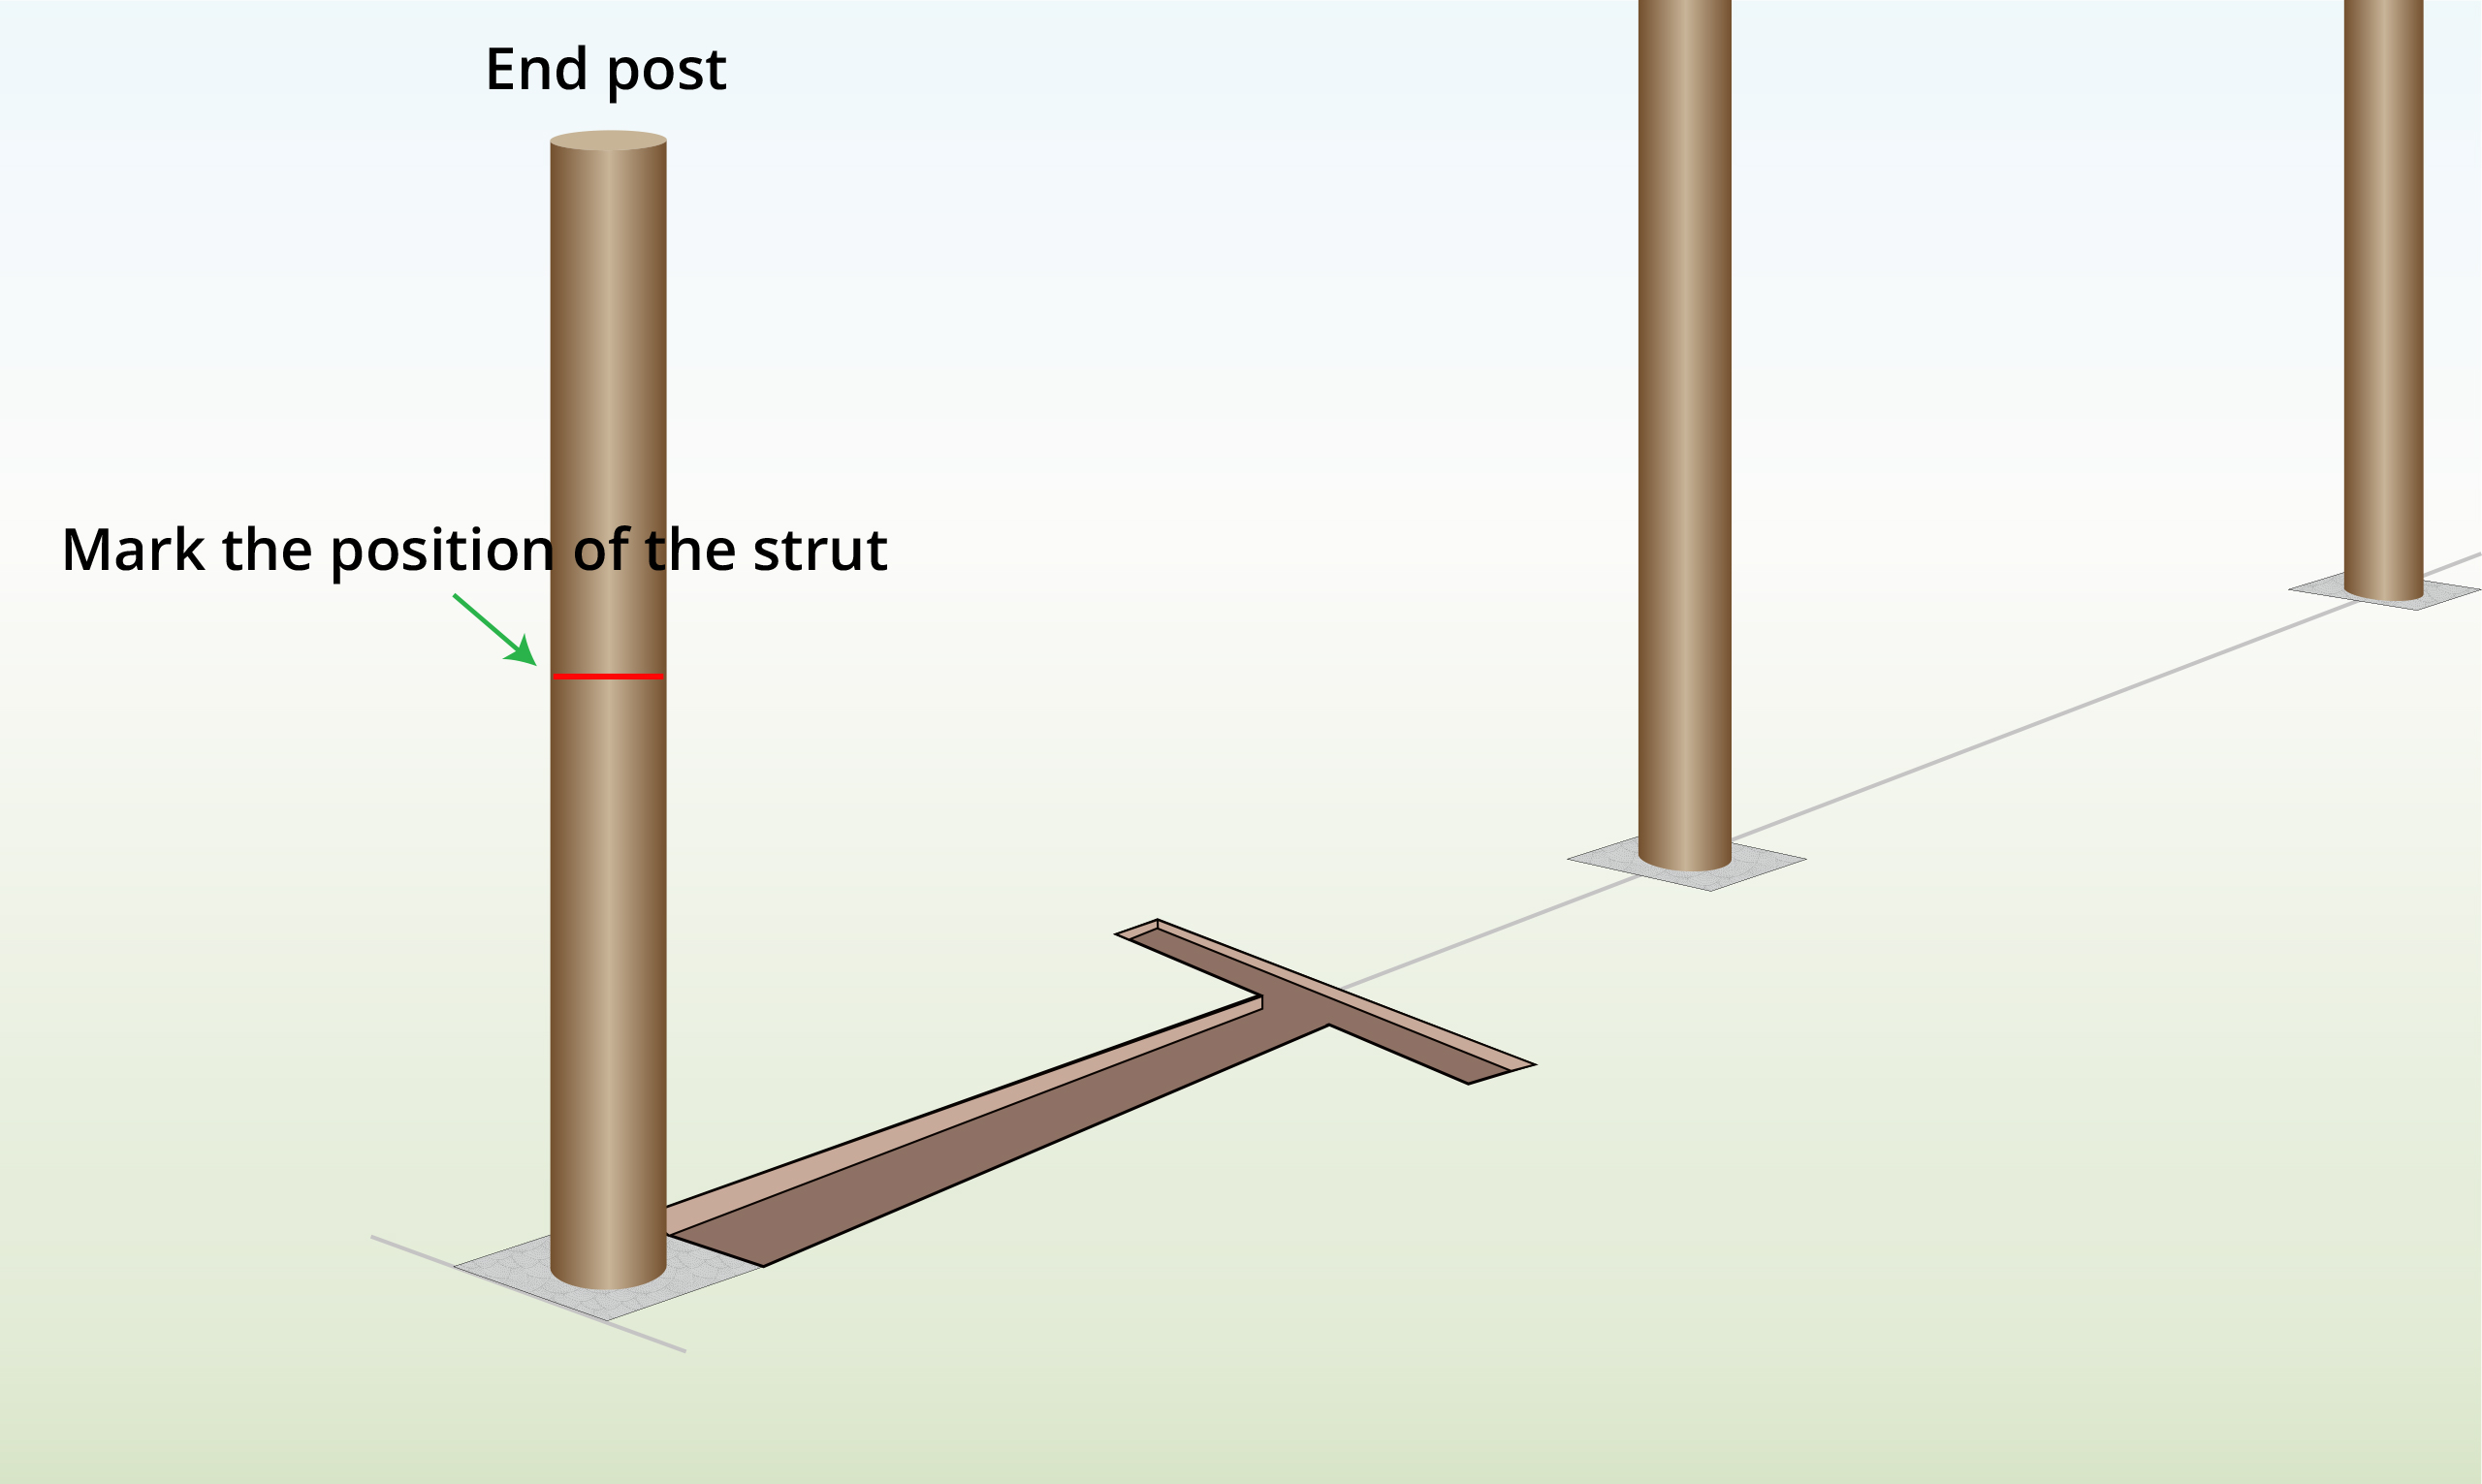
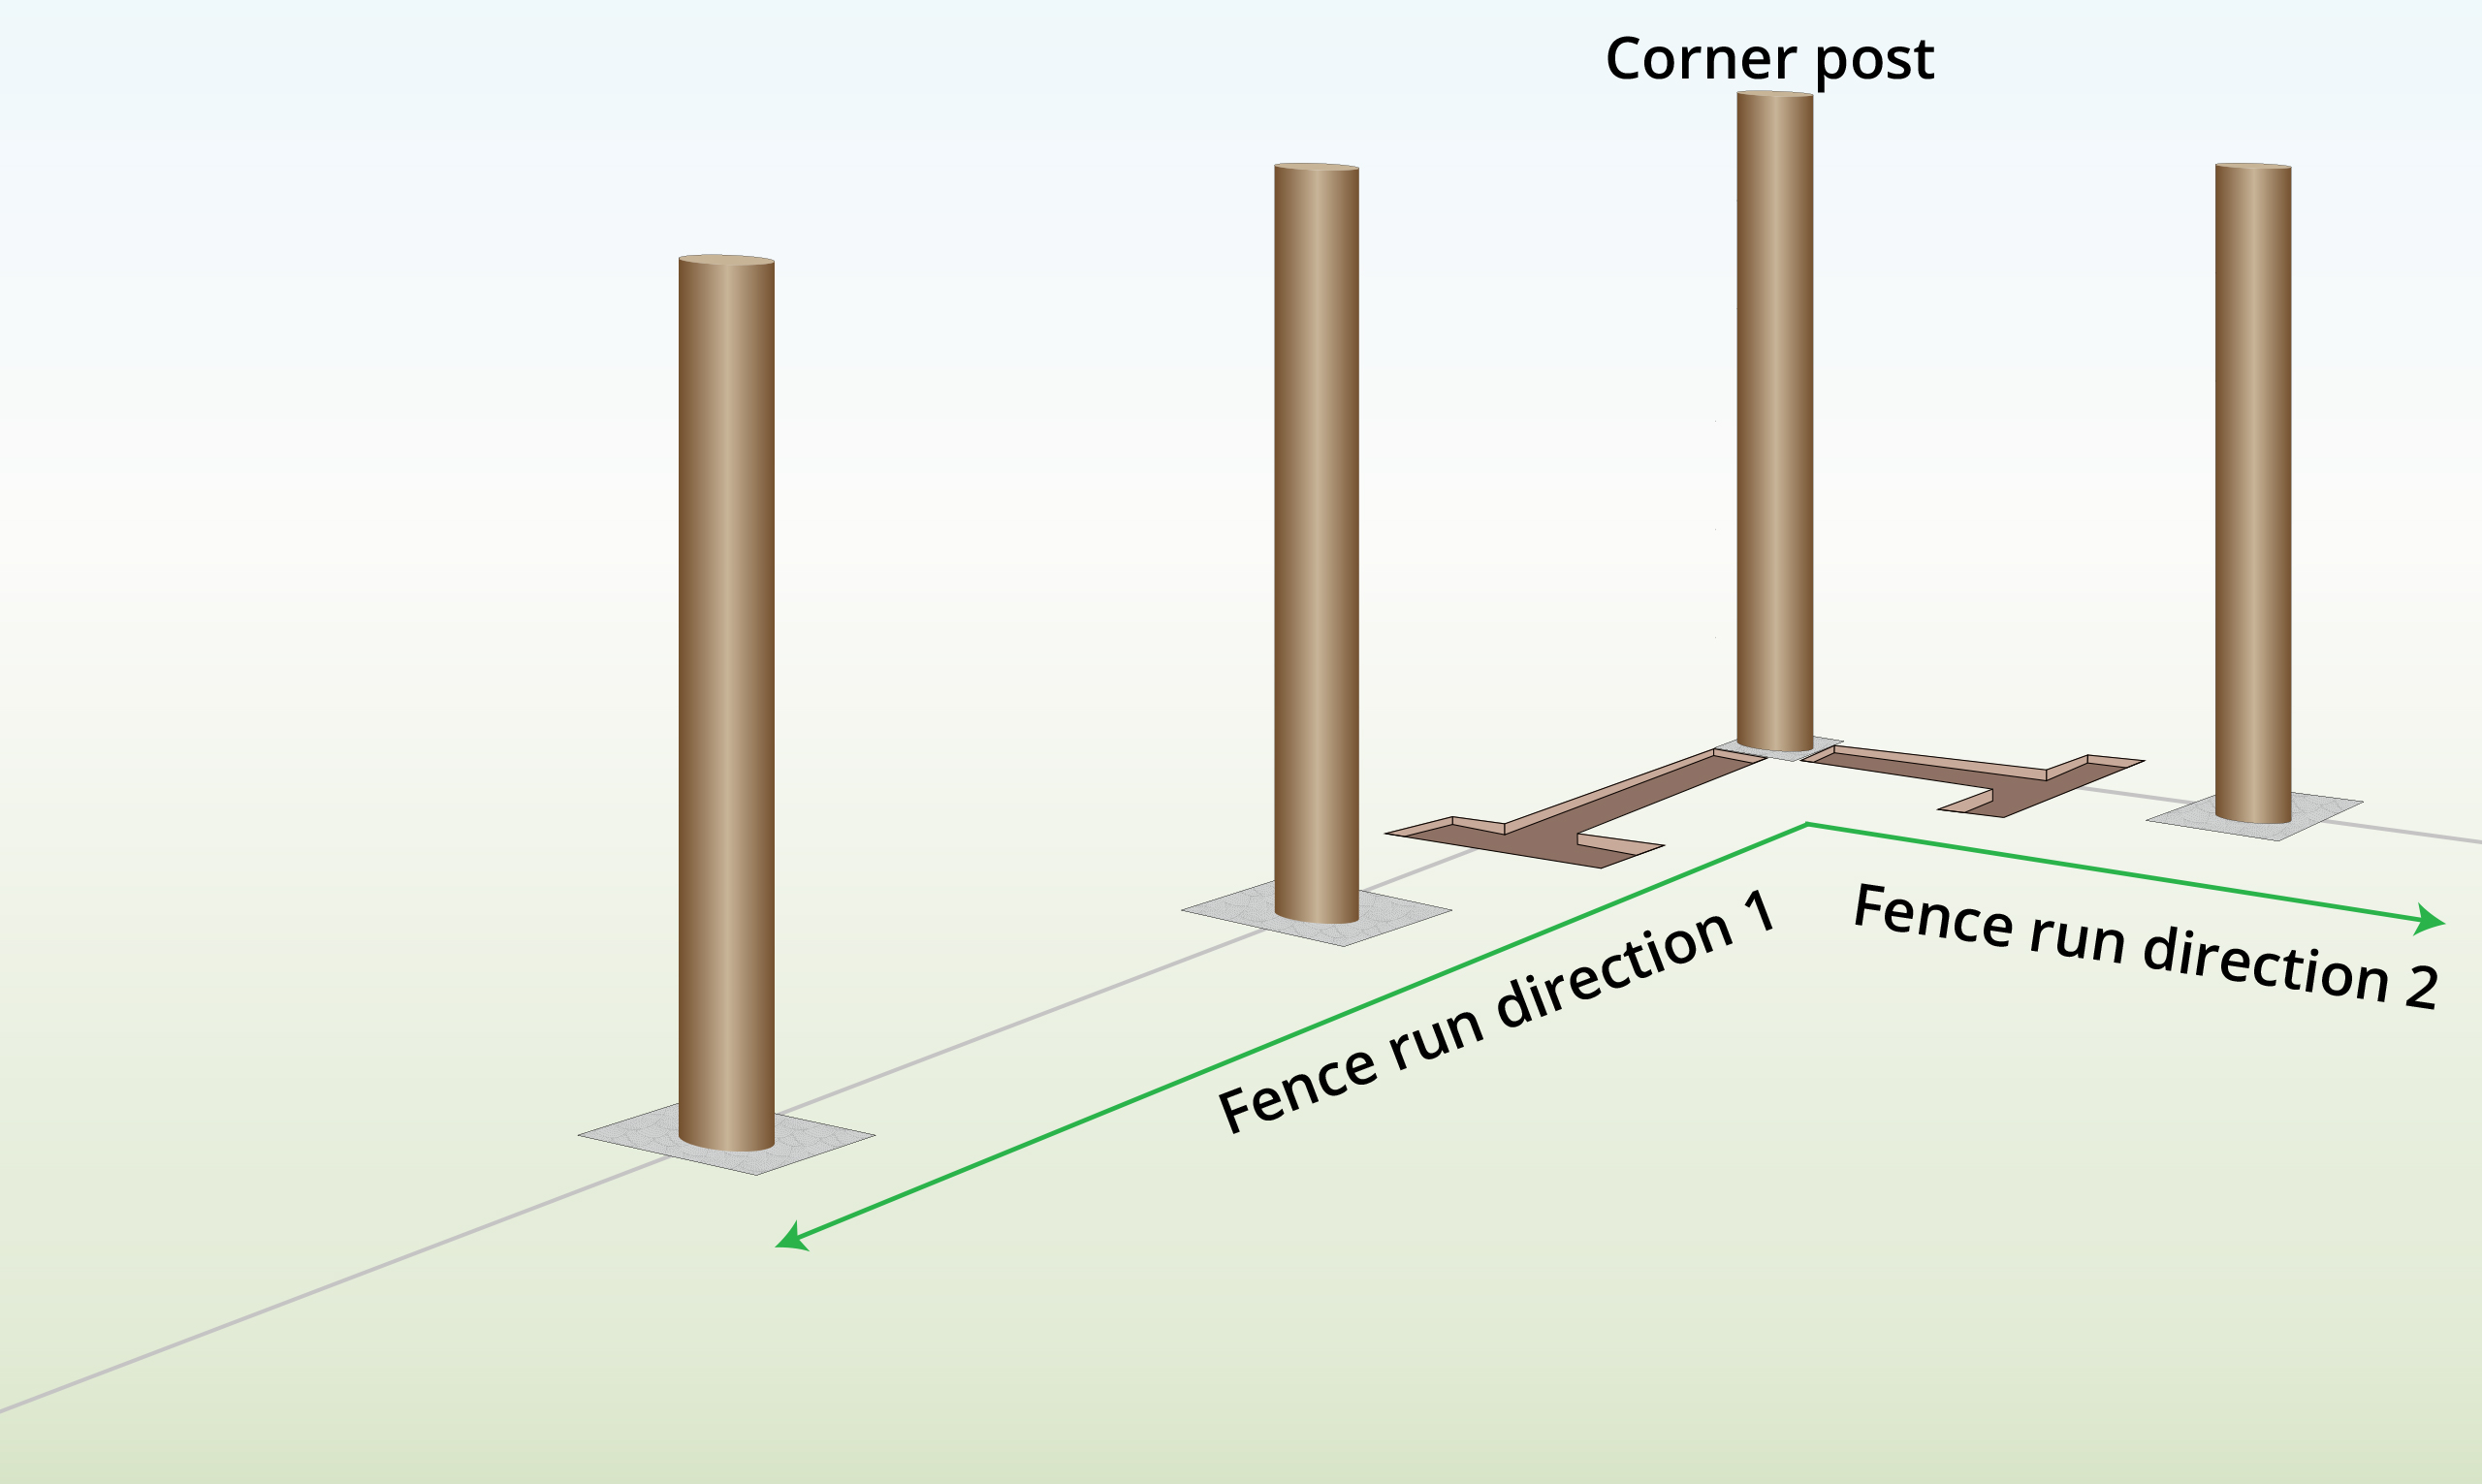
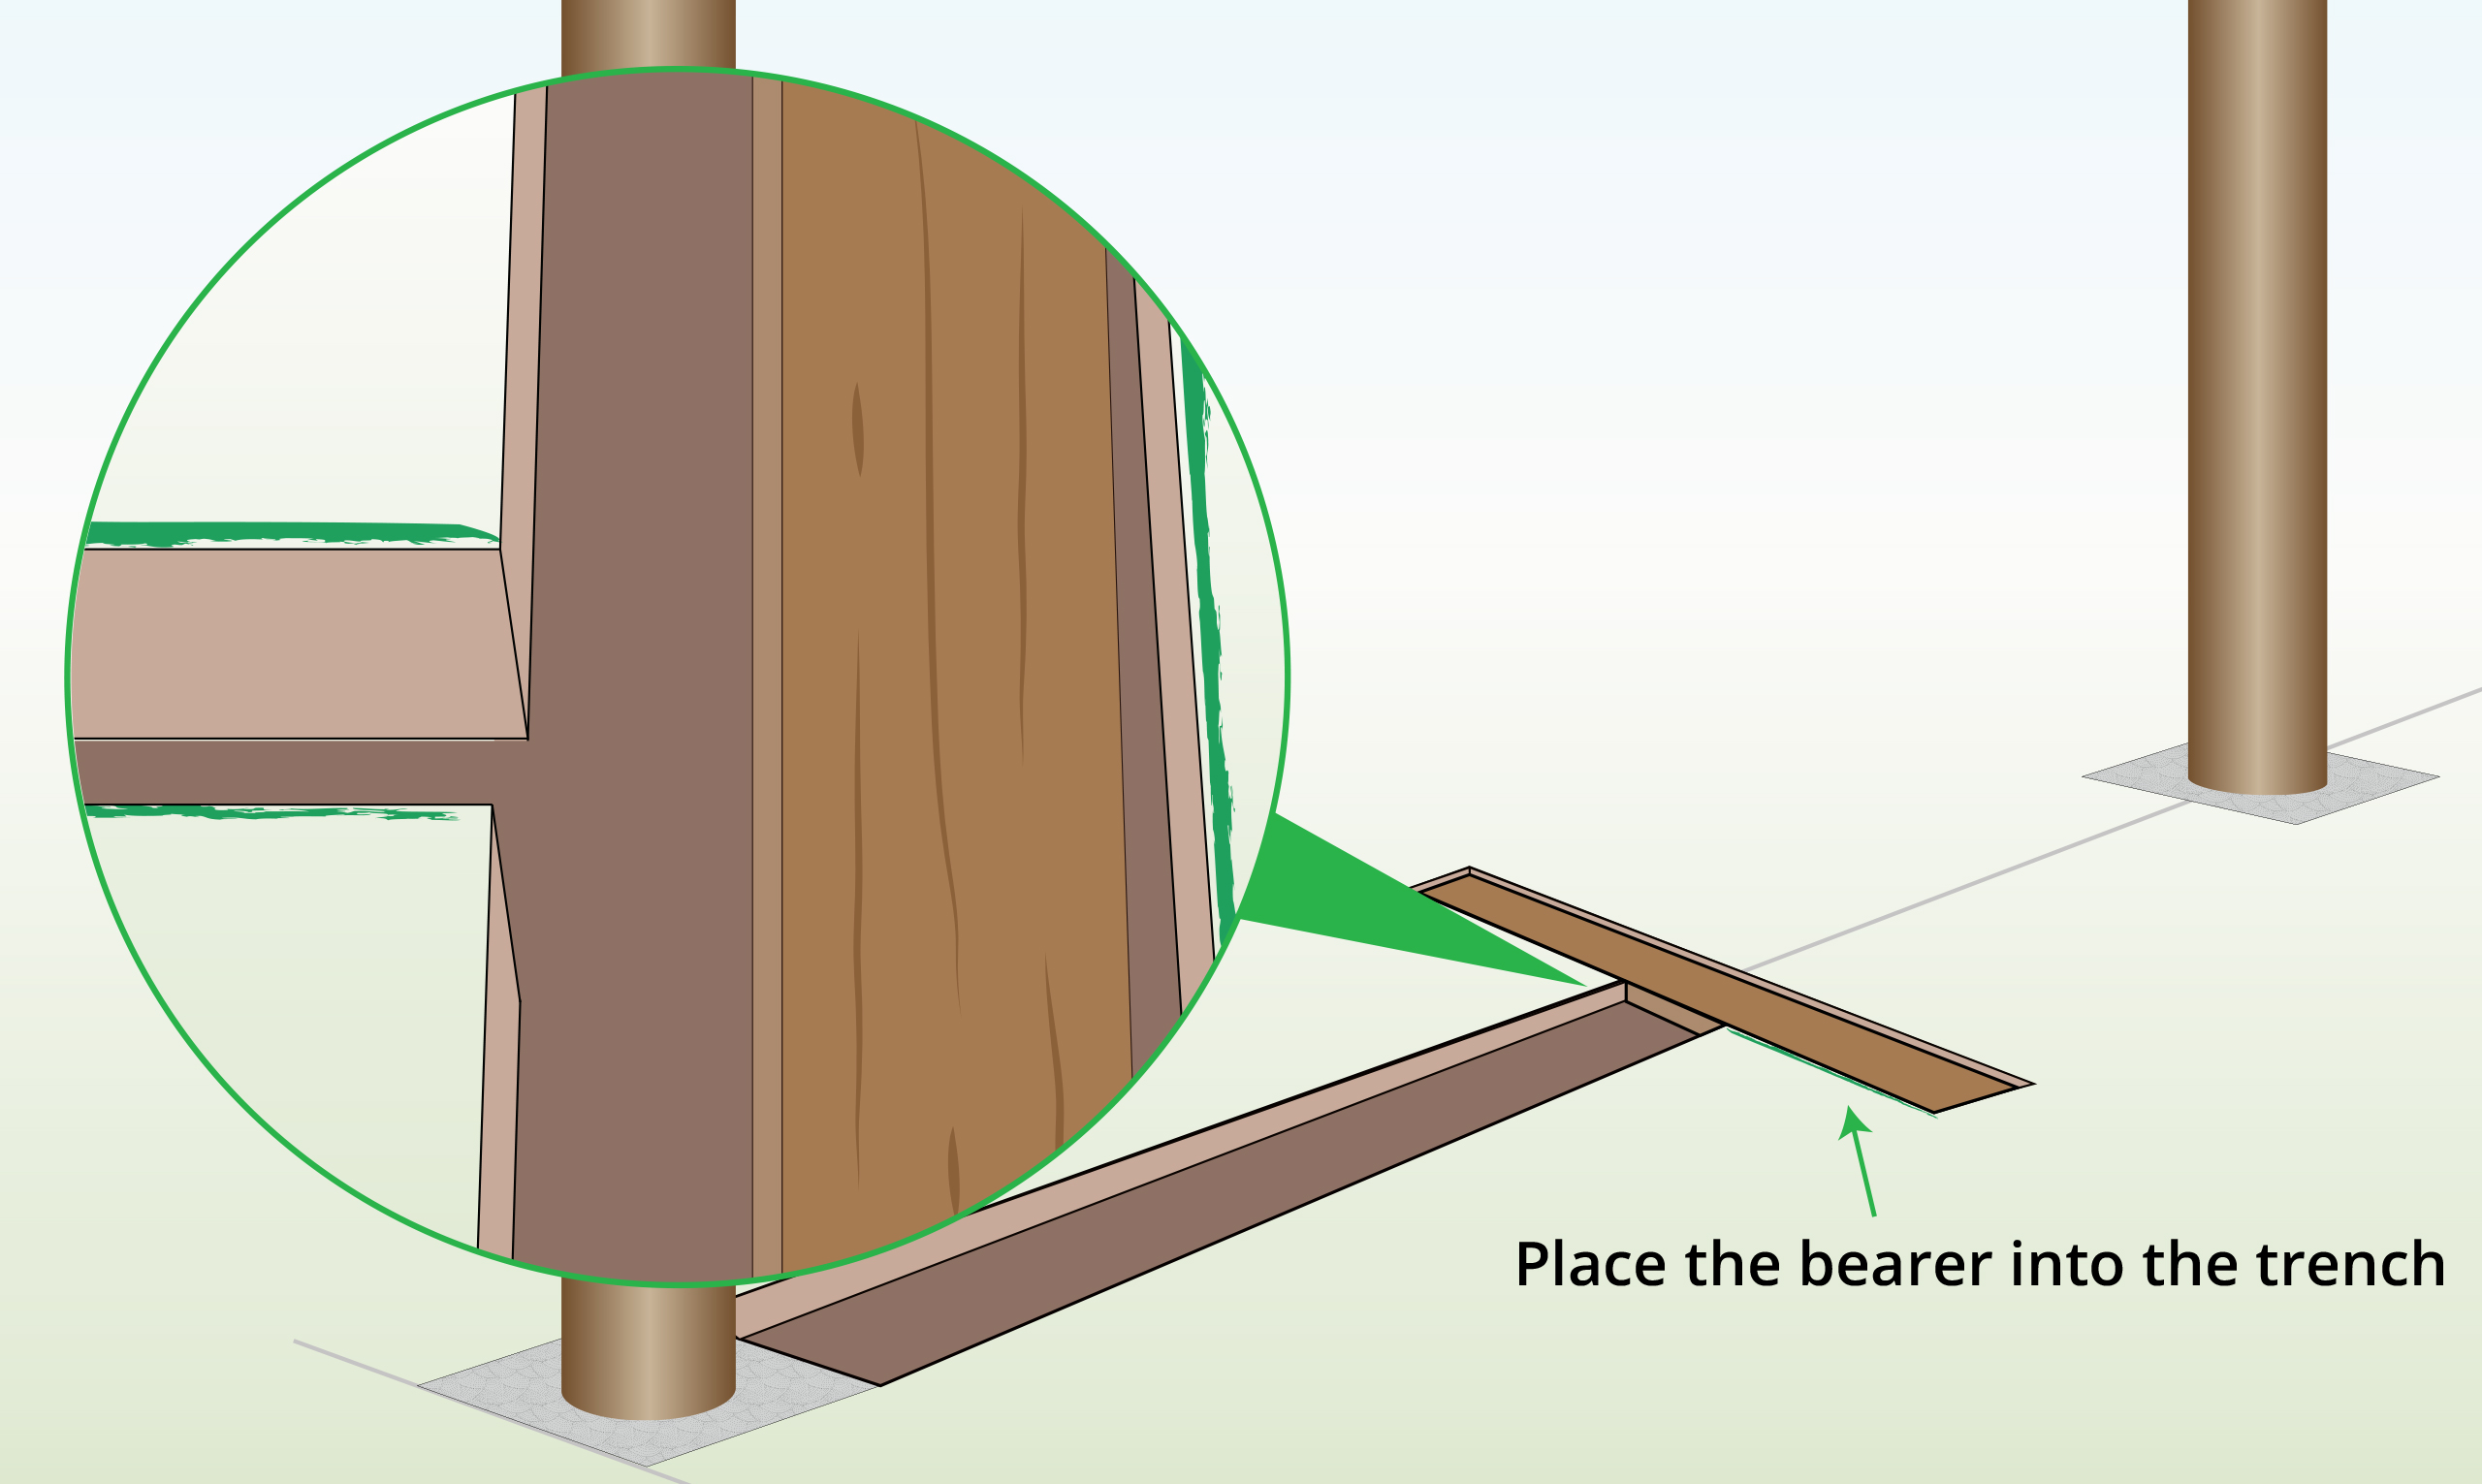
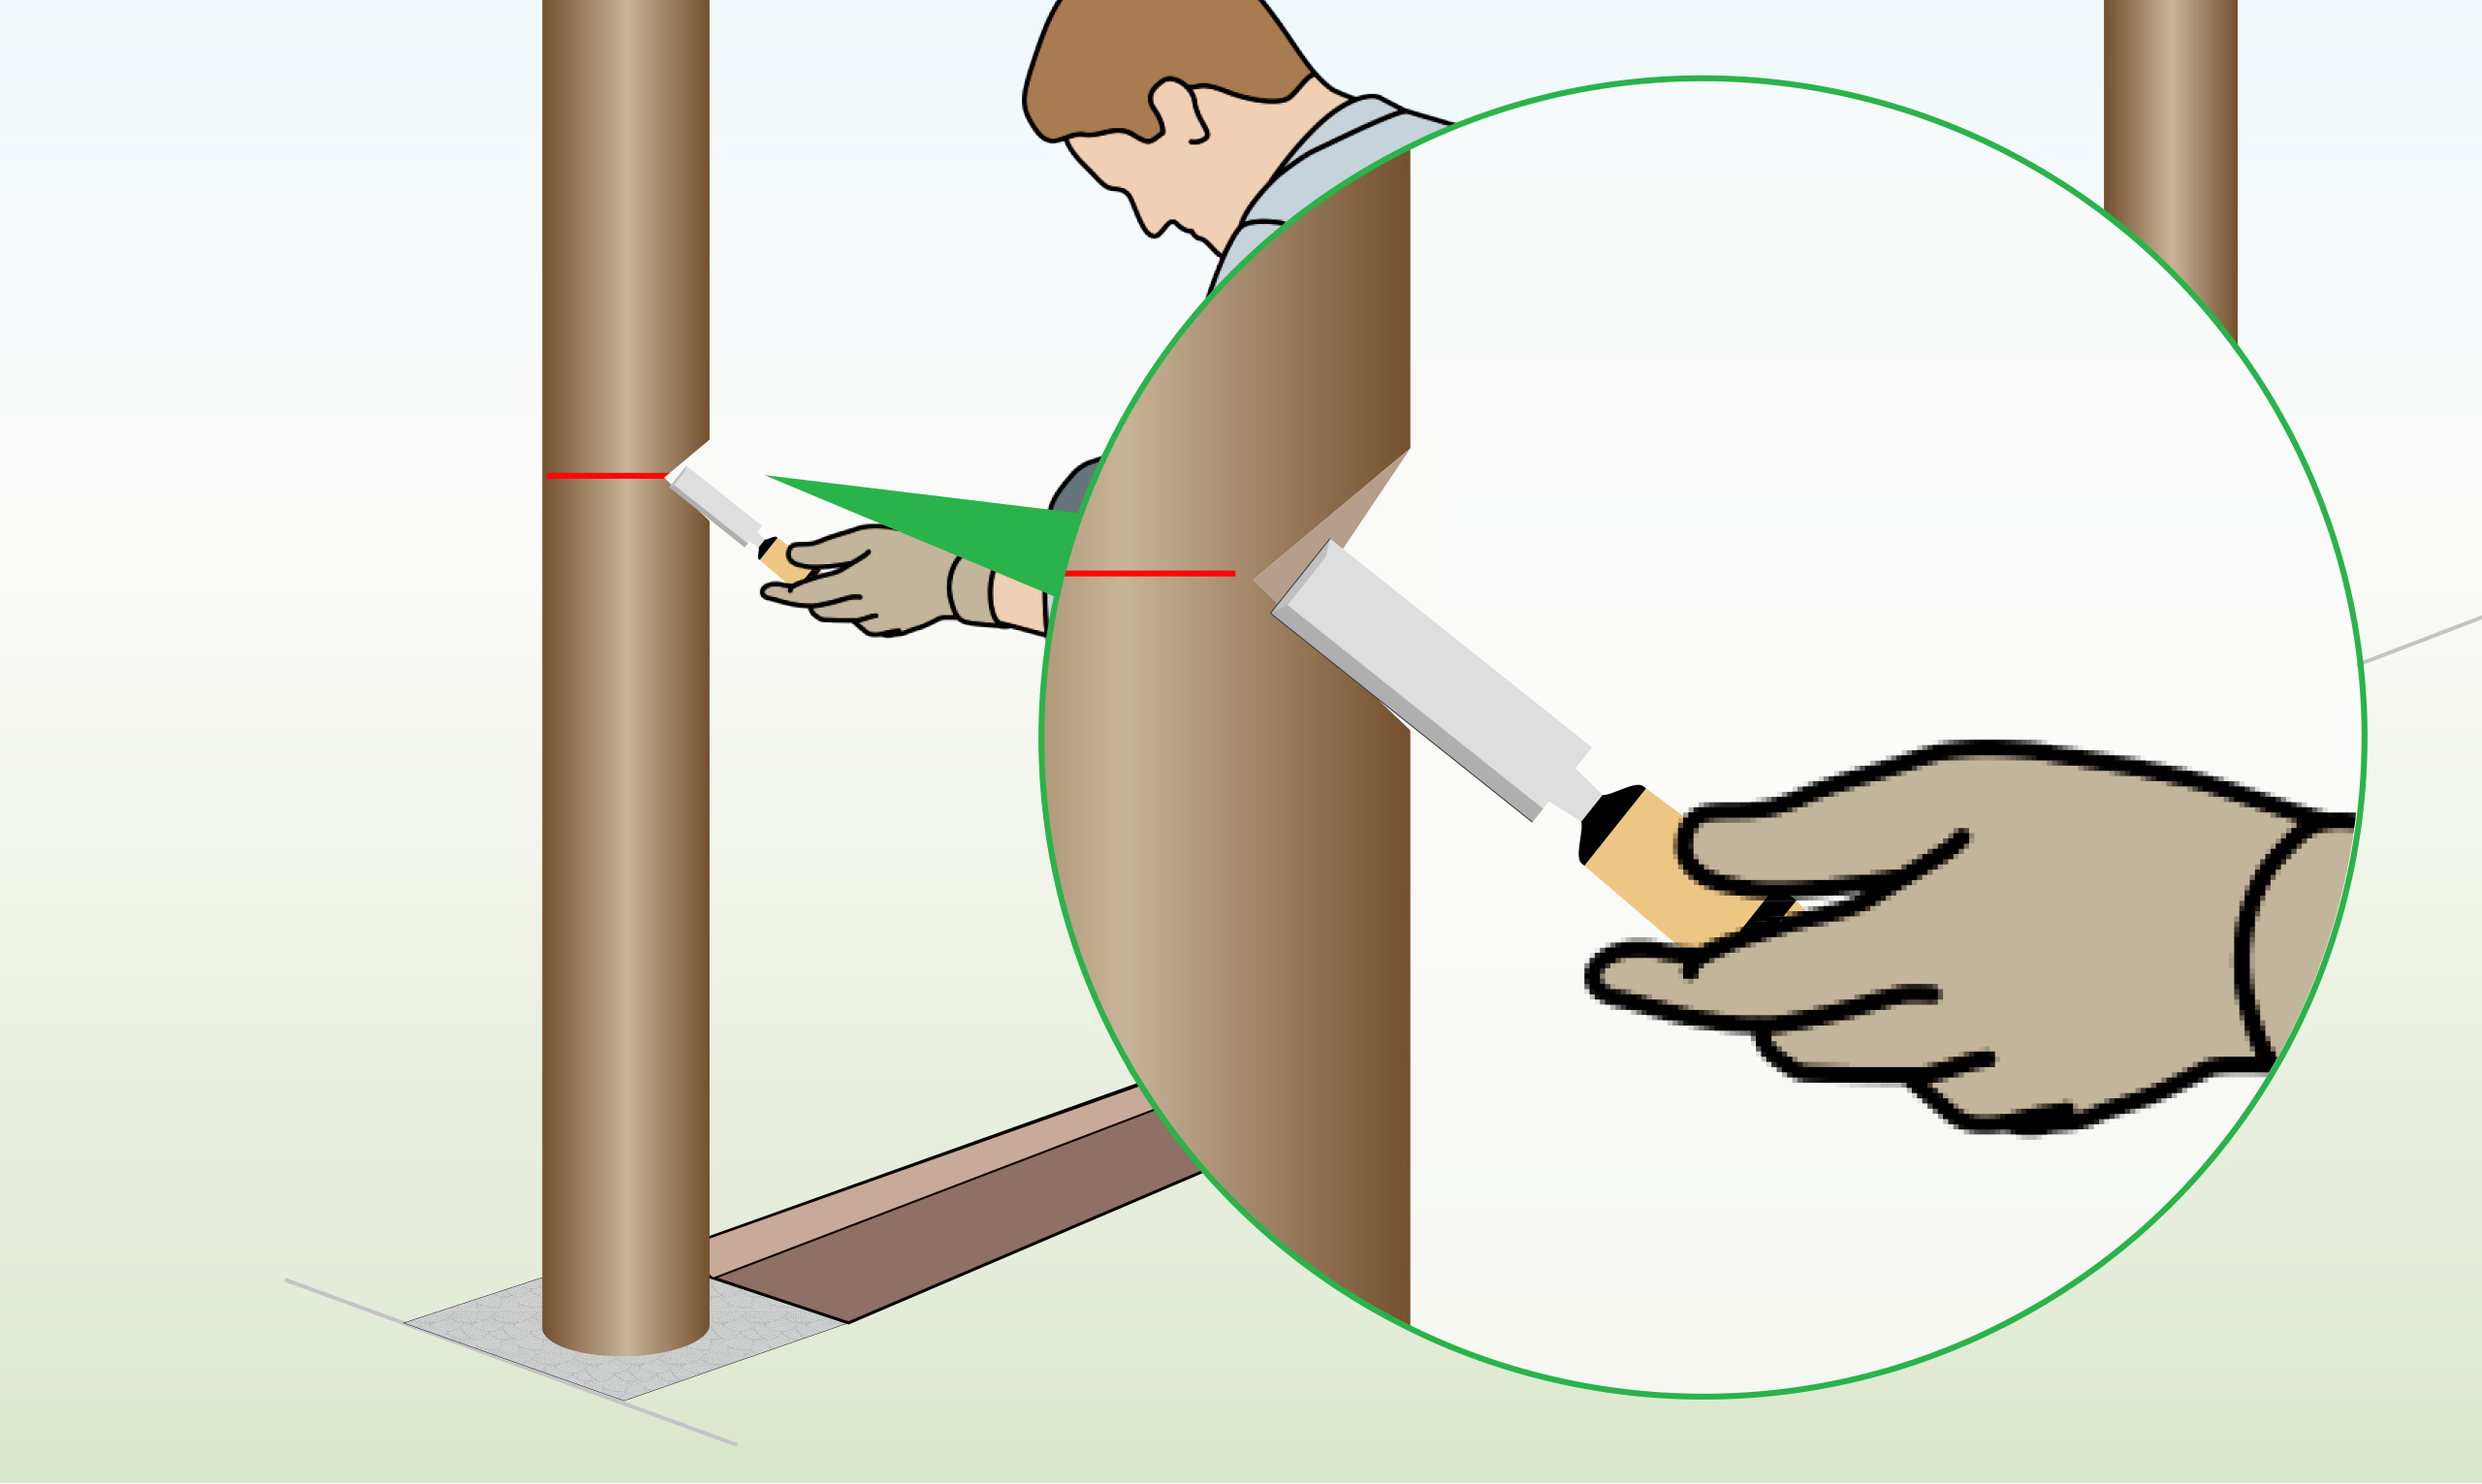
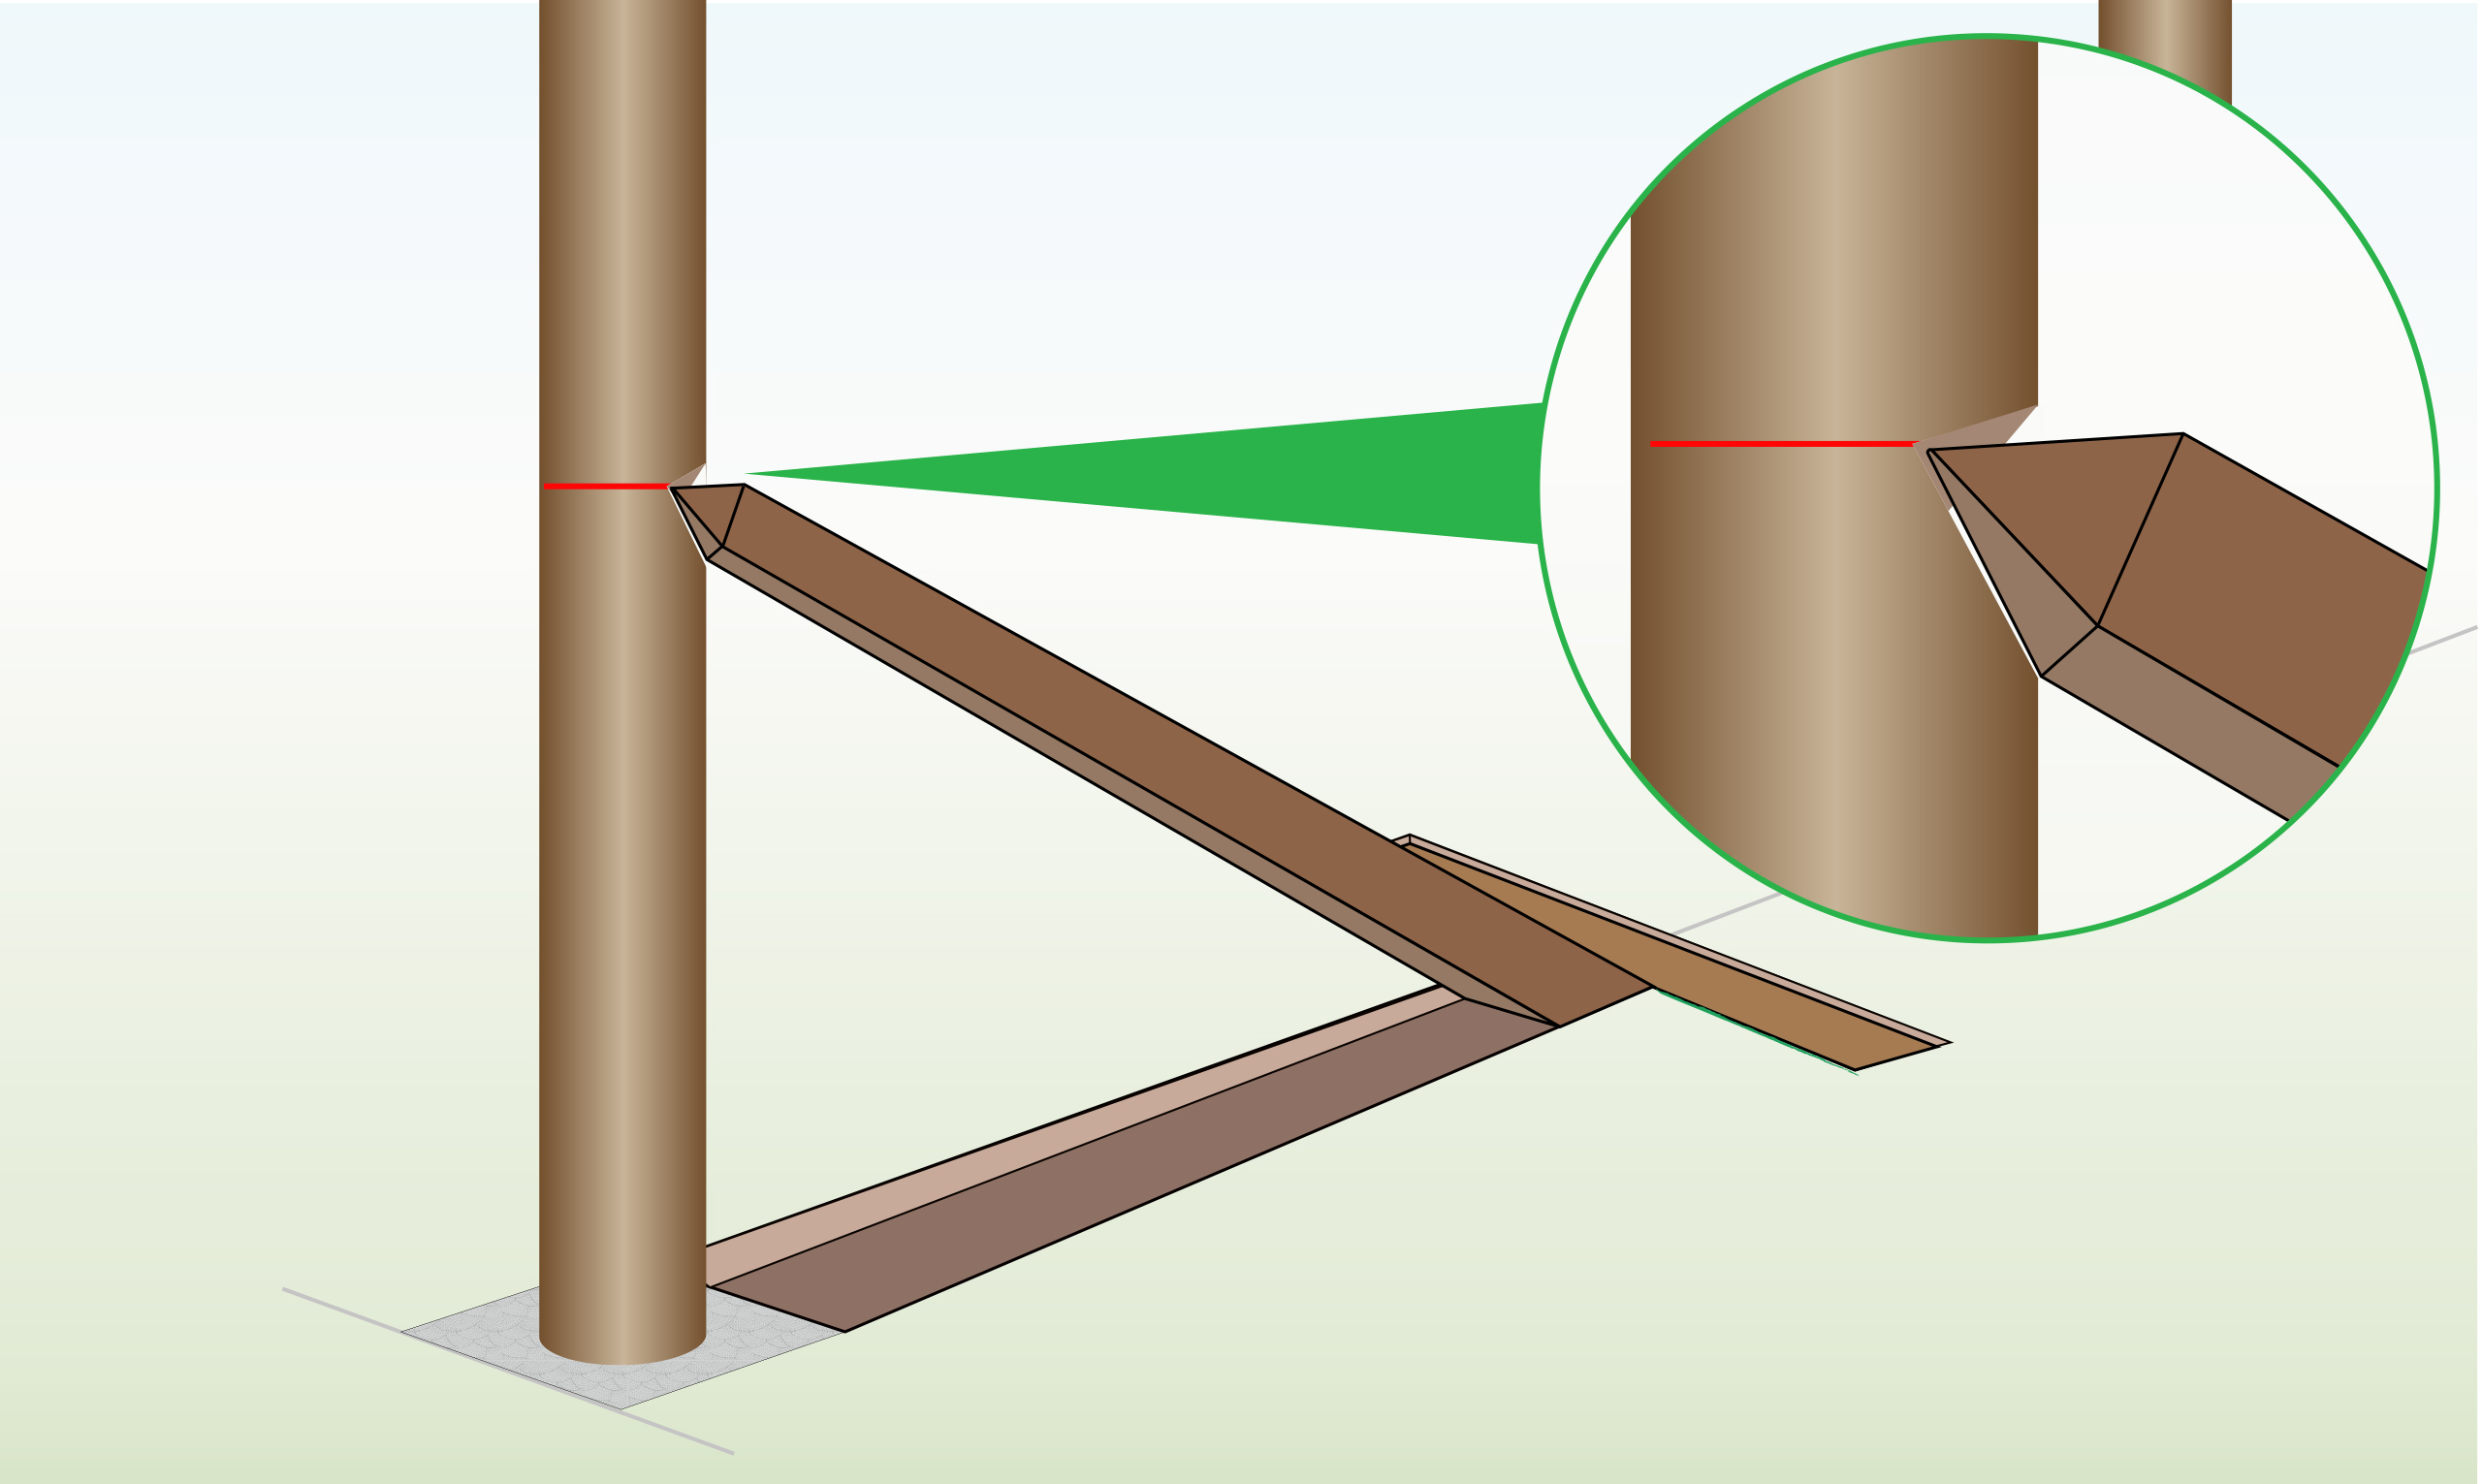
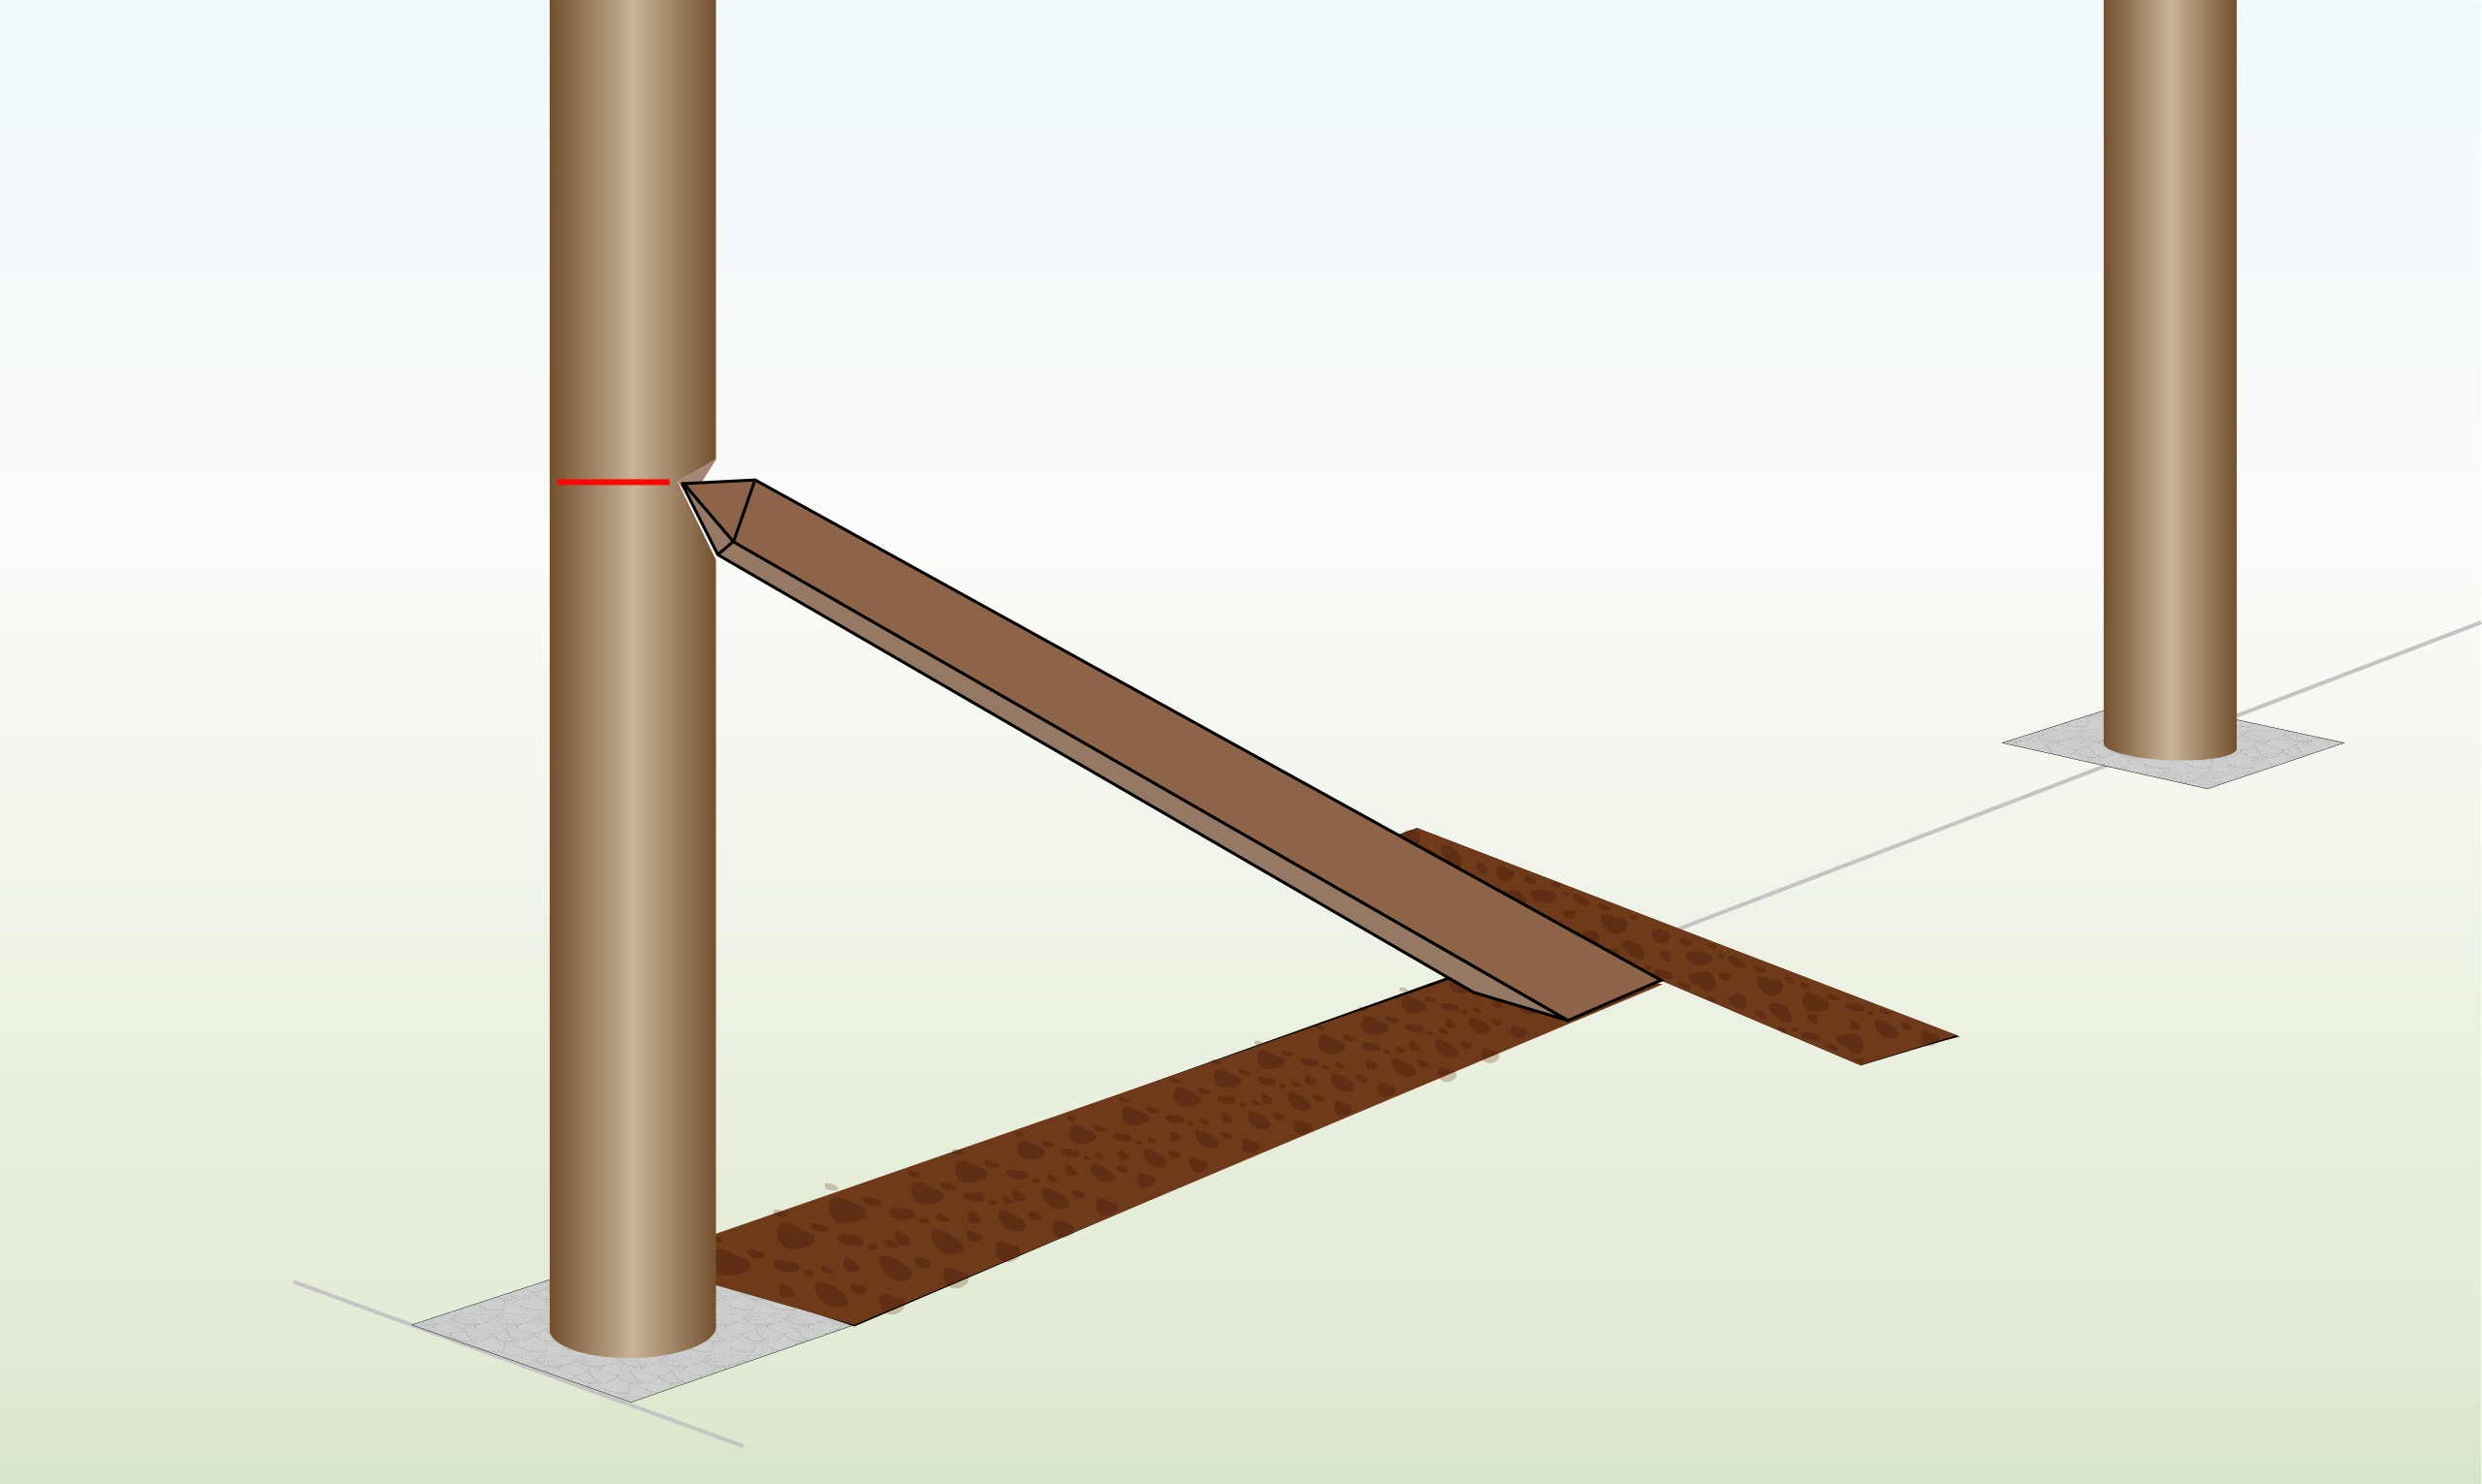
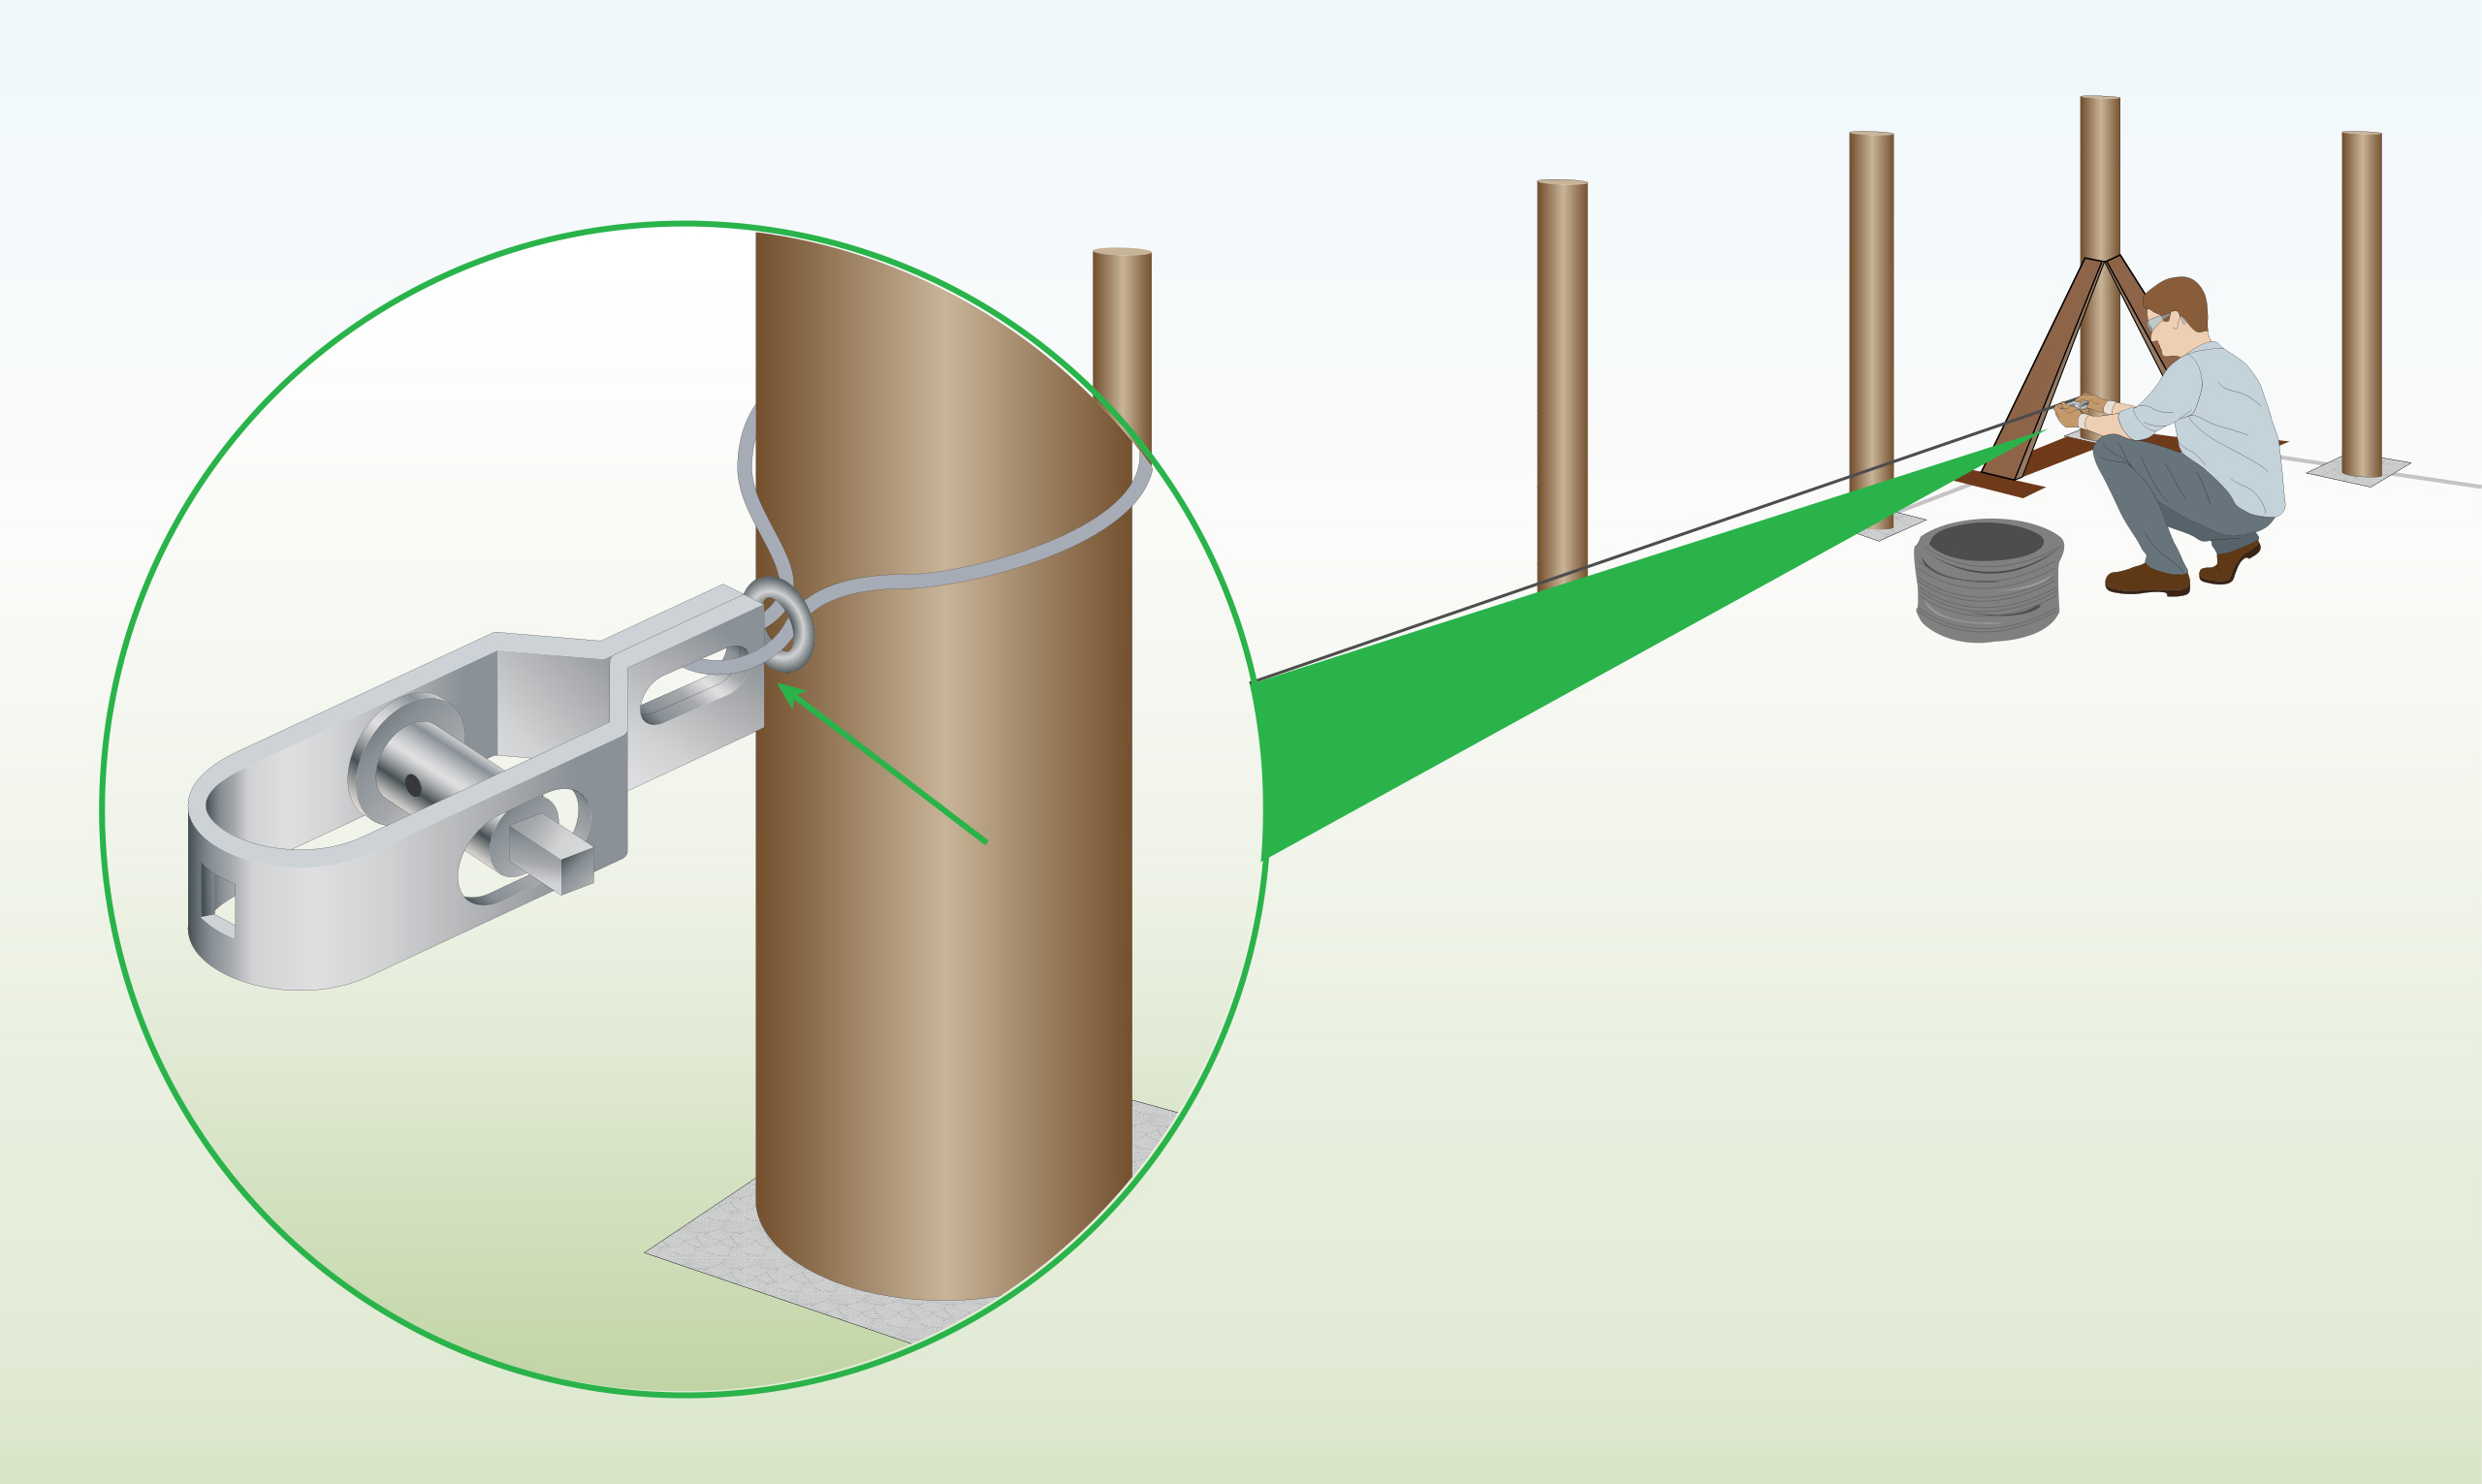
| Step 4 – Install Reinforcement Struts
|
Attach the reinforcement strut by aligning its hole with the second hole from the top of the T post. |
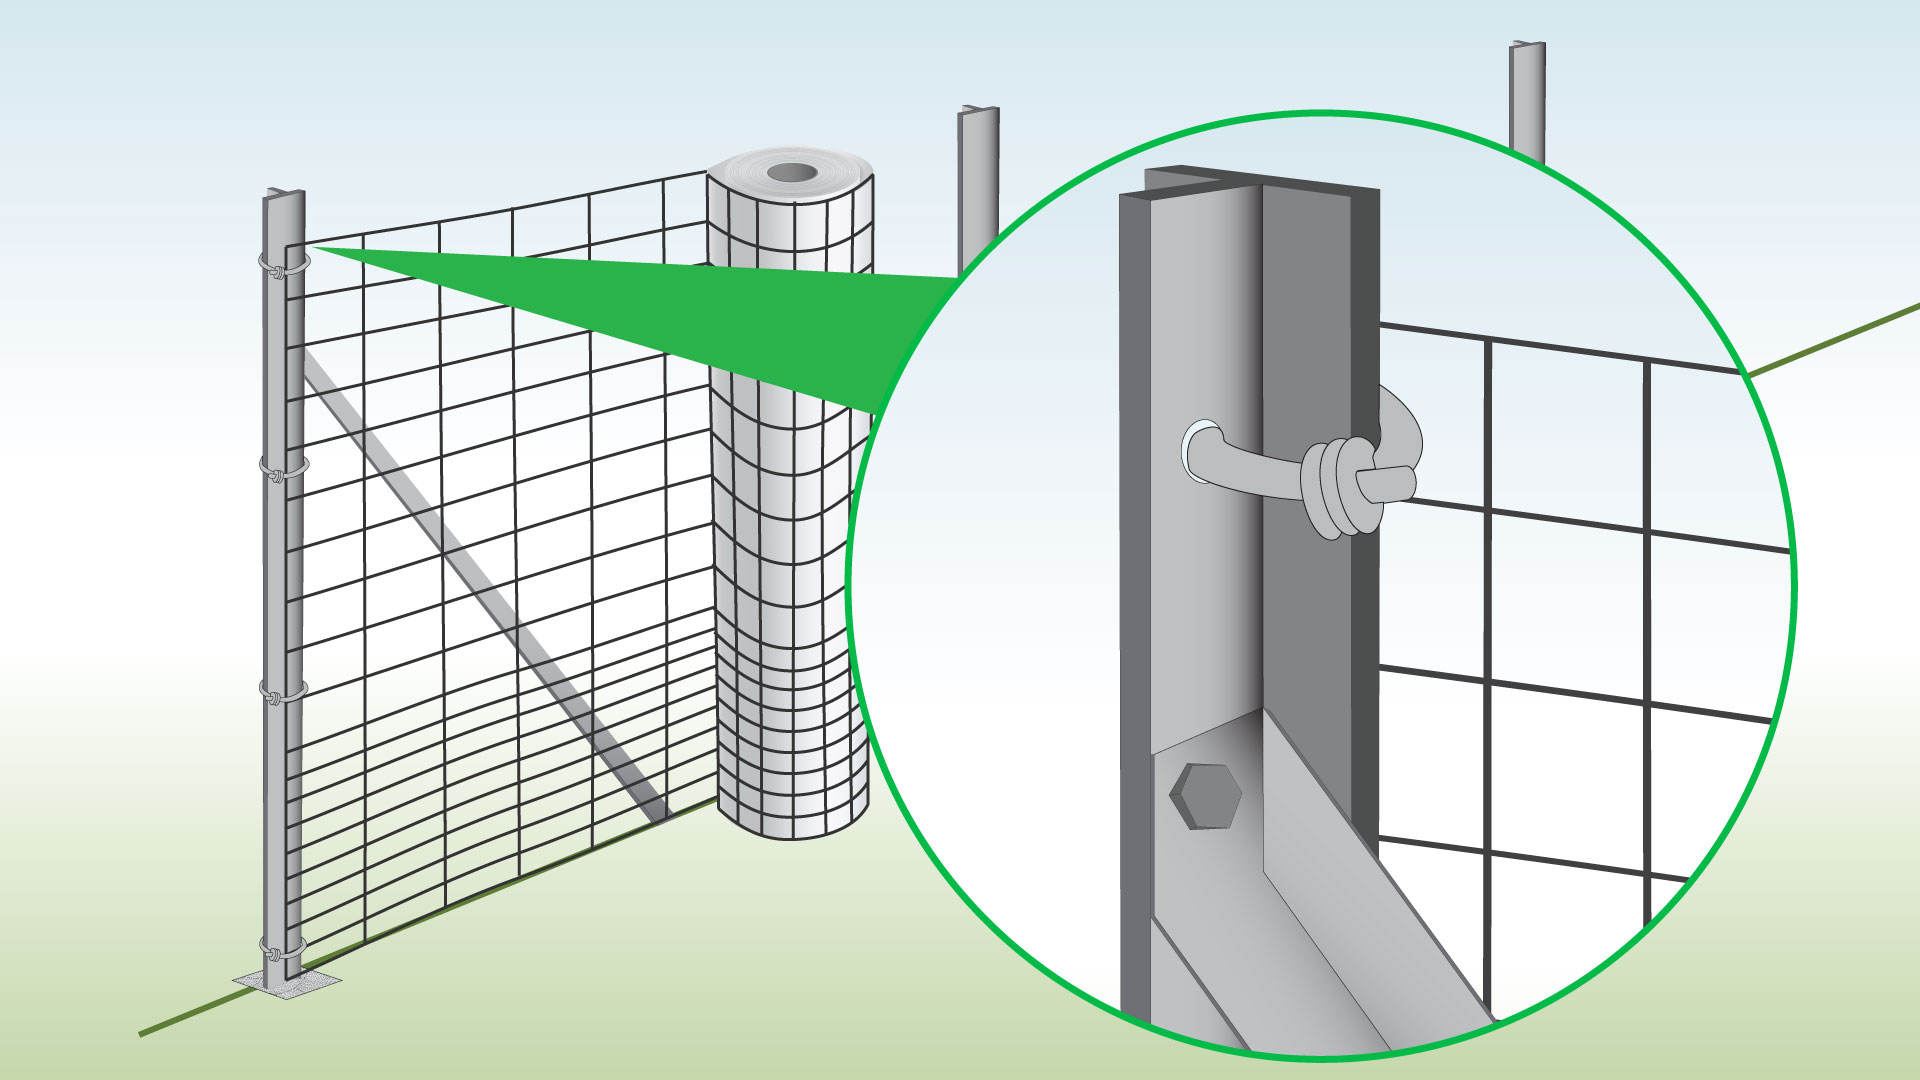
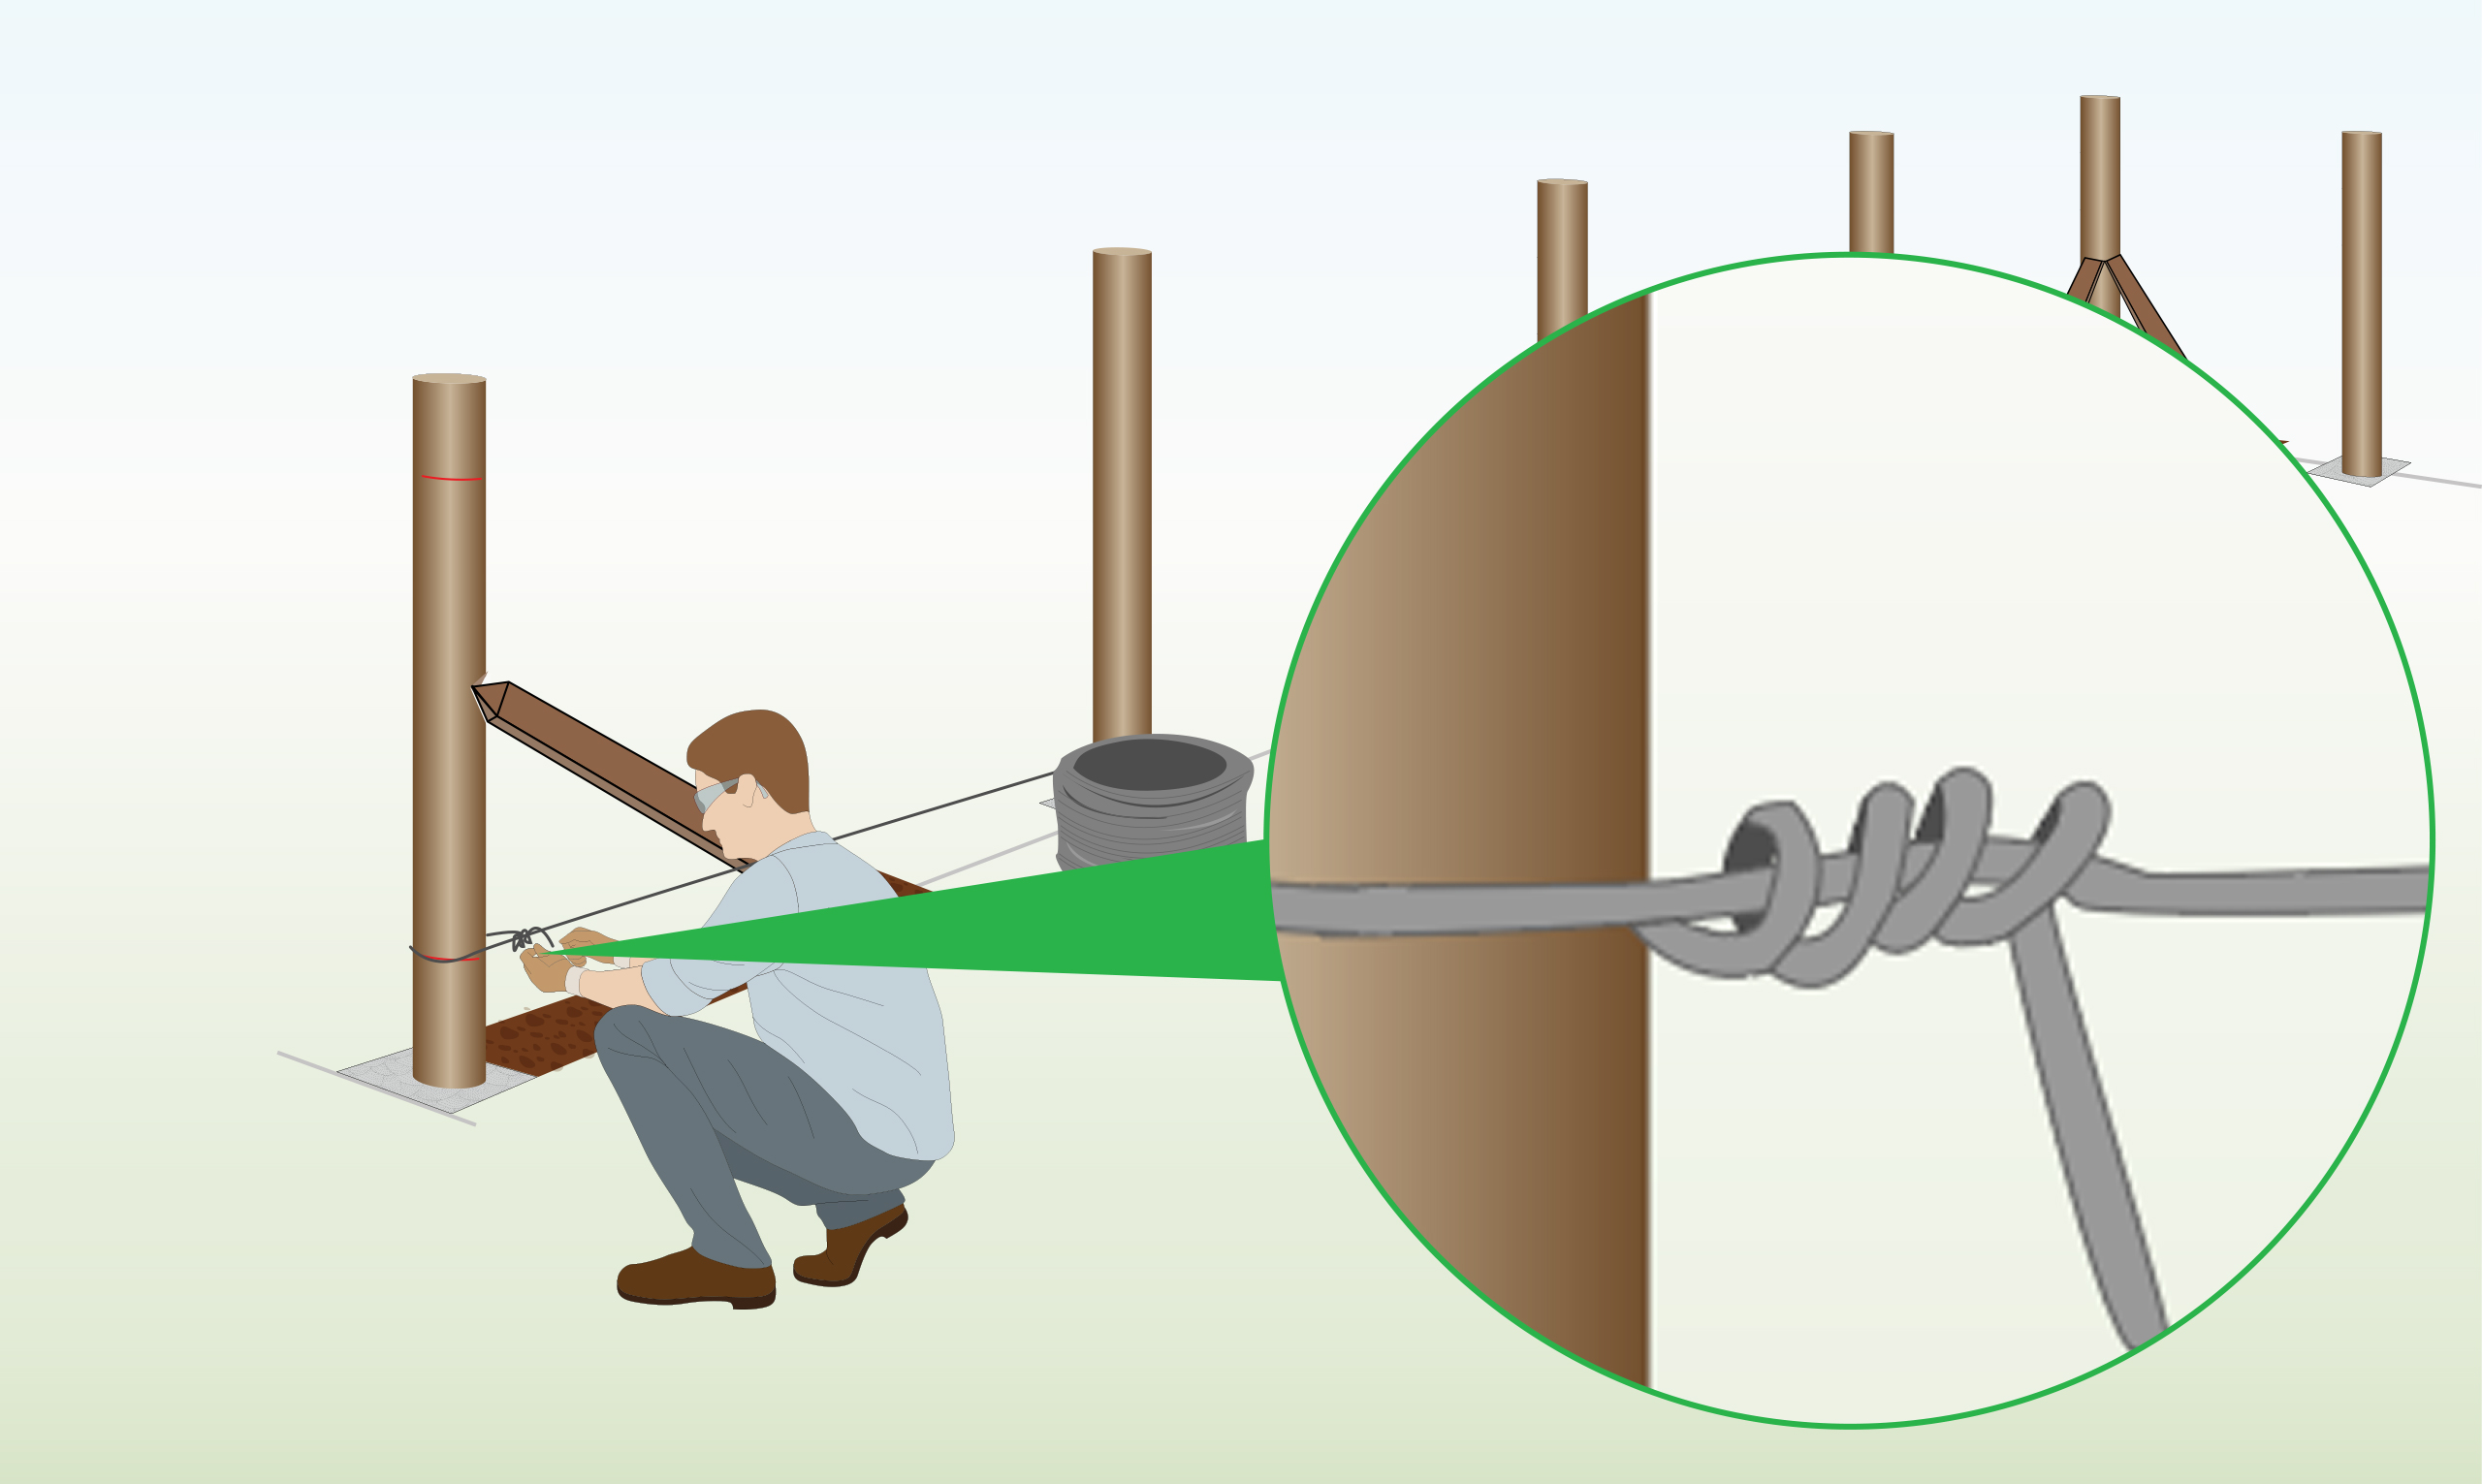
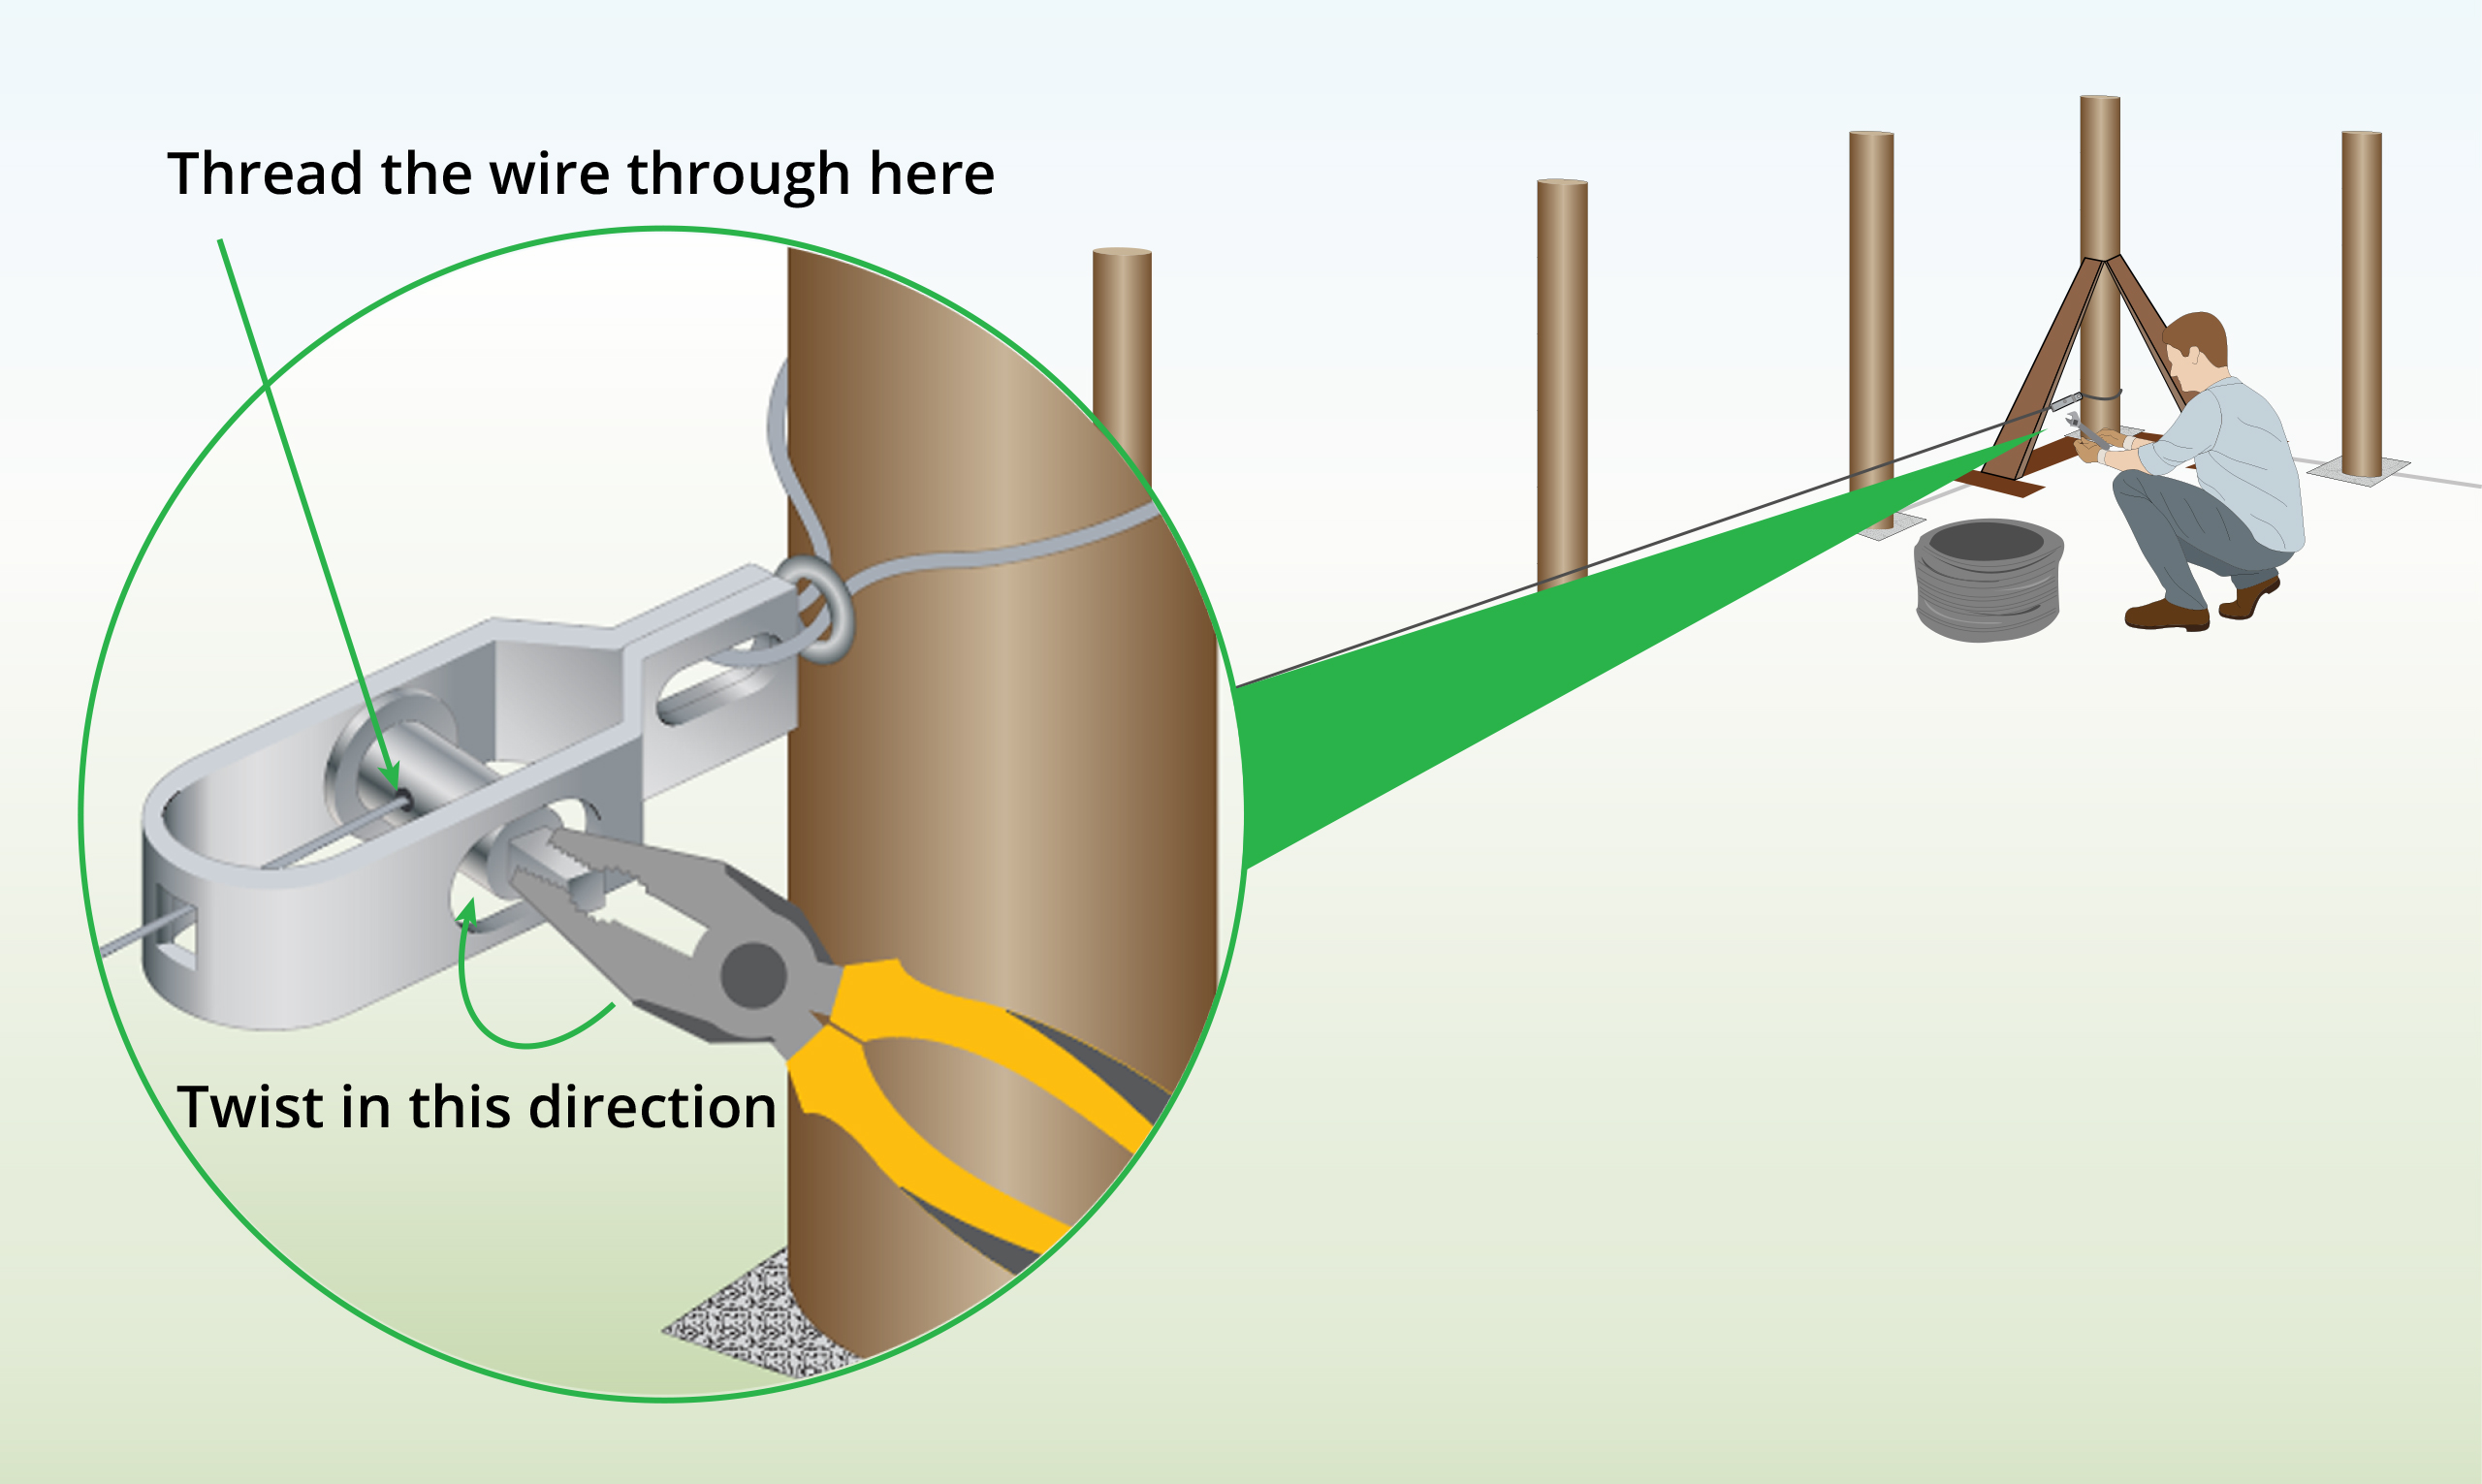
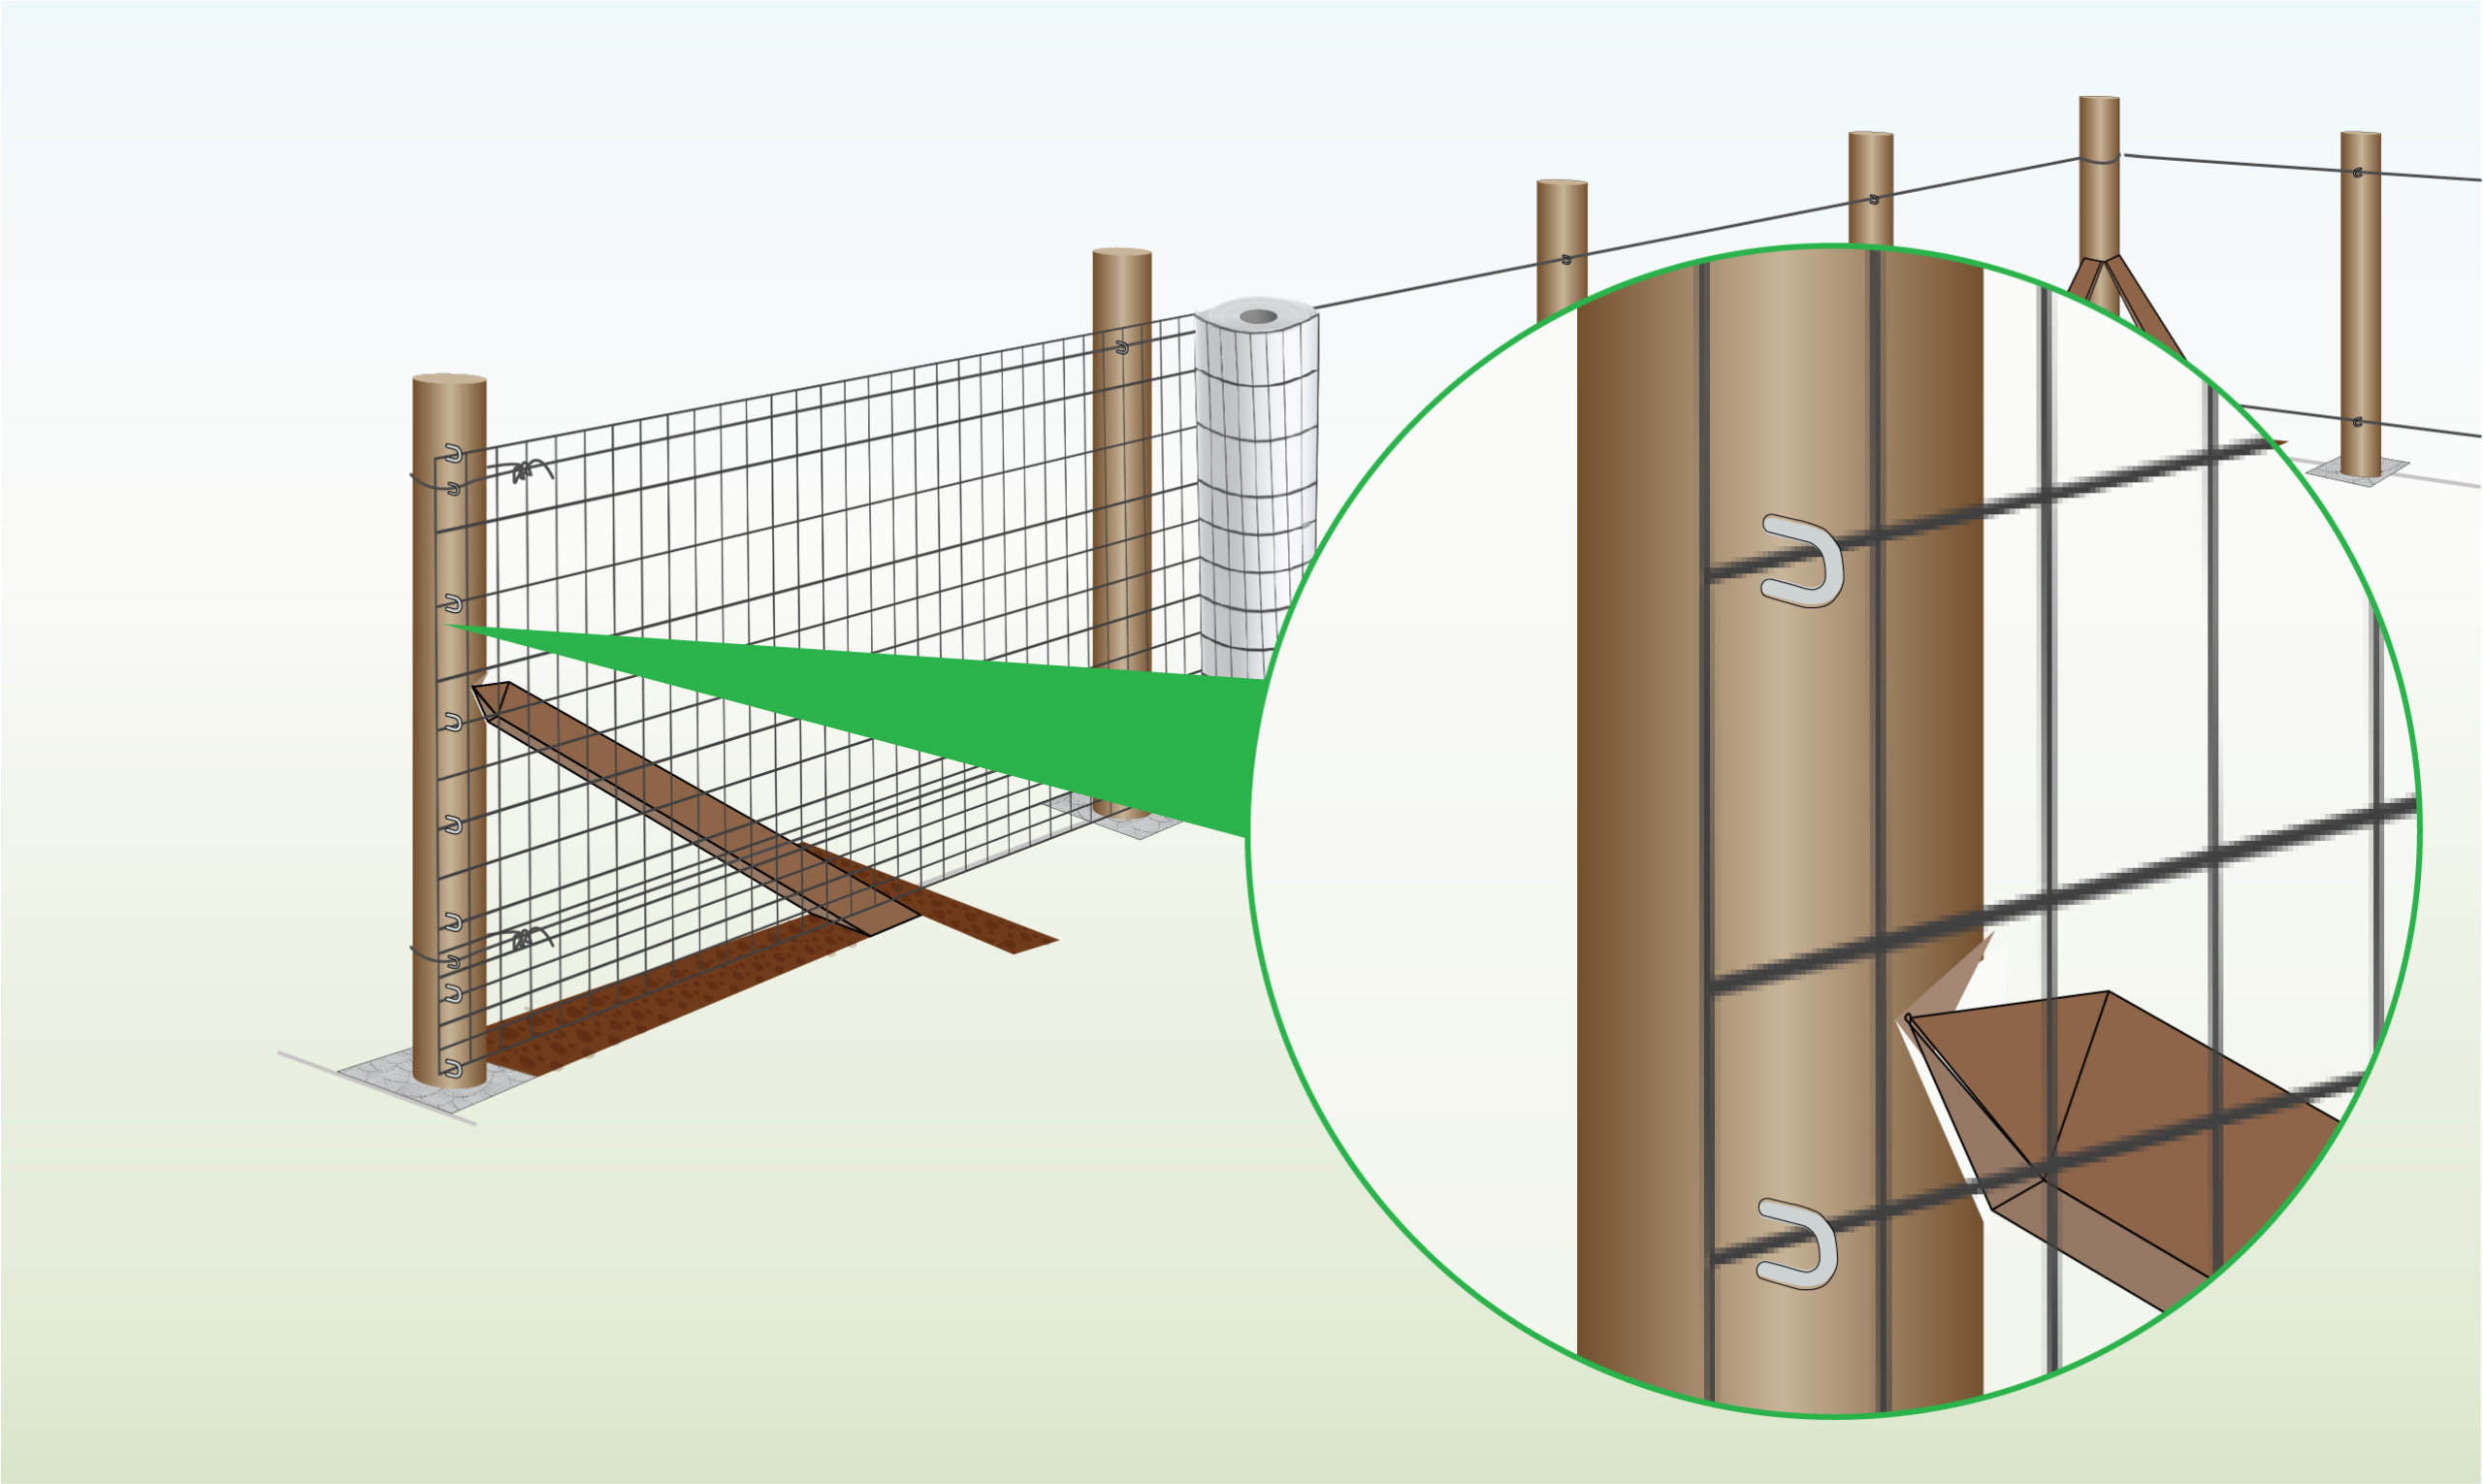
| Step 5 – Secure fencing to First Post
|
Attach the fence to the first end post using wire ties. |
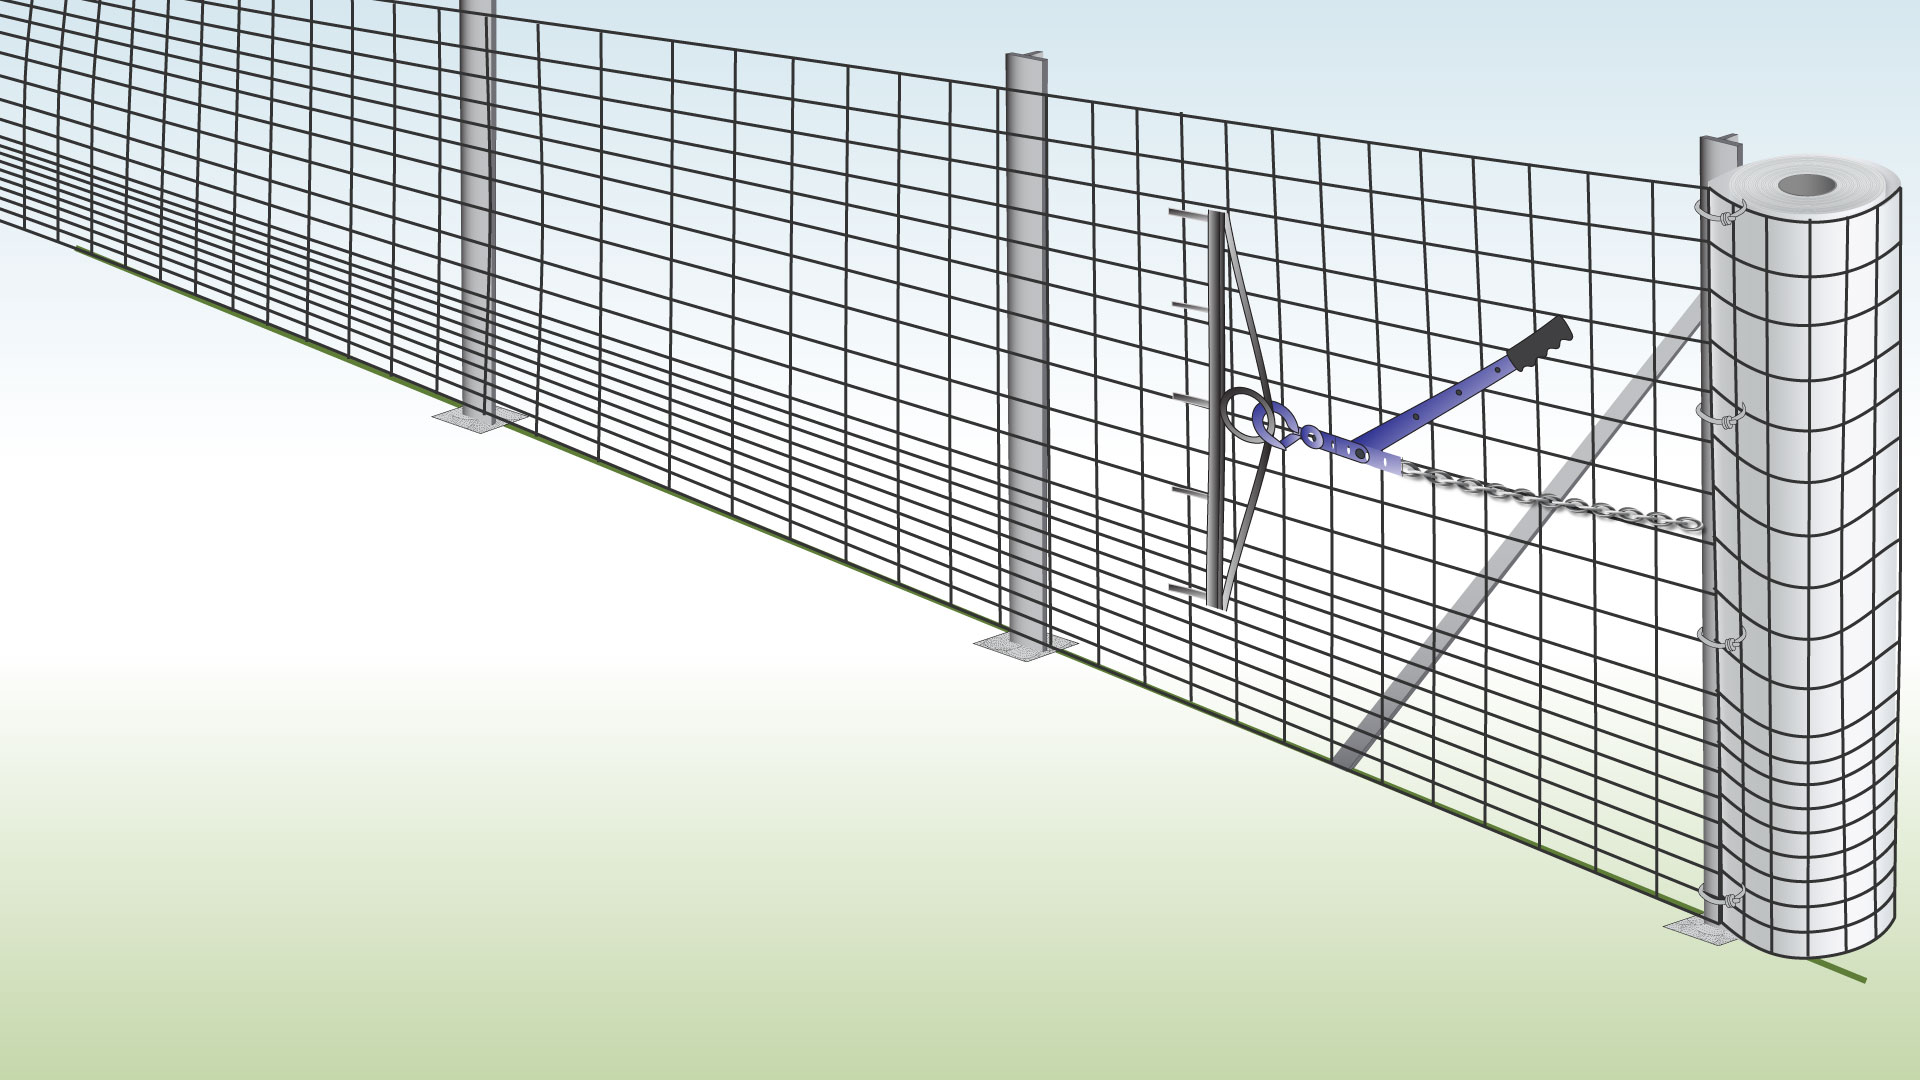
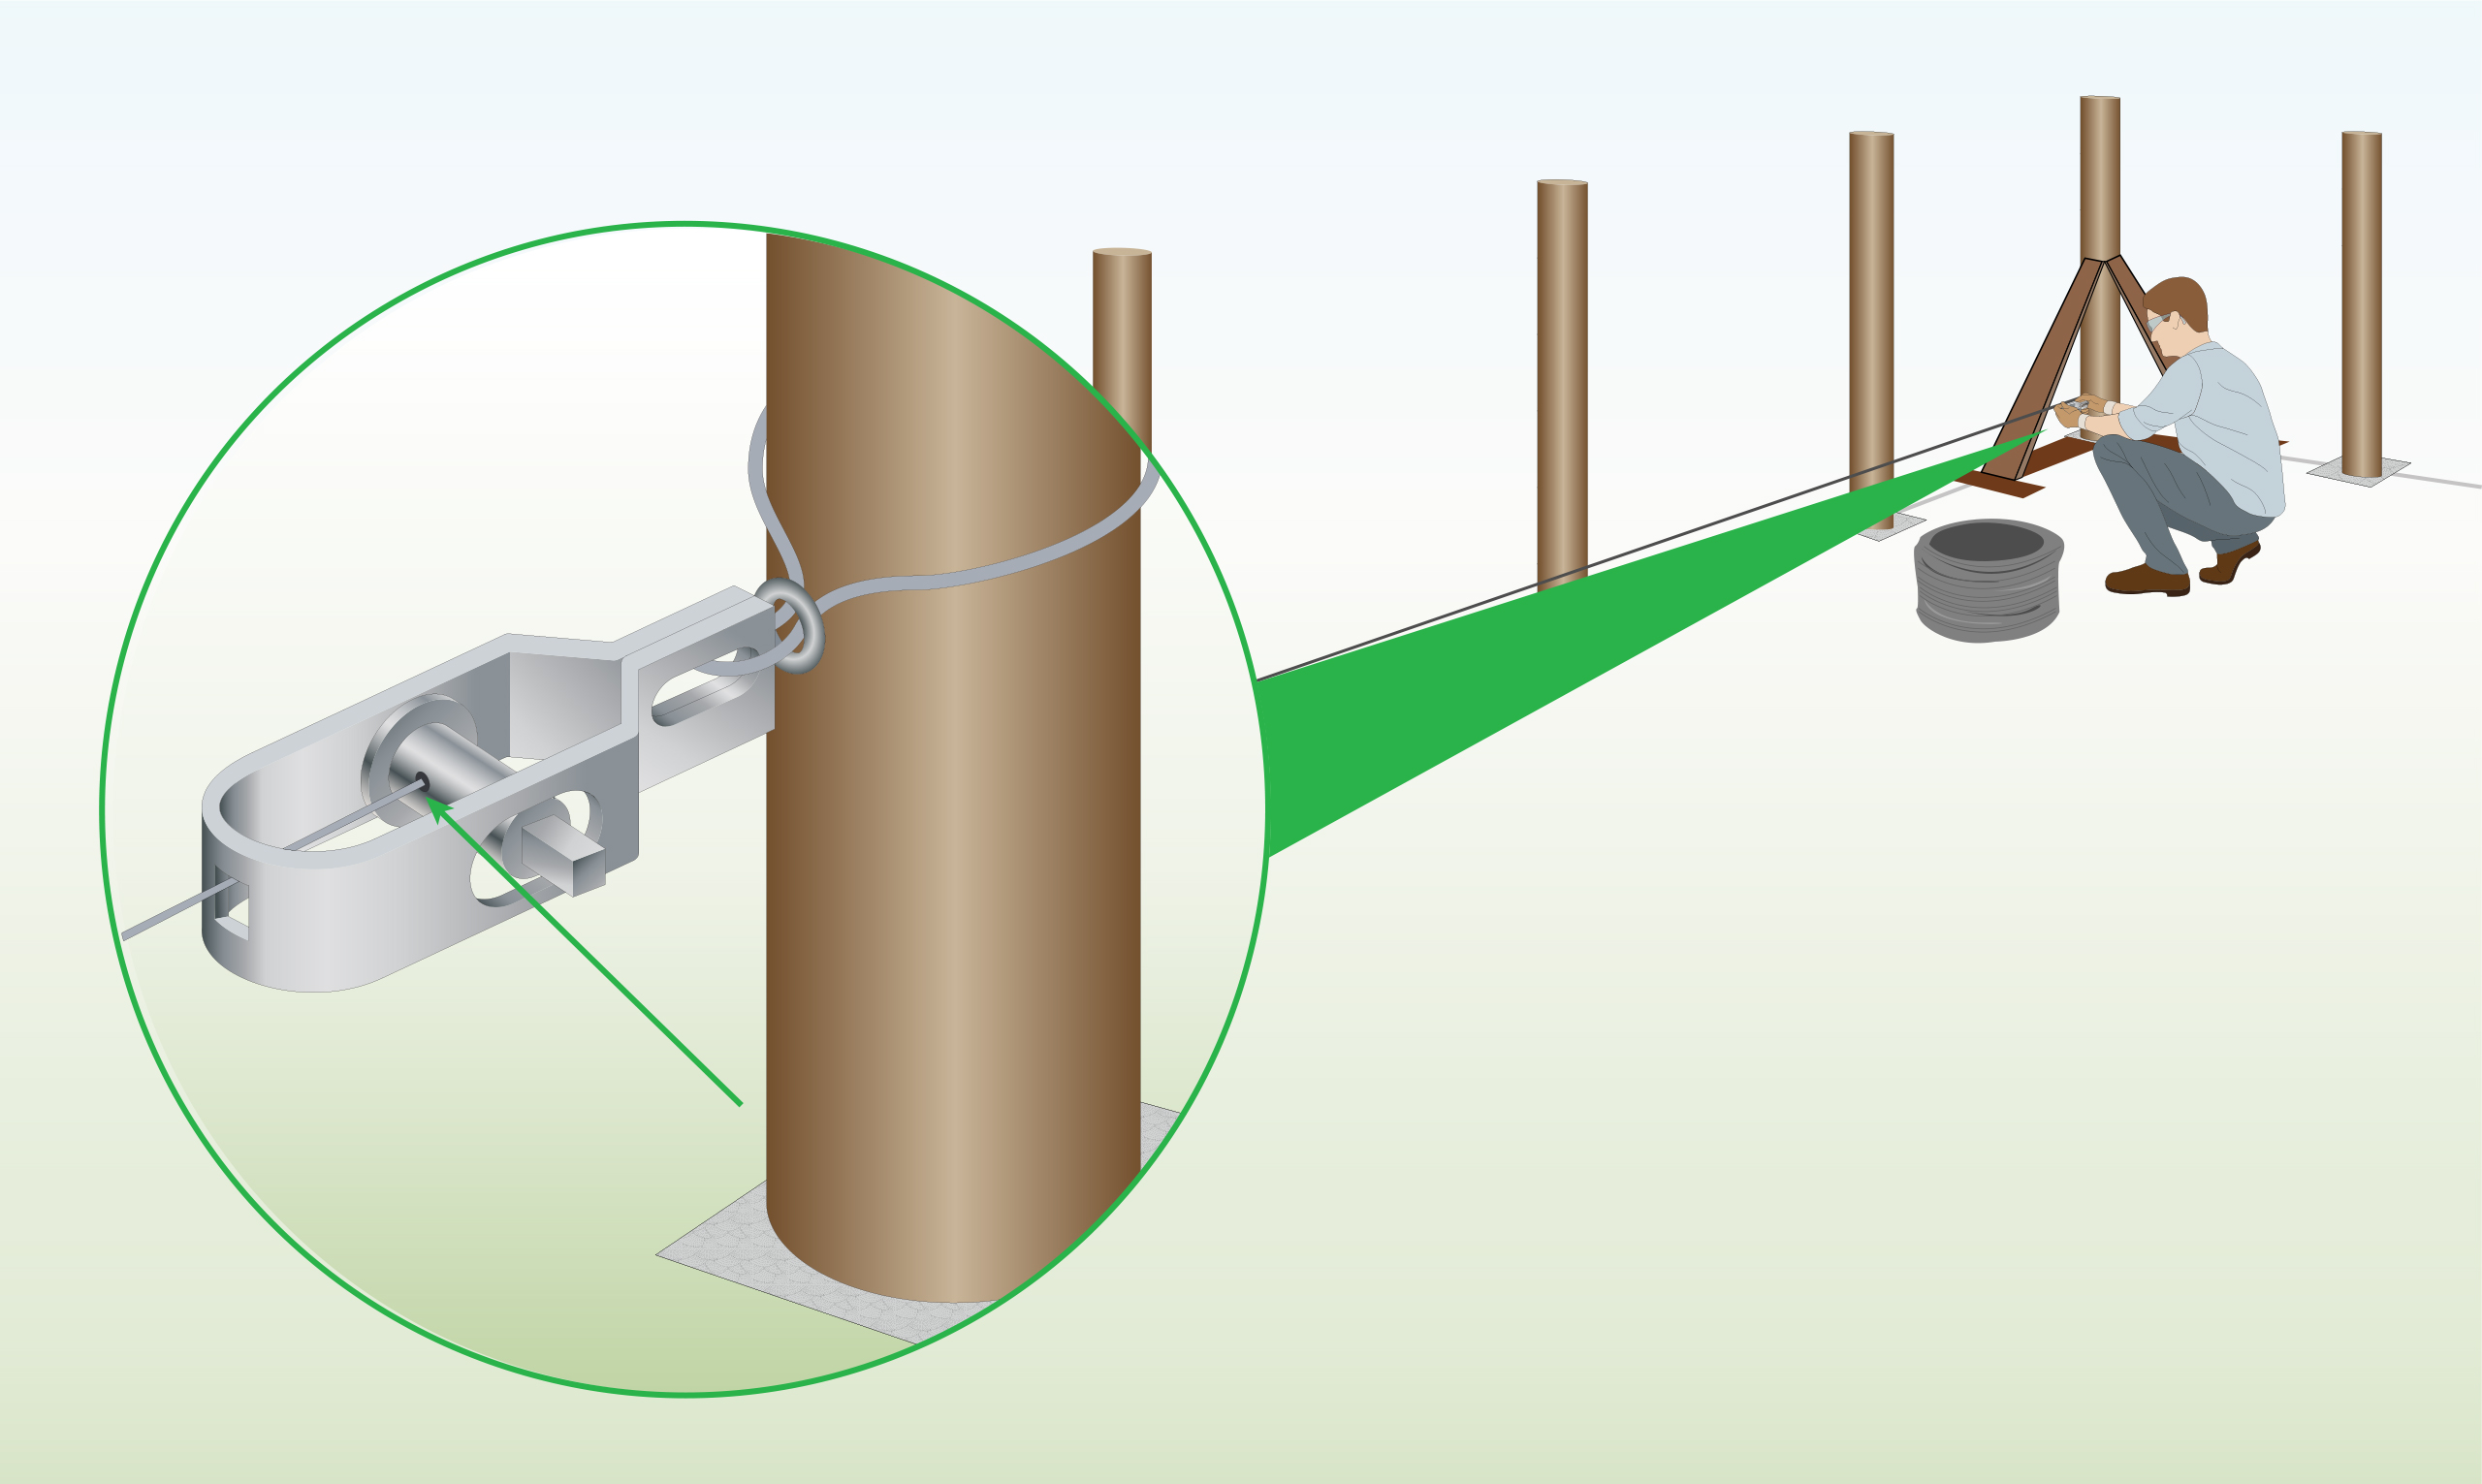
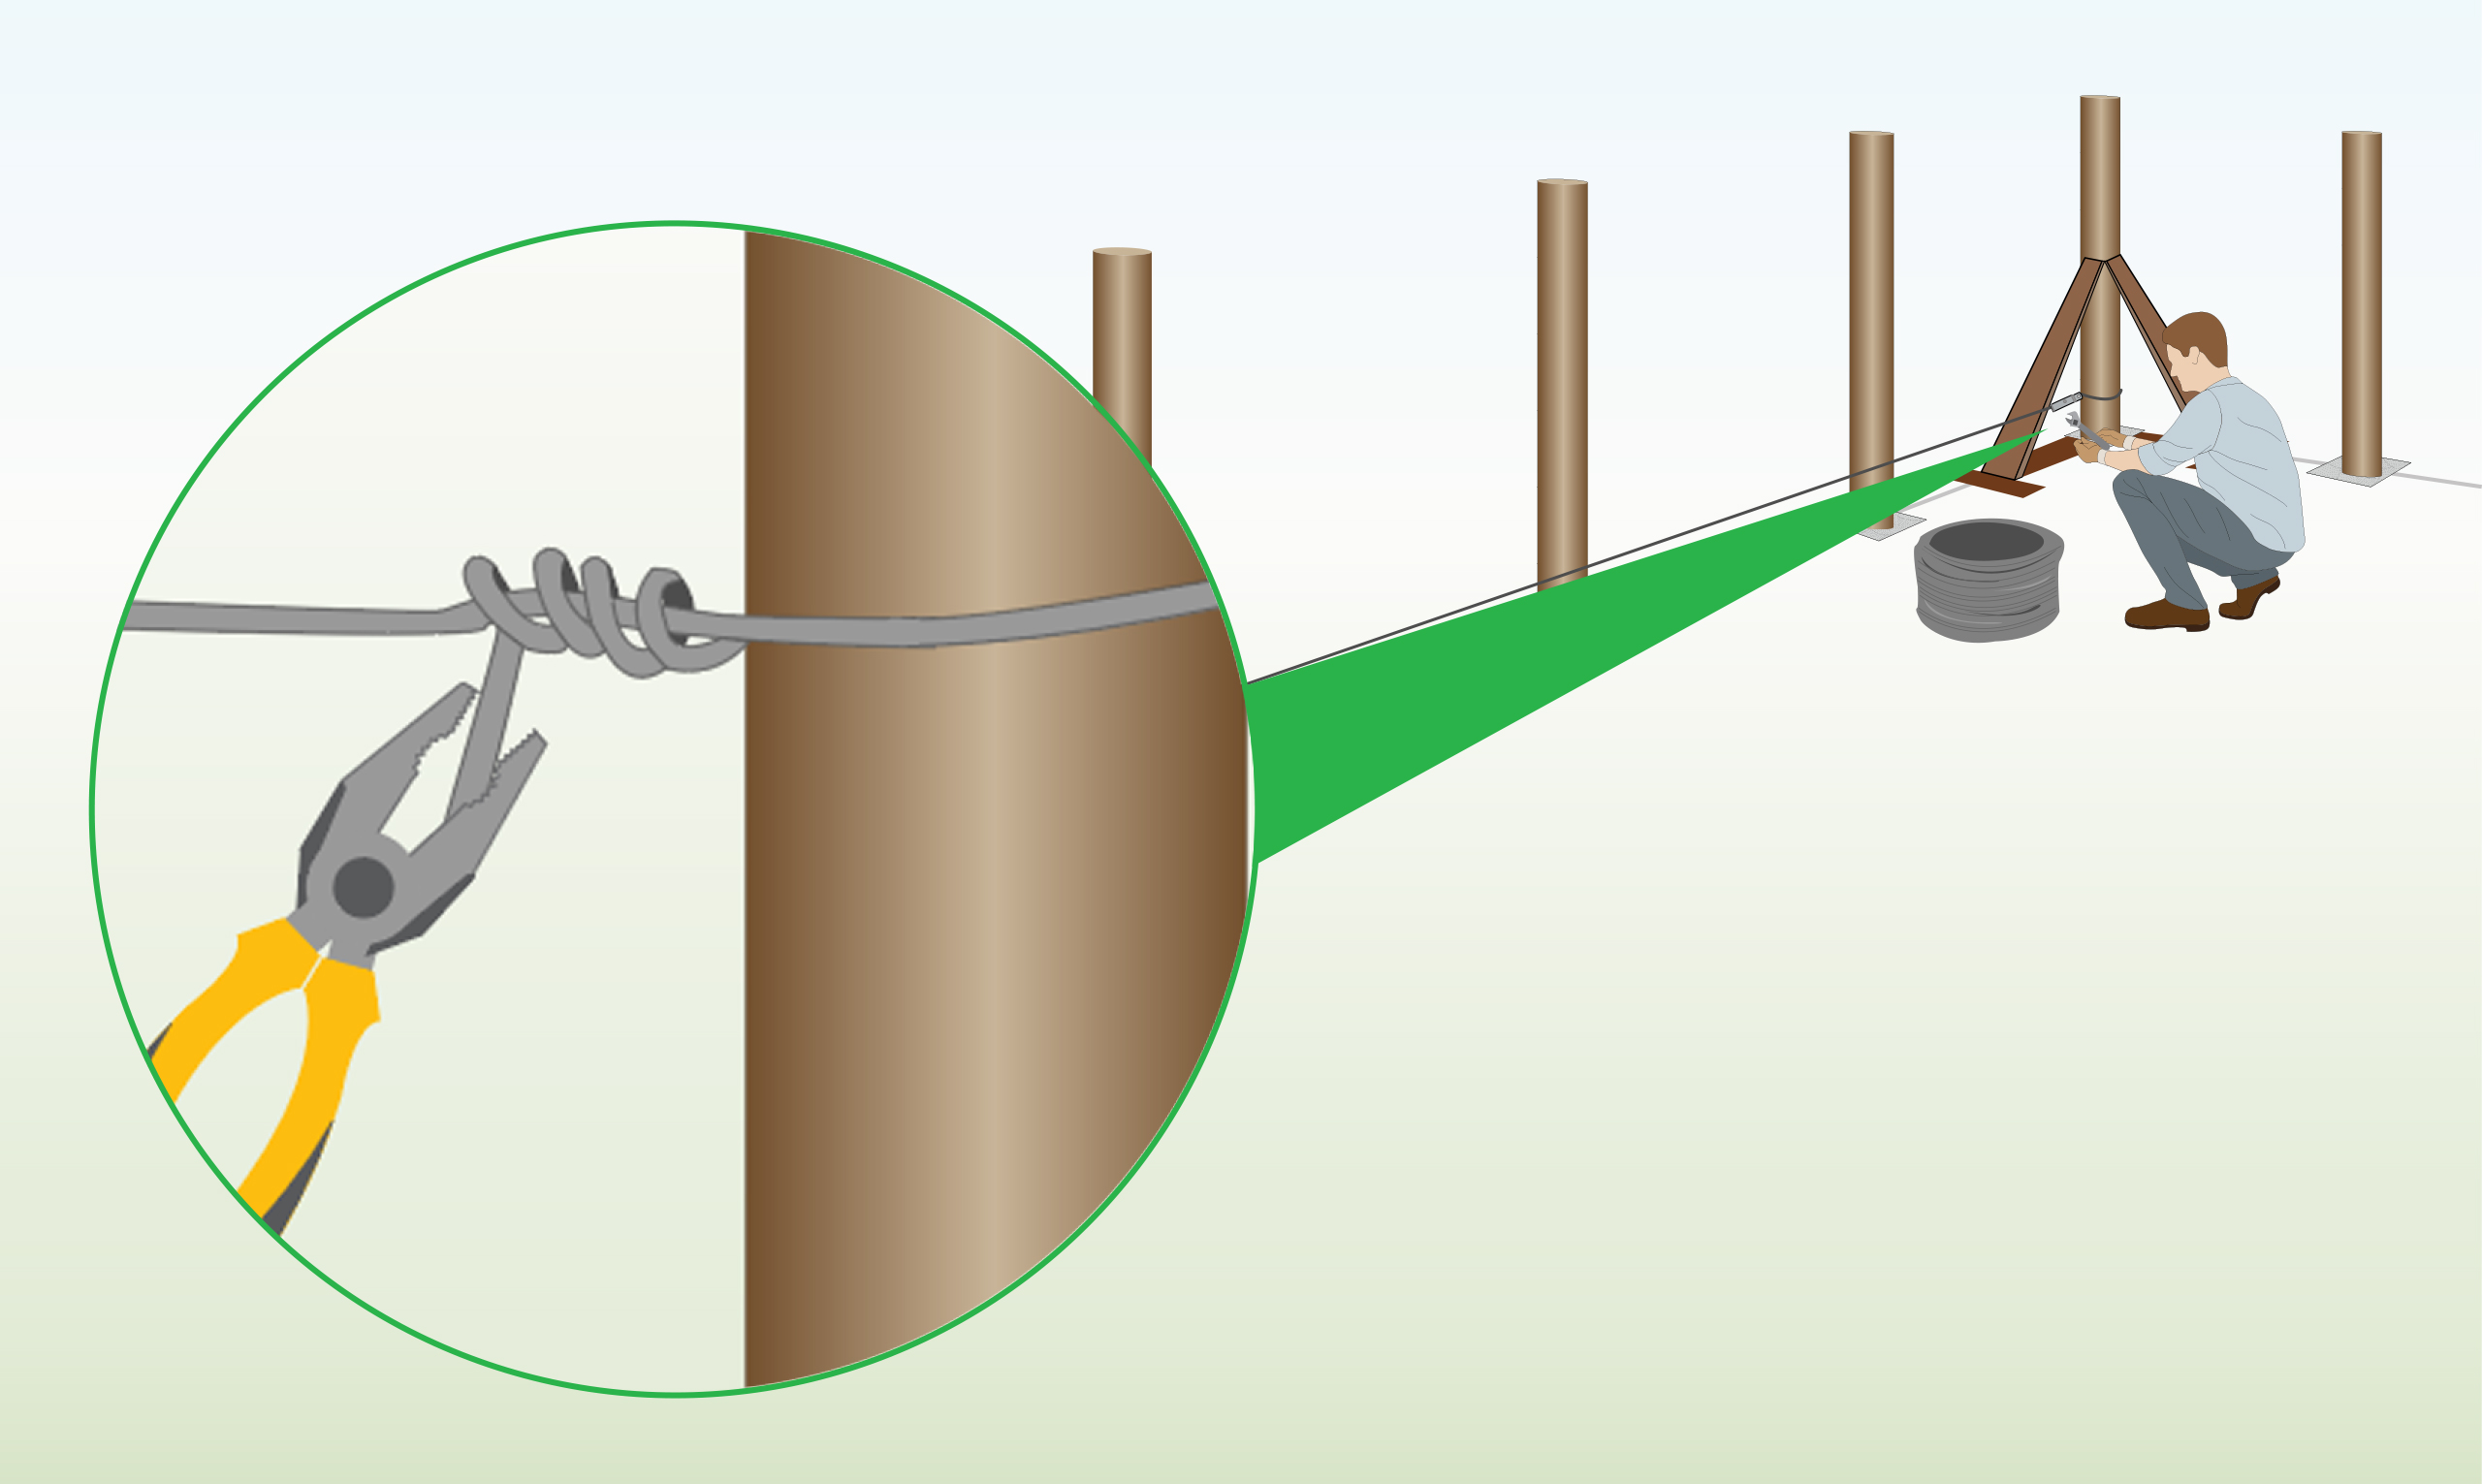
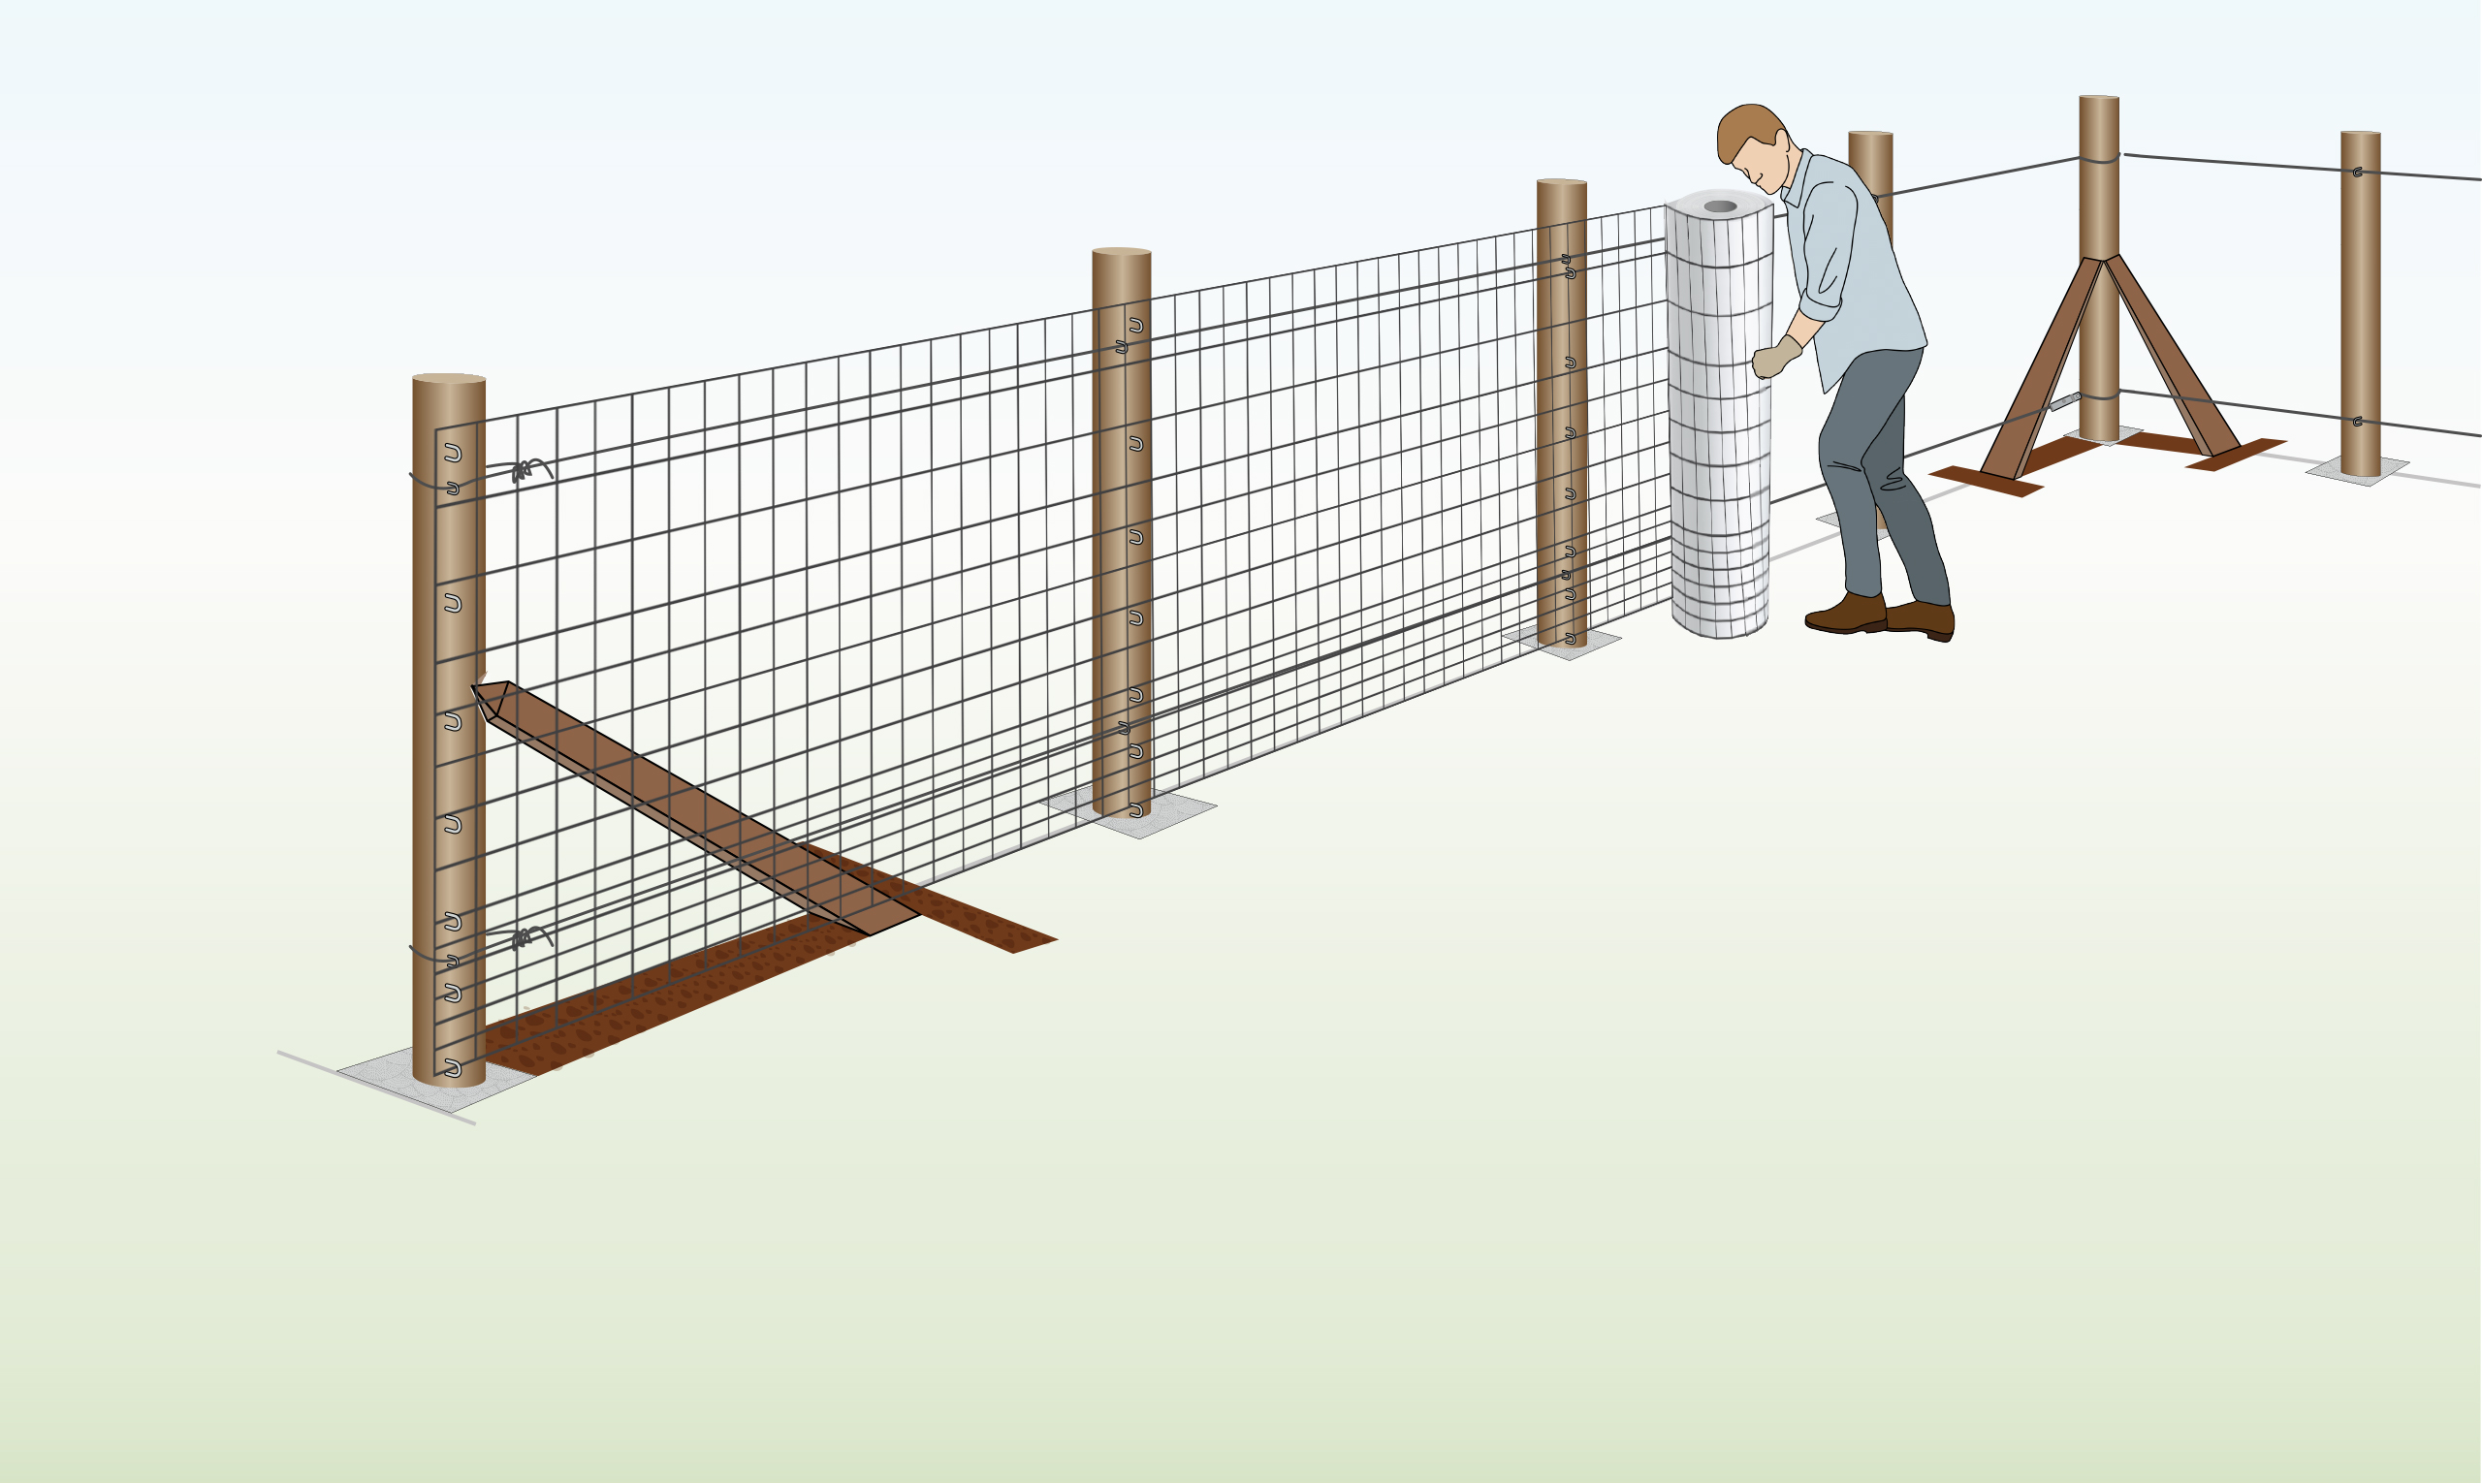
| Step 6 – Stretch It Tight
|
Unroll the fence to the other end, keeping it tight between the end posts.
Cut any excess, secure it to the end post as before, and then release the tension. |
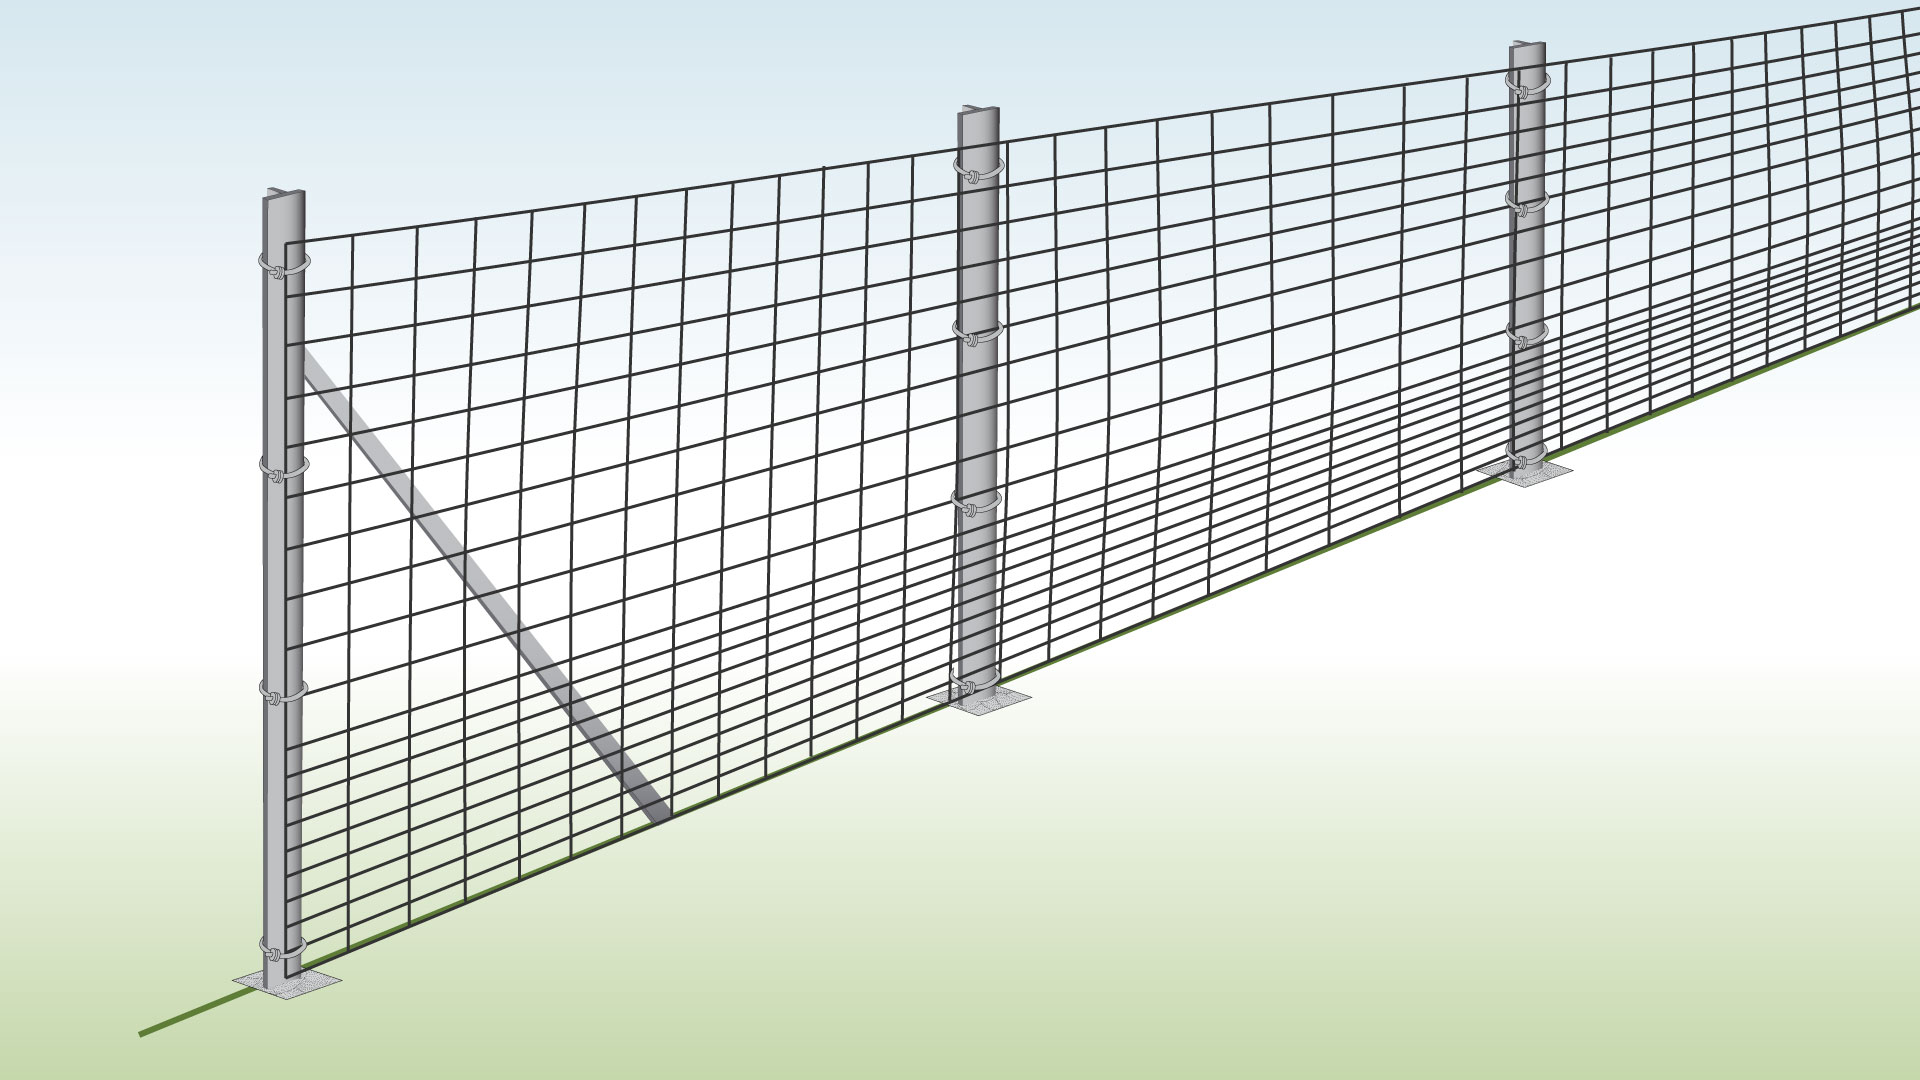
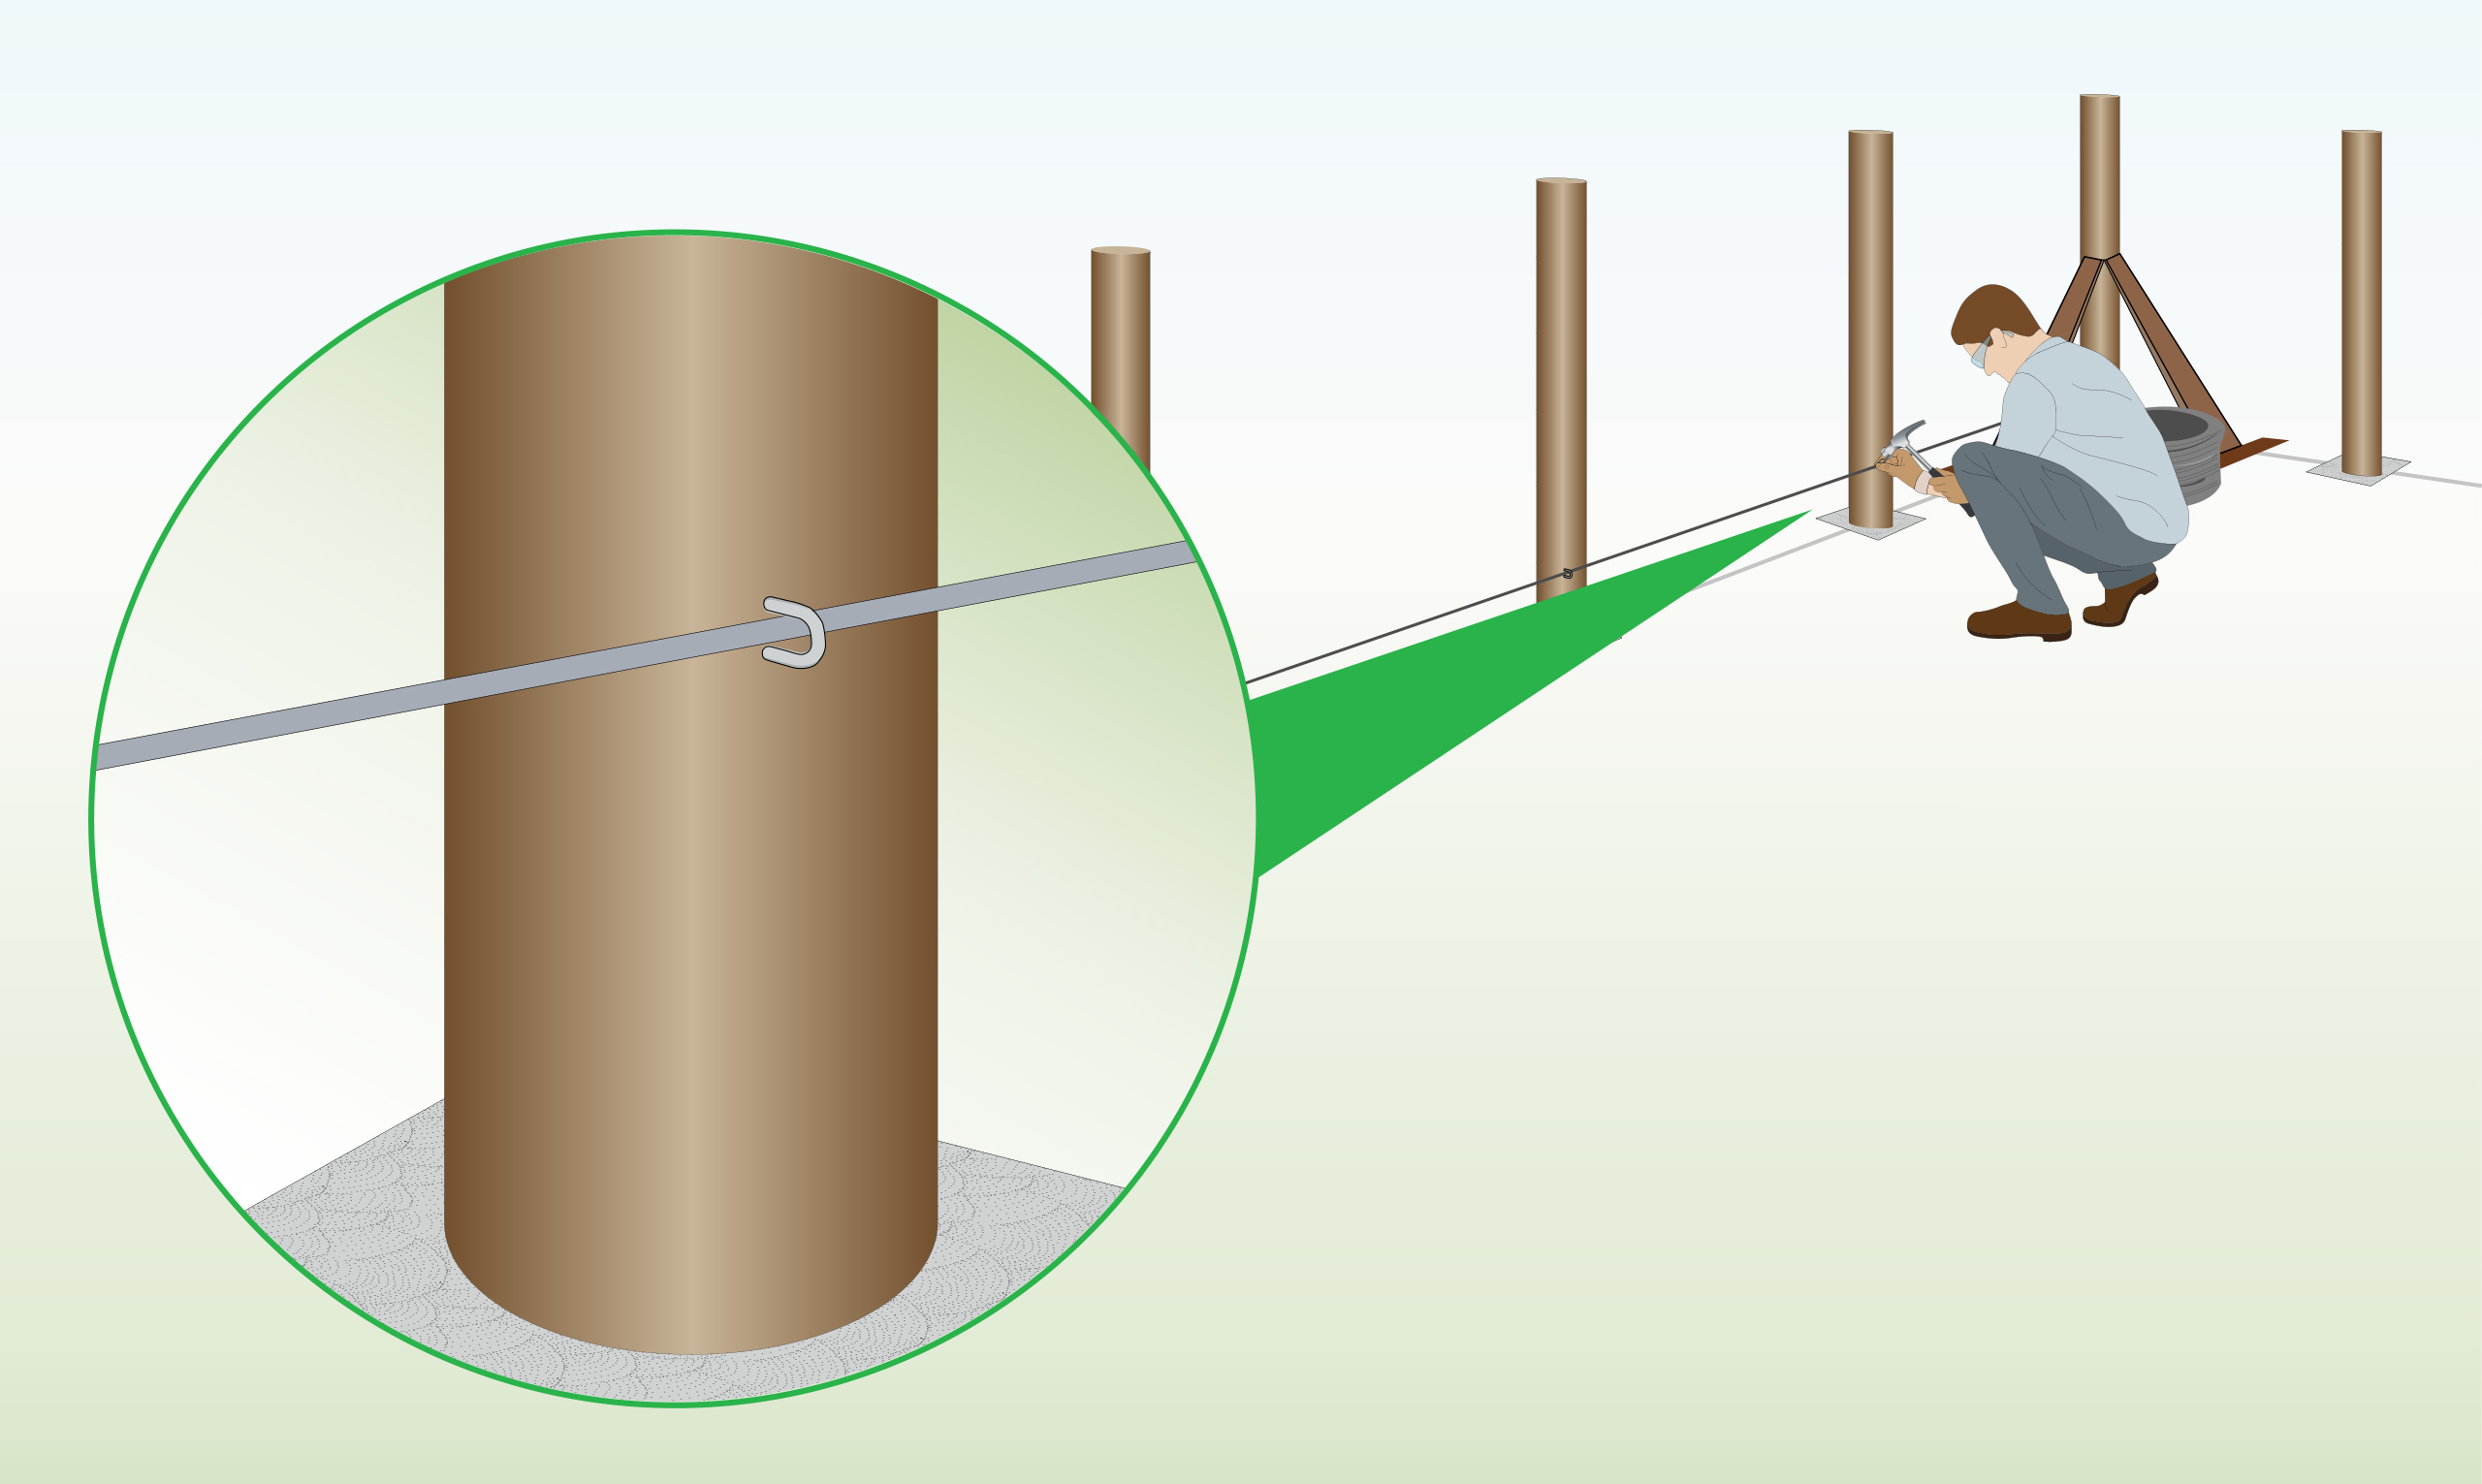
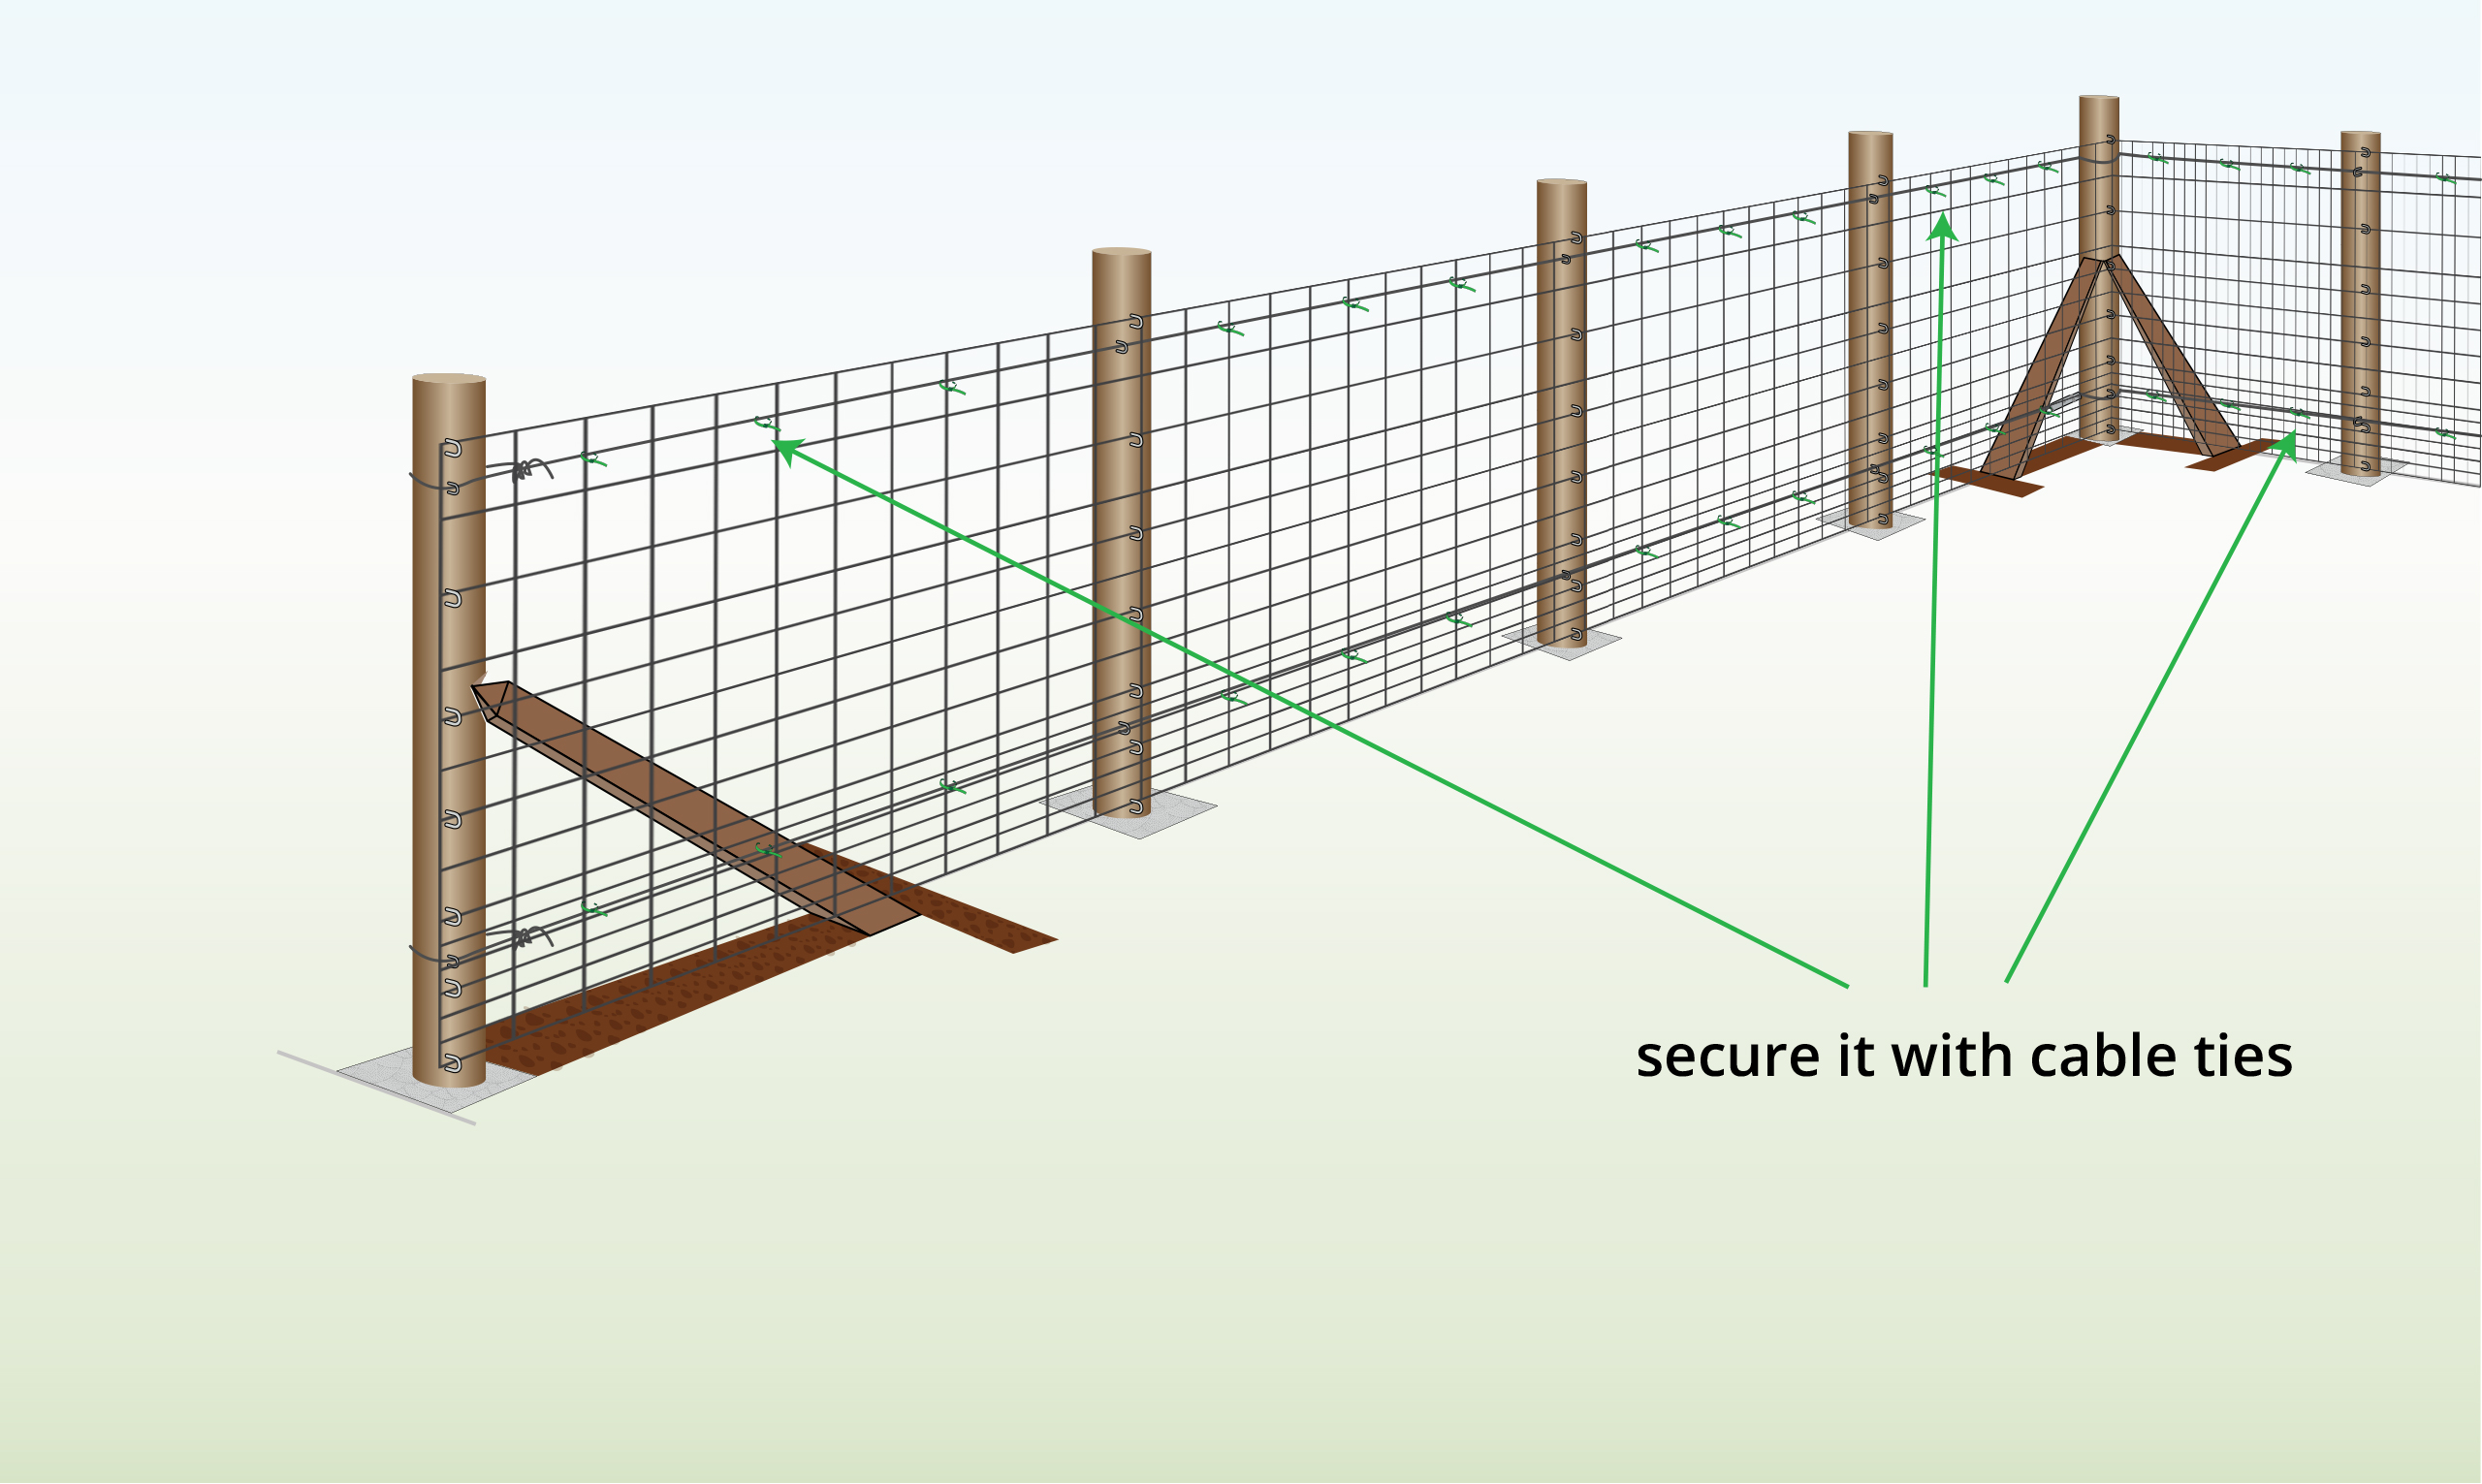
| Step 7 – Secure to Middle Posts
|
Finally, go along the fence and fasten it to the middle posts using the same wire ties. |
How do I cut wire mesh?
With wire cutting pliers or bolt cutters to ensure a smooth cut.
What can I cover the edges with?
Sharp edges should be folded up and under the bottom edge of a mesh fence, allowing grass to grow up from beneath. Alternatively, you can cover the bottom edge with timber boards.
When installing agricultural fencing, how far apart should the posts be positioned?
In most cases, 2-3 metres apart.


Wire Fence is part of the Super Magic Bean group - VAT Registered: 344 7643 83 - Company Registration No: 11290483